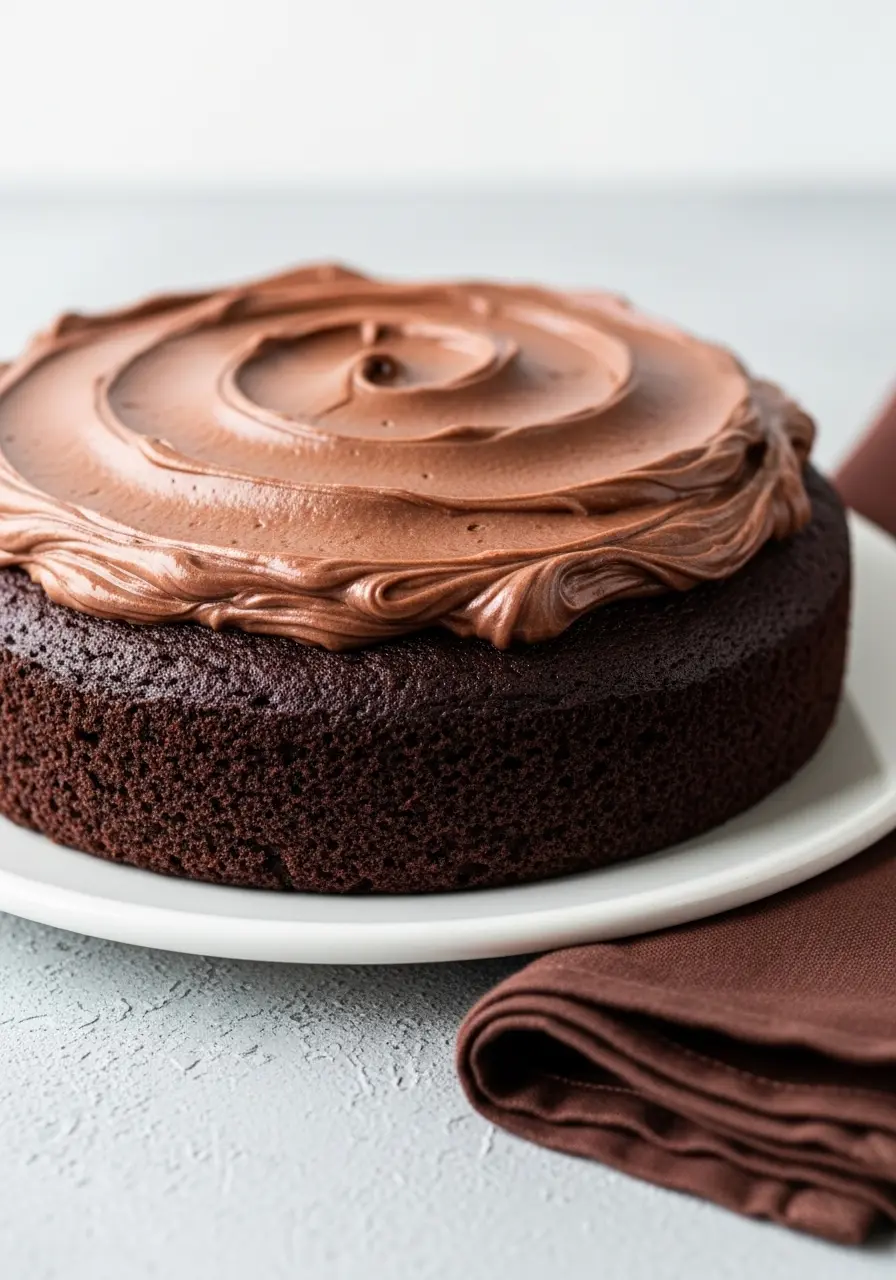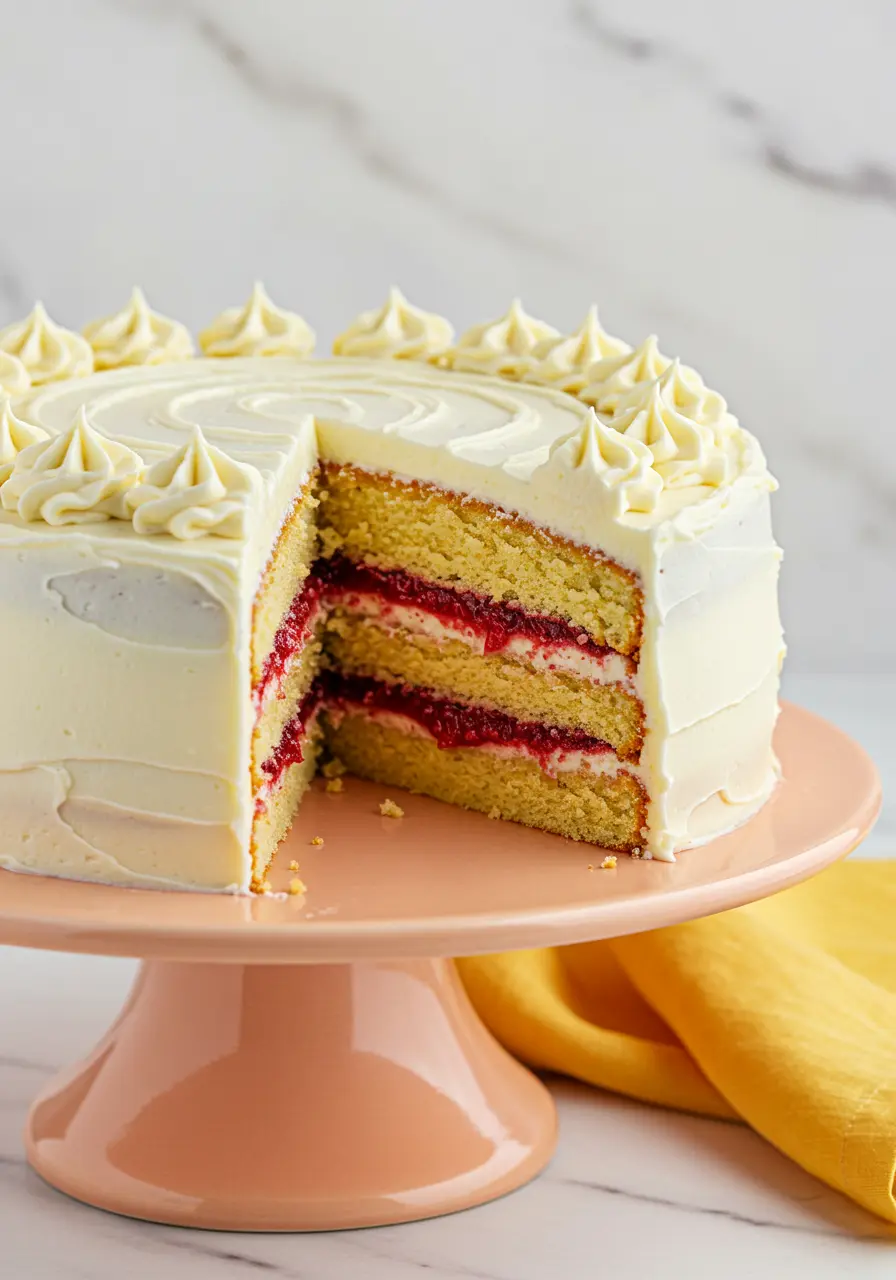
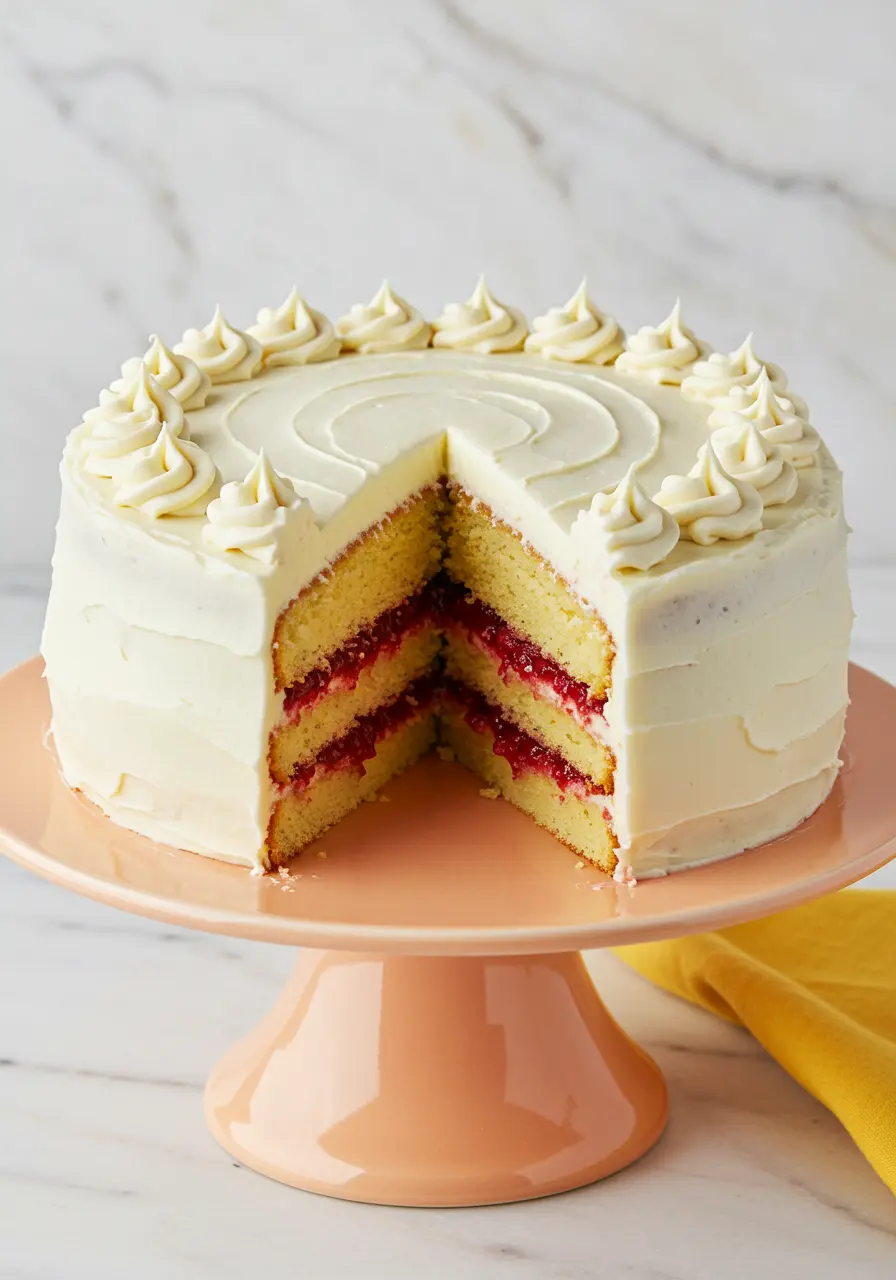
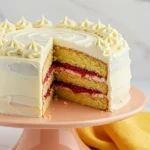
You know those cakes that look like they belong in a fancy bakery window? The kind that makes people say, “Wait, you actually made this?!”, Yes, this white chocolate raspberry cake is the kind that steals the show. But here’s the best part: you can absolutely make it at home!
I won’t lie, the ingredient list might look a little long, but don’t let that scare you. Every single ingredient plays a role in making this white chocolate raspberry cake as soft, flavorful, and stunning as it is.
And trust me, with the simple step-by-step guide I’ll walk you through, you’ll be surprised at just how easy it all comes together!
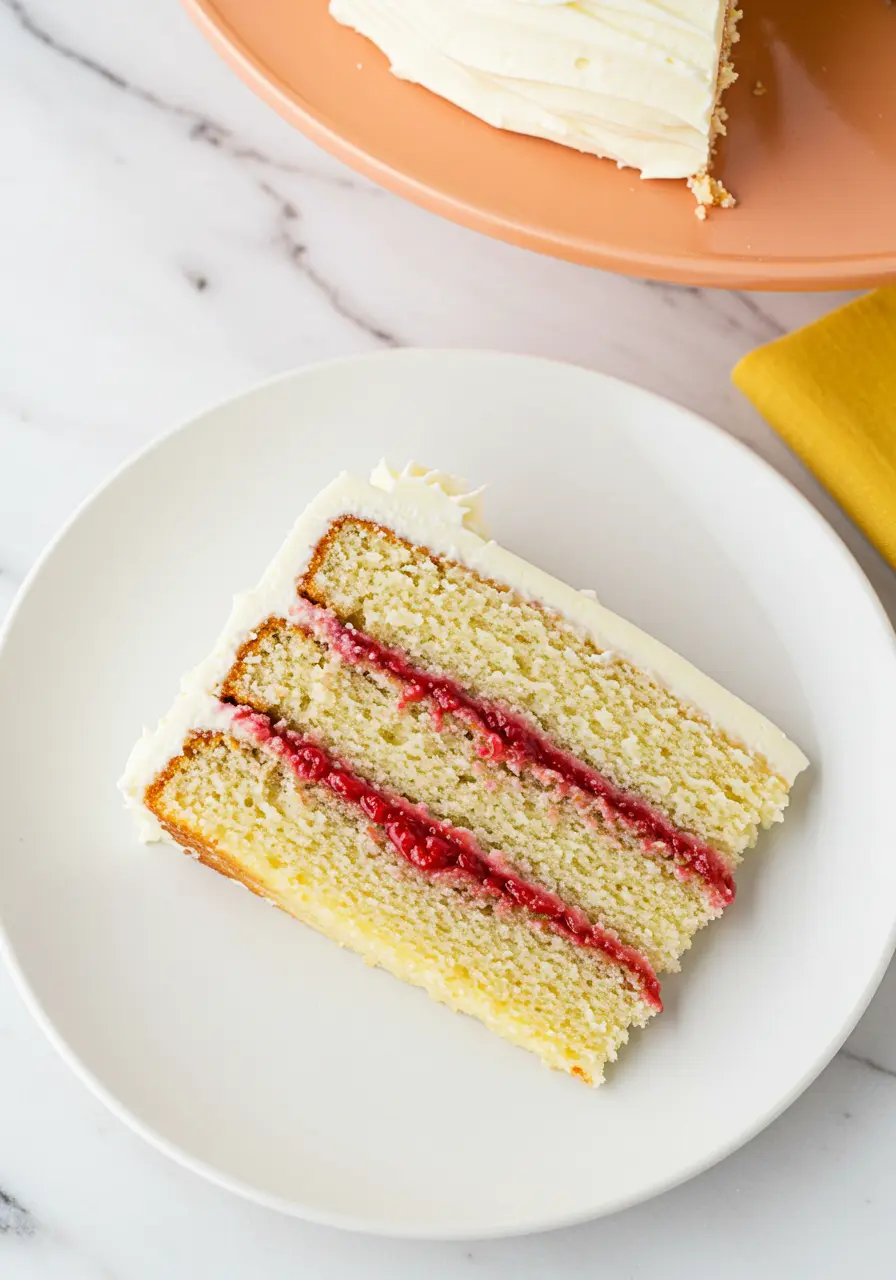
Imagine biting into a moist, fluffy vanilla cake layered with a fresh raspberry filling, just the right balance of sweet and tangy, with a tiny hint of cinnamon to make the flavor pop.
Then, it’s all wrapped up in the creamiest white chocolate cream cheese frosting, smooth, rich, and just the right amount of sweet. It’s the kind of cake that feels fancy but is made for real, everyday kitchens.
Jump to
So, if you’re ready to impress yourself (and everyone else), let’s get baking! And if you love fruity cakes, you have to check out my strawberry lemon cake, another absolute winner!
The Ingredients You’ll Need
- Buttermilk- This ingredient adds moisture and a slight tang to the cake, making it incredibly tender and fluffy.
- Egg Whites- Egg whites help the cake rise while keeping it light and airy, giving the perfect crumb texture.
- Vanilla Extract- Vanilla extract brings a rich, warm flavor that enhances the overall sweetness of the cake.
- Almond Extract- Just a hint of almond extract adds a subtle nutty depth that complements the raspberry and white chocolate flavors.
- Cake Flour- Cake flour makes the cake soft and delicate, giving it a lighter, melt-in-your-mouth texture compared to all-purpose flour.
- Granulated Sugar- Sugar balances the flavors, sweetens the cake, and helps it achieve that perfect golden-brown crust.
- Baking Powder- Baking powder ensures the cake rises properly, creating a light and fluffy texture without being too dense.
- Salt- Salt enhances all the flavors and helps balance the sweetness, making the cake taste more flavorful overall.
- Unsalted Butter– Butter adds richness and moisture to the cake, helping create a tender crumb and a deliciously buttery flavor.
- Fresh Raspberries- Fresh raspberries add a tart burst of flavor that perfectly contrasts the sweetness of the cake and frosting.
- Cornstarch- Cornstarch thickens the raspberry filling, ensuring it holds its shape and doesn’t run, creating the perfect filling consistency.
- Lemon Juice- Lemon juice brightens the raspberry filling, bringing out its natural sweetness and adding a refreshing tang.
- White Baking Chocolate- White chocolate gives the frosting its creamy, velvety texture while adding a sweet, luxurious flavor that pairs perfectly with the raspberries.
- Heavy Cream- Heavy cream helps create a smooth, glossy consistency in the frosting, making it extra creamy and rich.
- Cream Cheese- Cream cheese adds richness, a slight tang, and smoothness to the frosting, perfectly complementing the sweetness of the white chocolate.
- Powdered Sugar- Powdered sugar gives the frosting its smooth, sweet consistency and helps it hold its shape when spread or piped onto the cake.
How to Make Your White Chocolate Raspberry Cake
Prep Your Pans and Preheat the Oven
Preheat your oven to 350°F (175°C). Then, grab three 9-inch cake pans. If you don’t have three, no worries, just bake in two batches!
Line the bottoms of your pans with parchment paper, and spray the sides with nonstick cooking spray that has flour in it (or simply grease and flour them).
This will make sure your cakes come out beautifully and don’t stick to the pans.
Mix the Wet Ingredients
In a medium bowl whisk together your buttermilk, egg whites, and extracts (vanilla and almond). Set it aside for now, we’re getting everything ready to combine.
Prepare the Dry Ingredients and Butter
In the bowl of your mixer, combine the cake flour, granulated sugar, baking powder, and salt. Mix on low speed to combine everything. Now, let’s add the butter!
Cut it into small cubes and slowly add them to the dry ingredients. Keep the mixer on medium-low speed, and let it mix until it looks like moist crumbs with some larger pieces of butter.
Combine the Wet and Dry Ingredients
Pour in half of the buttermilk mixture and mix on medium-high speed for about a minute until everything is light and fluffy.
Don’t skip this part, it’s key to getting that soft, airy texture!
Scrape down the sides of your bowl, then slowly stream in the rest of the wet ingredients.
Mix it all together on low speed, and don’t overdo it. If the batter looks a little lumpy, that’s perfectly fine.
Give it a gentle stir with a spatula to smooth it out.
Bake the Cakes
Now, divide the batter evenly between your prepared cake pans. Pop them in the preheated oven and bake for about 22-25 minutes.
You’ll know they’re done when a toothpick comes out with just a few crumbs attached. Let the cakes cool in the pans for 5 minutes before transferring them to a cooling rack.
Make the Raspberry Filling
While your cakes are cooling, let’s work on that gorgeous raspberry filling. Add your fresh raspberries (or thawed frozen ones) to a food processor and puree them until smooth.
Then, place a fine-mesh sieve over a medium saucepan and pour the puree into it.
Press the mixture with the back of a spoon to strain out the seeds. Now, whisk in the cornstarch, sugar, and lemon juice. Bring everything to a simmer over medium-high heat while stirring constantly.
Once it simmers, lower the heat to medium and keep stirring until it thickens into a spreadable consistency. It should be thick enough that it won’t run off your cakes. Let it cool completely in the fridge, it’ll firm up as it chills.
Create the White Chocolate Cream Cheese Frosting
Let’s get to the good part, the frosting! Start by melting your white chocolate with the heavy cream in the microwave. Heat it in 30-second bursts, stirring in between until it’s completely smooth.
Let it rest for 5 minutes to cool.
In a large bowl, beat the cream cheese and butter together until creamy and smooth, about 1-2 minutes. Add in the melted white chocolate and vanilla extract, and mix until everything is well combined.
Now, gradually add in the powdered sugar a bit at a time, mixing on low speed after each addition. Once it’s all in, you’ll have a thick and creamy frosting. If it feels too soft, refrigerate it for 30 minutes to help it firm up.
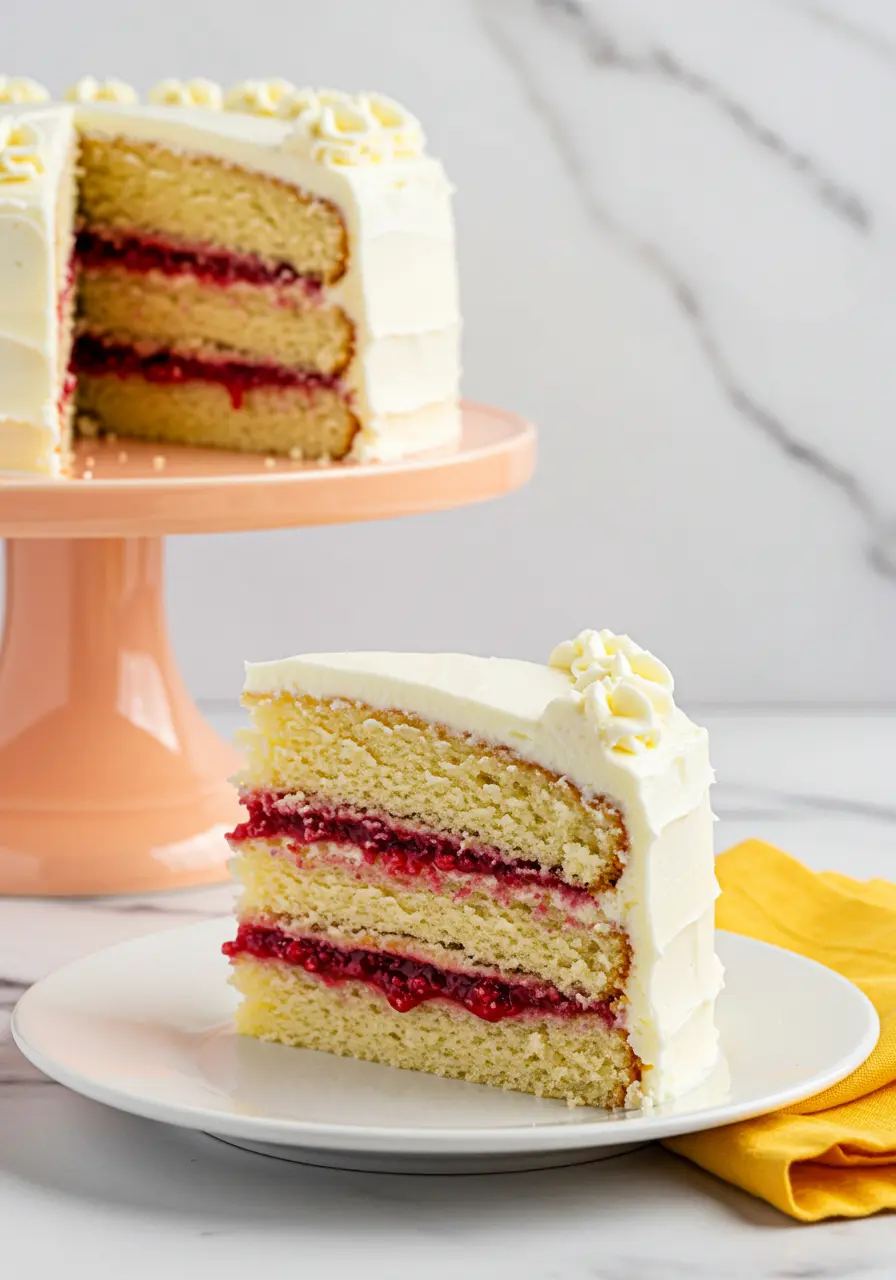
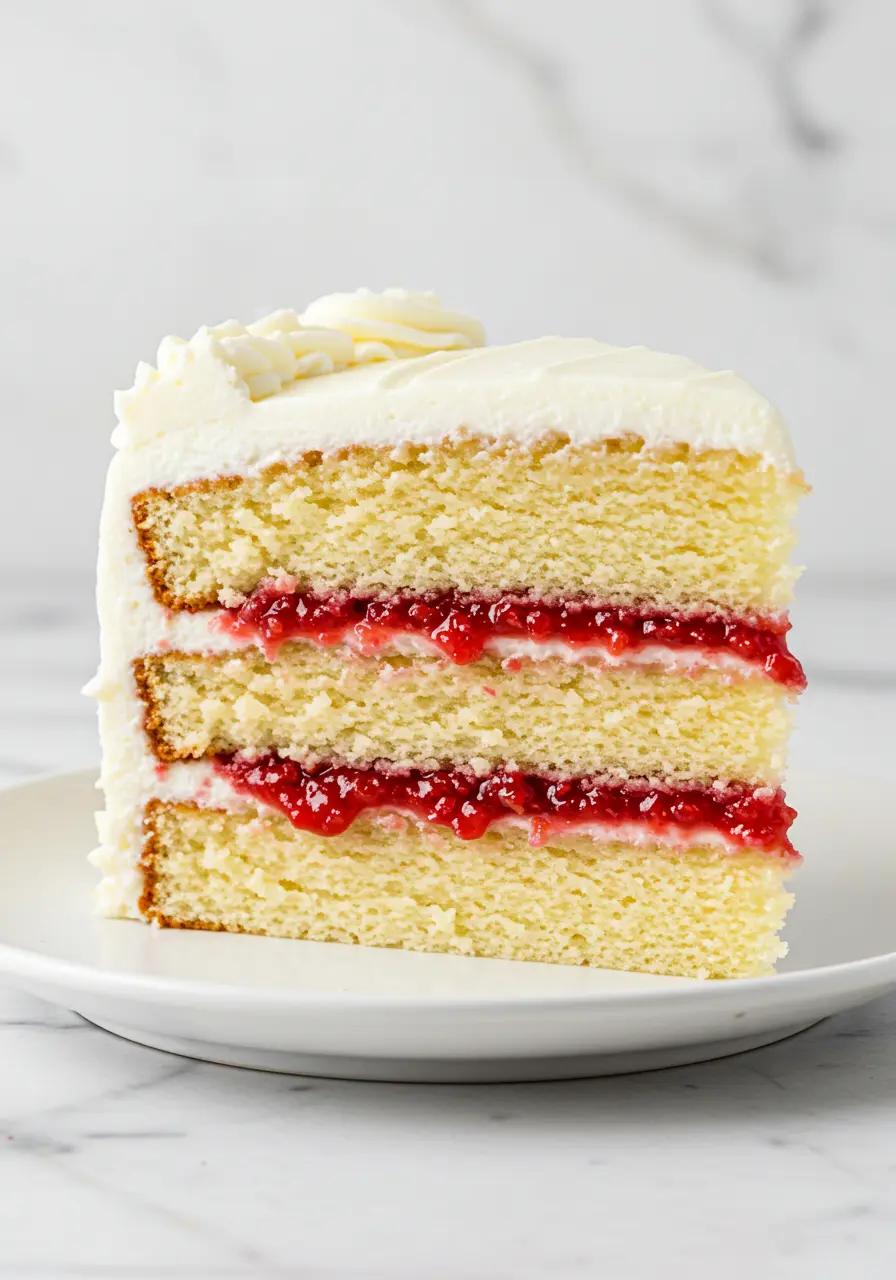
Assemble the Cake
It’s time to bring everything together! Start by using a serrated knife to trim the tops of your cakes, leveling them off so they’re flat. This will make stacking them much easier.
Place a small dollop of frosting in the center of your cake stand or platter, this will help keep your cake from sliding around.
Put the first cake layer on top, top side up. Pipe a ring of frosting just inside the top edge of the cake (this will keep the filling in place).
Spread half of your chilled raspberry filling evenly inside the frosting ring. Add a generous layer of white chocolate cream cheese frosting on top of the raspberry filling.
Top with your second cake layer, but this time flip it so the bottom side is up. Repeat the process: pipe the frosting, add the raspberry filling, and top with more white chocolate frosting. Finish with your final cake layer, again top side down.
Frost and Finish
Time for the crumb coat! Use the remaining frosting to cover the entire cake with a thin layer, making sure it’s even and smooth. This first layer of frosting traps in any crumbs, so don’t worry if it’s a little messy. Chill the cake for around 30 minutes to allow the crumb coat to set.
Once the crumb coat has set, it’s time for the final layer of frosting! Spread the remaining frosting all over the outside of the cake, making it as smooth or textured as you like. Remove the parchment strips from around the base of the cake to reveal a clean edge.
3 Mistakes to Avoid When Making Your White Chocolate Raspberry Cake
Making a cake as stunning as this one can be super rewarding, but there are a few common slip-ups that can throw you off track.
Overmixing the Batter
It’s tempting to keep the mixer going until everything’s completely smooth but resist the urge! Overmixing can lead to a dense cake, and we’re going for fluffy and light here.
Once the batter is just combined, stop mixing! A few lumps are perfectly okay.
Not Letting the Cake Layers Cool Properly
Patience is key! You’ll want to let the cake layers cool completely before frosting them.
If you frost too early, the warm cake could cause the frosting to melt and slide off. So, cool those layers on a rack for at least 1 hour to make sure everything sets up beautifully.
Not Chilling the Raspberry Filling Enough
The raspberry filling needs to be thick enough to stay in place between the cake layers without oozing out.
After cooking it, make sure you refrigerate it until it’s completely chilled, it’ll thicken up as it cools. You’ll thank me later when the filling stays exactly where you want it!
What to Serve with Your White Chocolate Raspberry Cake
- Chilled Raspberry Coulis
A drizzle of tangy raspberry coulis on the plate adds a burst of flavor and color. It pairs perfectly with the cake’s sweetness and brings out the raspberry filling. - Lemon Sorbet
The refreshing, zesty notes of lemon sorbet balance the richness of the cake, making it a great contrast that cuts through the sweetness. - Chocolate-Dipped Strawberries
These elegant treats offer a combination of fresh fruit and chocolate that compliments the white chocolate in your cake beautifully. A showstopper!
Craving another fruity treat? Check out this easy and delicious blueberry dump cake for a simple yet satisfying dessert!
How to Store Your White Chocolate Raspberry Cake
- Room Temperature: Keep it in an airtight container for 2-3 days to maintain its softness.
- Refrigerate: Store in the fridge for up to 5 days, wrapped tightly to prevent drying.
- Freeze: Slice and wrap portions in plastic, then freeze for up to 3 months. Thaw overnight in the fridge.
For another irresistible dessert, don’t miss out on this chocolate cake with strawberries, a perfect blend of rich and refreshing flavors!
The Best White Chocolate Raspberry Cake (Step-by-Step)
Ingredients
For the White Cake:
- 3 ⅓ cups cake flour see notes for substitution
- 1 tablespoon + 1 teaspoon baking powder
- 1 ½ teaspoons salt
- 2 ½ cups granulated sugar
- 18 tablespoons 2 ¼ sticks unsalted butter, cubed and softened
- 9 large egg whites at room temperature
- 1 ½ cups buttermilk at room temperature
- 1 tablespoon vanilla extract
- ½ teaspoon almond extract
For the Raspberry Filling:
- 1 ounces fresh raspberries or frozen, thawed and well-drained
- ½ cup granulated sugar
- 2 tablespoons lemon juice
- 2 ½ tablespoons cornstarch
- ⅛ teaspoon cinnamon our special touch, enhances the raspberry flavor!
For the White Chocolate Cream Cheese Frosting:
- 16 ounces 2 blocks full-fat cream cheese, at room temperature
- ½ cup unsalted butter at room temperature
- 10 ounces white baking chocolate finely chopped
- ⅓ cup heavy cream
- 6 ½ cups powdered sugar
- 2 teaspoons vanilla extract
- ¼ teaspoon salt adjust to taste
Instructions
- Set your oven to 350°F (175°C) and get three 9-inch cake pans ready. If you don't have three pans, no worries, just bake in two batches!
- Line the bottoms with parchment paper and coat the sides with nonstick cooking spray that includes flour, or simply grease and flour the pans. This guarantees your cakes release effortlessly without sticking.
- In a medium bowl, whisk together the buttermilk, egg whites, and vanilla and almond extracts. Set this aside for later.
- In the bowl of a stand mixer, mix together the cake flour, sugar, baking powder, and salt.
- Blend on low speed until the dry ingredients are evenly combined. Cut the butter into small cubes and slowly add them to the dry mixture, mixing on medium-low until the texture looks like moist crumbs.
- Now, pour in half of the buttermilk mixture and mix on medium-high speed for about a minute until the batter becomes light and fluffy.
- Scrape down the sides of the bowl, then pour in the rest of the buttermilk mixture, mixing on low speed until it’s just combined.
- If the batter looks slightly lumpy, don’t worry! Gently stir it with a spatula to smooth it out.
- Divide the batter evenly among your prepared cake pans and bake in the preheated oven for about 22-25 minutes.
- To check if the cakes are done, insert a toothpick in the center, if it comes out with just a few crumbs, they’re ready.
- Let the cakes rest in the pans for 5 minutes, then transfer them to a cooling rack to cool completely.
- While the cakes cool, prepare the raspberry filling. Puree the raspberries (either fresh or thawed frozen ones) in a food processor, then strain the mixture through a fine-mesh sieve to remove the seeds.
- Whisk in the cornstarch, sugar, and lemon juice, and bring the mixture to a simmer over medium-high heat, stirring constantly.
- Once it begins to simmer, reduce the heat to medium and continue cooking while stirring until the mixture thickens to a spreadable consistency. Let it cool completely in the fridge, this will help it firm up.
- Next, make the white chocolate cream cheese frosting. In a microwave-safe bowl, melt the white chocolate and heavy cream together in 30-second intervals, stirring in between until smooth.
- Let the mixture cool for 5 minutes. In a large bowl, beat the cream cheese and butter together until smooth and creamy, about 1-2 minutes.
- Add the cooled white chocolate and vanilla extract, then mix until everything is well incorporated.
- Gradually add the powdered sugar, mixing at low speed after each addition, until the frosting is thick and creamy. If it’s too soft, refrigerate it for 30 minutes to help it firm up.
- Once the cakes have cooled completely, use a serrated knife to trim the tops, making them flat and even.
- Place the first cake layer on your cake stand or platter. Pipe a ring of frosting along the edge of the cake to create a barrier for the raspberry filling.
- Spread half of the raspberry filling inside the ring of frosting, then top it with a generous layer of white chocolate frosting.
- Place the second cake layer on top, flipped so the bottom side is up. Repeat the process: pipe the frosting, add the raspberry filling, and top with more white chocolate frosting.
- Finish by adding the final cake layer, top side down.
- Spread a thin layer of the remaining frosting over the entire cake, smoothing it out evenly. This layer helps trap in any crumbs. Chill the cake for 30 minutes to firm up the crumb coat.
- Once the crumb coat is set, spread the remaining frosting over the cake, smoothing it out to your desired finish.
- You can make it as smooth as you like or leave it a little textured. Finally, remove the parchment paper strips from around the base of the cake to reveal a clean edge. Enjoy!
Notes
- Don’t overmix the batter, as it can make your cake dense.
- Ensure your pans are well-greased and properly lined.
- Be careful not to add too much liquid when making the raspberry filling. It should be thick enough to stay put on the cake layers, not run off.