
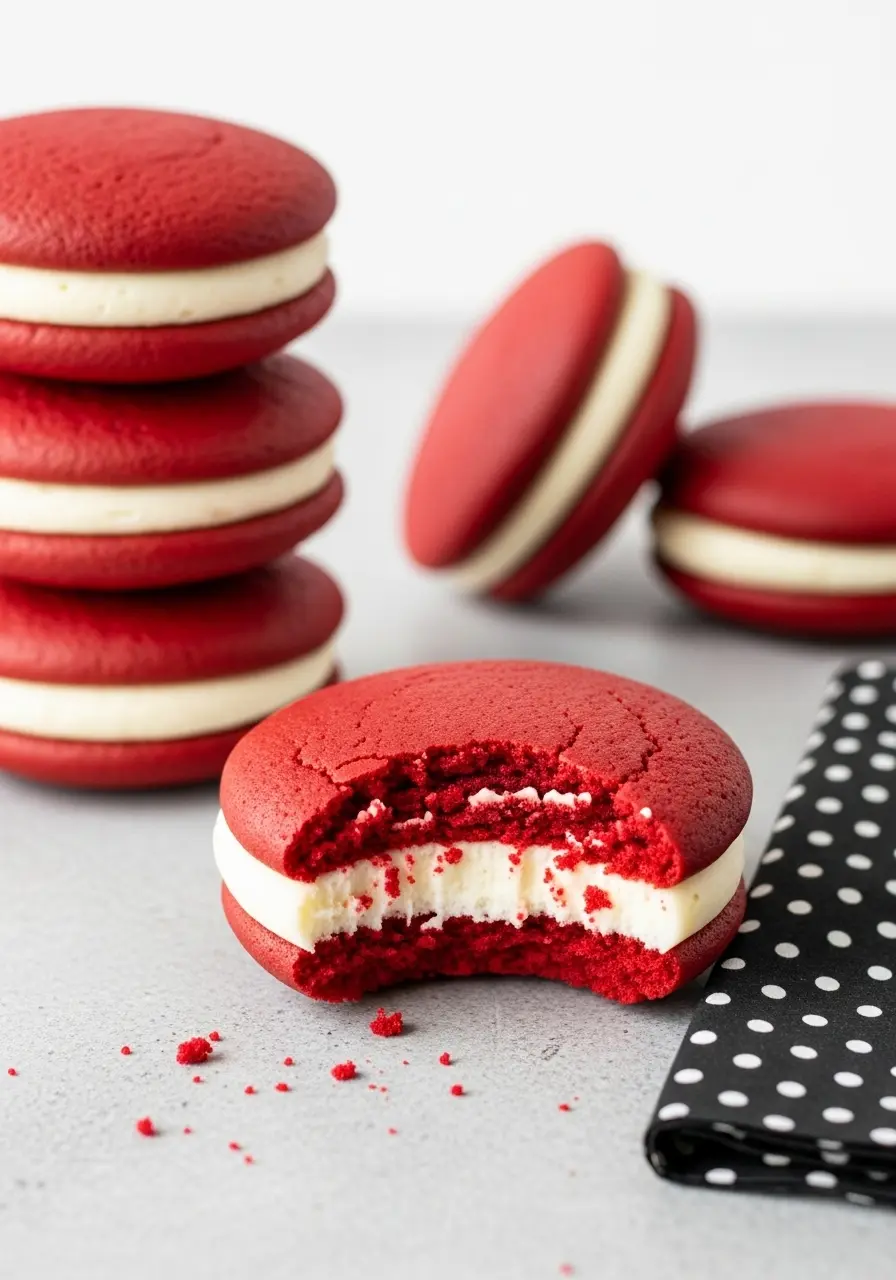
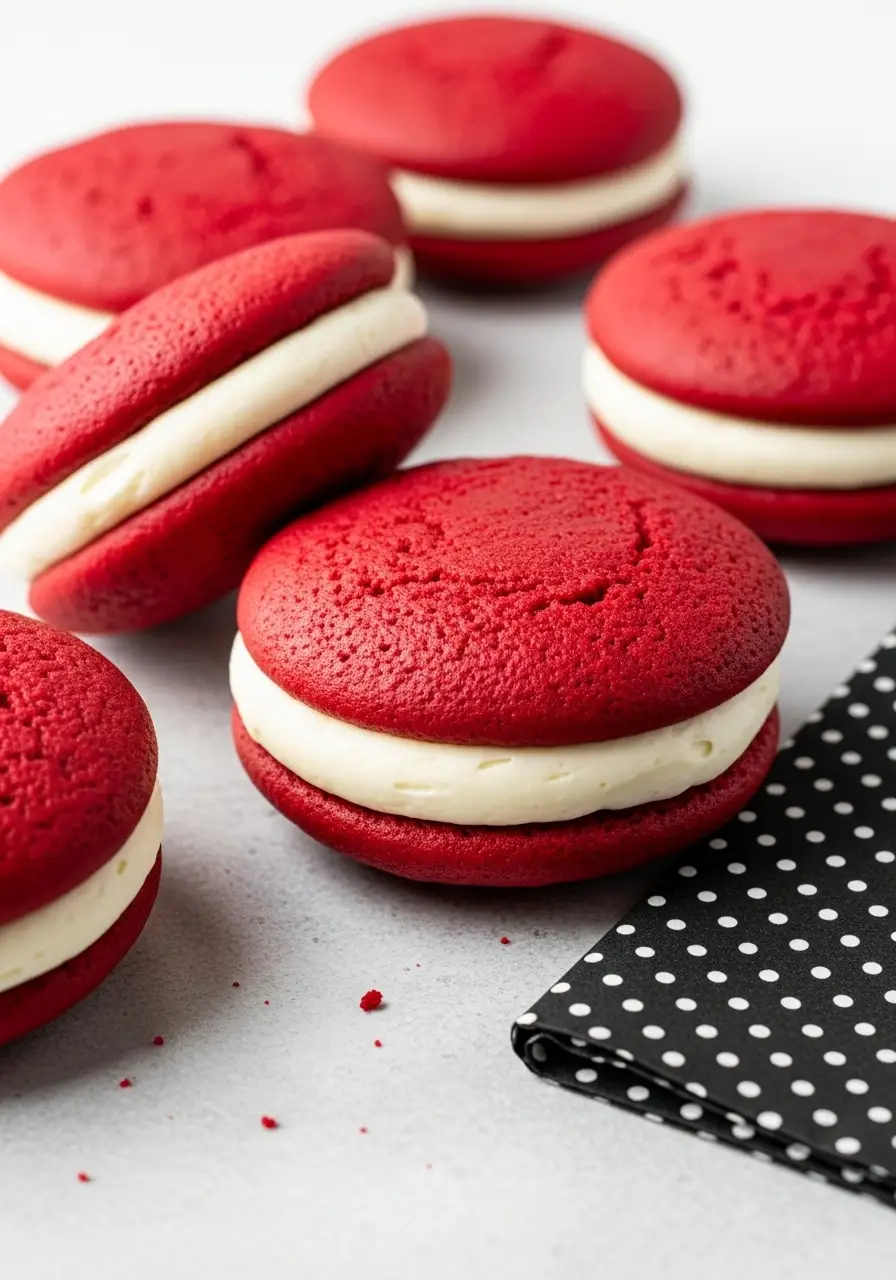
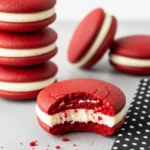
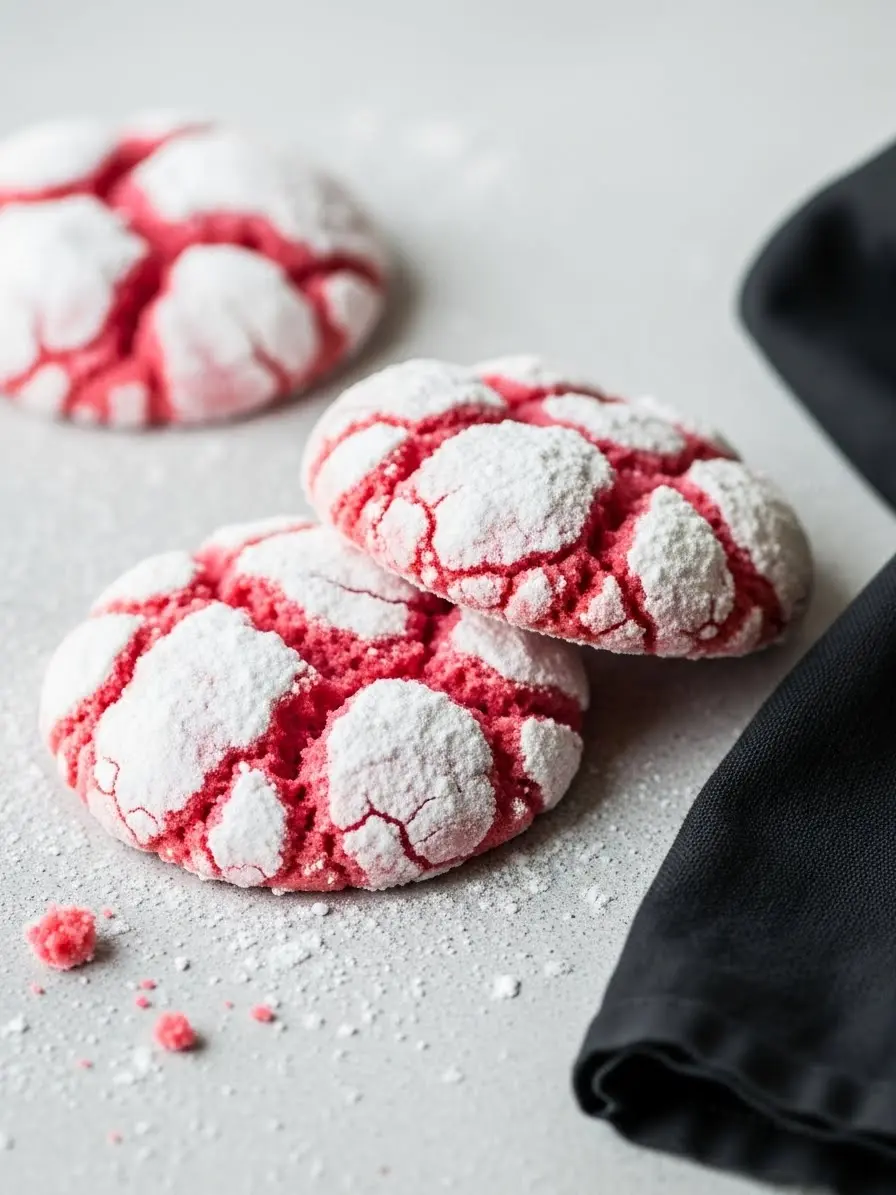
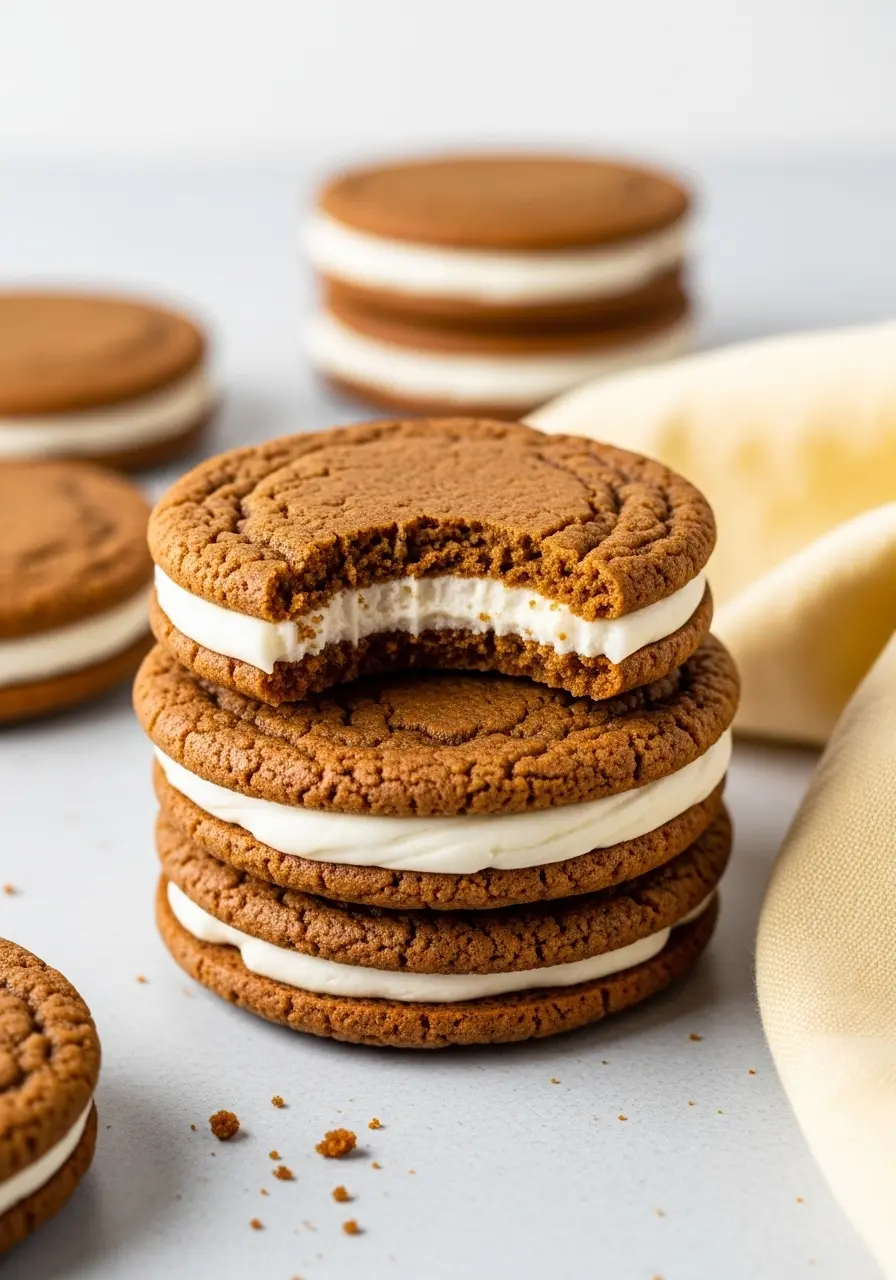
You know that moment when a dessert looks so good you can’t wait to take a bite? That’s exactly the feeling these Red Velvet Whoopie Pies give. Soft, fluffy cookies hugging a dreamy cream cheese center, they’re little bites of happiness you’ll want to hide from everyone (or not, sharing is fun too!).
If you’re planning your lineup of festive desserts, these are a must. They’re easy enough to whip up on a weekday, yet special enough to steal the show at any party. Honestly, making them feels less like following a recipe and more like creating little moments of joy, and I’ll show you exactly how to do it step by step, no stress, just pure, fun baking.
Why You Need These Red Velvet Whoopie Pies
The perfect balance of sweet and tangy – the cream cheese filling isn’t just sweet; it adds that subtle tang that makes every bite irresistible.
Fun to personalize – swap toppings, drizzle chocolate, or leave them classic; either way, they look like a bakery creation.
Perfect for gifting – wrap a few up, and you’ve got instant crowd-pleasers.
Kid-approved fun – fun to make, even more fun to eat!
The Ingredients You’ll Need
Flour and Cocoa Powder: the base of your cookies. Flour gives structure while cocoa adds a rich chocolate flavor and the deep red color that makes these cookies so festive.
Baking Soda, Baking Powder, and Vinegar: these little helpers make your cookies soft, pillowy, and perfectly risen. They work together to give you that perfect texture.
Butter, Oil, and Sugars: this trio keeps your cookies tender and moist. The brown sugar adds a warm, subtle caramel flavor while the granulated sugar gives a slight crisp edge.
Egg and Vanilla: the egg binds everything together, and vanilla adds a warm, cozy flavor in every bite.
Red Gel Food Coloring and Buttermilk: the buttermilk keeps the cookies tender with a slight tang, while the red food coloring gives them that iconic, festive look.
Cream Cheese, Butter, Powdered Sugar, and Vanilla (Filling): this dreamy filling is smooth, fluffy, and tangy. It makes each cookie an irresistible bite of creamy goodness.
Lemon Juice (Optional): just a tiny splash can brighten the filling and balance the sweetness, giving your whoopie pies an extra little pop of flavor.
If you’re a fan of rich, festive red velvet treats, you’ll want to check out my red velvet bundt cake, it’s full of that same cozy, indulgent flavor but with a show-stopping twist!
How to Make Red Velvet Whoopie Pies
Step 1: Warm up your kitchen
Preheat your oven and line your baking sheets with parchment paper. Trust me, this little step saves you from sticky cookie regrets and makes your cookies slide right off after baking.
Step 2: Prep your dry mix
In a bowl, whisk together the flour, Dutch-process cocoa powder, baking soda, and baking powder. This combo might look simple, but it’s the secret behind cookies that stay soft inside and just set on the edges. Set it aside for later.
Step 3: Cream the magic mix
With an electric mixer and in a large bowl, cream the salted butter, brown sugar, granulated sugar, and vegetable oil until silky and smooth. Take a moment to enjoy the smell, this is where the cozy, buttery goodness begins.
Step 4: Add color and flavor
Stir in the egg, vanilla, and white vinegar. Now for the fun part: add the red gel food coloring. Don’t worry if it looks intense, it bakes into a beautiful, classic red. This step is your chance to get playful and make the batter look just right.
Step 5: Bring it all together
Start by folding in half of the dry ingredients, then drizzle in the buttermilk and mix gently until it starts coming together. Finish by adding the rest of the dry mix, folding just until everything is smooth. Go slow here, the goal is soft, tender cookies!
Step 6: Shape your cookies
Scoop generous portions of batter onto your trays (about the size of a heaping tablespoon). Leave space for spreading, these cookies puff just enough to touch their neighbors slightly. Little tip: if you want perfectly round cookies, give each scoop a gentle tap or nudge with the back of a spoon.
Step 7: Bake to perfection
Bake until the centers puff slightly, around 10-12 minutes. Cool on the pan for a couple of minutes, then transfer to a wire rack. Let them fully cool before frosting; rushing this step risks a messy meltdown.
Step 8: Whip up the dreamy frosting
Beat the butter and cream cheese until completely smooth (about 3-4 minutes). Gradually mix in the powdered sugar, vanilla, and optional lemon juice. Whip for a few minutes to make it light and airy. Here’s a tiny pro tip: scraping the bowl a couple of times ensures every bit of frosting is smooth, creamy, and ready to pipe beautifully.
Step 9: Assemble your creations
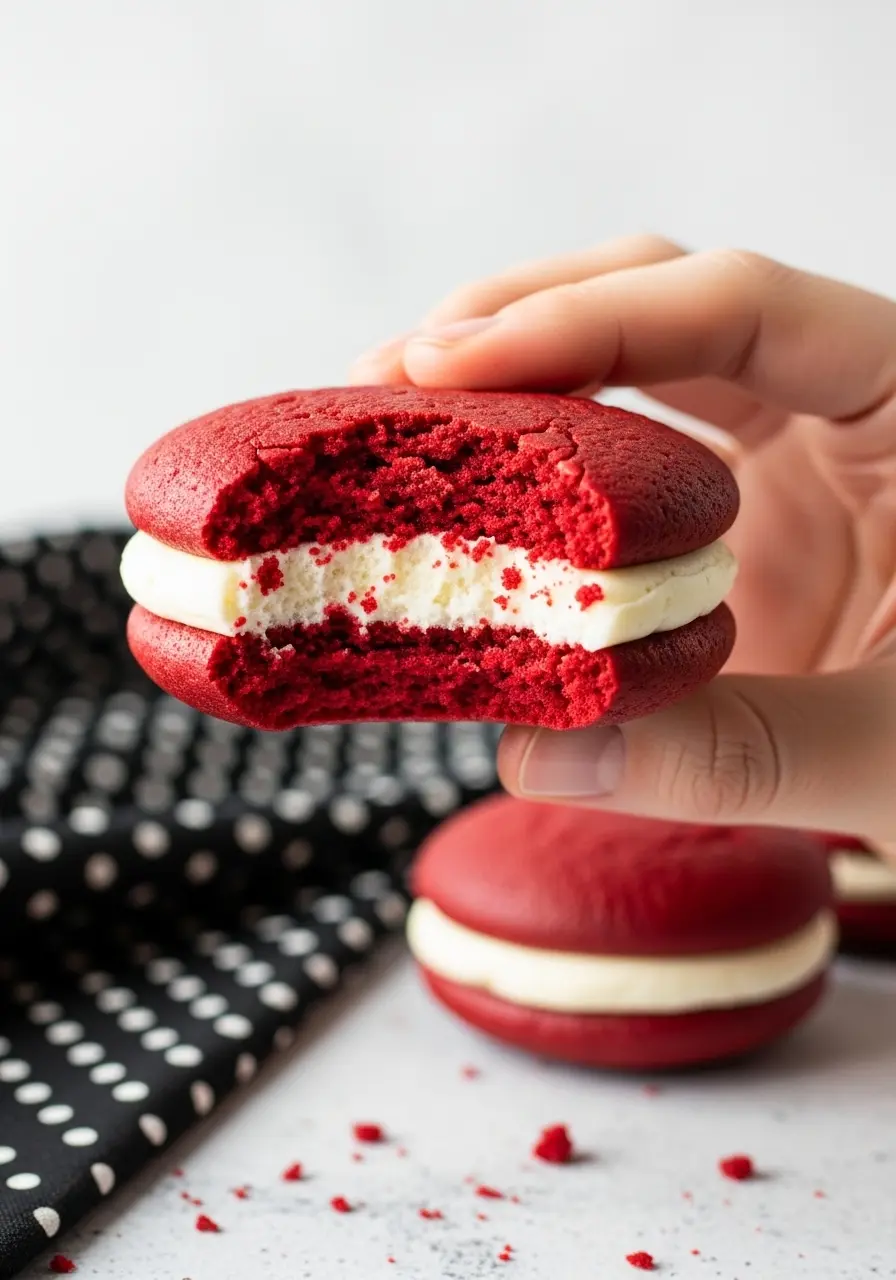
Pipe a generous swirl of frosting onto the flat side of one cookie, then sandwich with another. Press lightly to secure, but don’t squish, we want that fluffy center to shine.
Step 10: Relish and share
Step back and admire your festive, soft, irresistible Red Velvet Whoopie Pies. Perfect for gifting, parties, or sneaky midnight snacks. Remember: the first bite is always for you, because you earned it!
Mistakes to Avoid
Overmixing the batter: Mixing too much can make your cookies dense instead of soft and pillowy. Fold gently and stop as soon as the ingredients come together. Your future self (and taste buds) will thank you.
Skipping room temperature ingredients: Butter, eggs, and buttermilk should be at room temp. Cold ingredients resist blending and can leave your batter lumpy or your cookies uneven.
Using the wrong baking sheet: Thin sheets can burn the bottoms. A sturdy pan helps your cookies bake evenly and stay soft.
Overbaking: Watch the edges, not just the time. Even a minute too long can dry out your perfect pillowy cookies.
What to Serve With Red Velvet Whoopie Pies
- Warm milk or hot cocoa: the ultimate cozy pairing, think soft cookies dunked in chocolatey goodness.
- Spiced chai or cinnamon tea: the warm spices make the cookies feel even cozier.
- Salted caramel sauce: drizzle a little on the side for dipping, sweet meets salty perfection.
- Chocolate-dipped pretzels: crunchy, salty, and chocolatey, a fun texture contrast.
How to Store Your Red Velvet Whoopie Pies
Short-term at room temp: Keep them in an airtight container for 1–2 days. Tip: layer with parchment paper so the frosting doesn’t smoosh. They’ll stay soft, cozy, and ready to snack on immediately.
Refrigeration for a few days: Pop them in the fridge in a sealed container. Chilling firms up the frosting slightly, making them easier to grab for lunchboxes or parties.
I’d love to hear from you! Give these whoopie pies a try, and let me know how they turned out in the comments.
More Whoopie Pies To Bake
Fluffy Red Velvet Whoopie Pies You’ll Love
Ingredients
For The Red Velvet Cookies
- 2 cups all-purpose flour measured correctly
- 1 tsp baking soda
- ¼ tsp baking powder
- 3 tbsp unsweetened cocoa powder
- ½ cup salted butter at room temperature
- 2 tbsp vegetable oil
- ⅔ cup brown sugar
- ⅓ cup granulated sugar
- 1 large egg
- ¾ cup buttermilk
- ½ tsp white vinegar
- 1 ½ tsp vanilla extract
- 1-2 tsp red gel food coloring
For The Cream Cheese Frosting
- 4 oz cream cheese softened
- 1 cup salted butter softened
- 3 ⅓ cups powdered sugar sifted for smoothness
- 1 tsp vanilla extract
- ½ tsp lemon juice optional but brightens the flavor
Instructions
- Preheat your oven to 350°F (180°C), and line your baking sheets with parchment paper or silicone mats, this little step keeps your cookies from sticking and makes cleanup way easier.
- In a medium bowl, whisk together the flour, Dutch-process cocoa powder, baking soda, and baking powder until everything is evenly mixed.
- In a large bowl, use a hand or stand mixer to cream the salted butter, brown sugar, granulated sugar, and vegetable oil until silky and fluffy.
- Add in the egg, vanilla extract, and white vinegar, mixing just until incorporated. Then add the red gel food coloring and fold until the batter is a bright, festive red.
- Gently fold in half of the dry ingredients, then pour in the buttermilk in a slow stream. Mix lightly until the batter begins to come together, then fold in the remaining dry ingredients until smooth. Take your time, gentle folding keeps your cookies tender and soft.
- Scoop generous portions of batter onto your prepared baking sheets, leaving a little space between each. The cookies puff just enough to touch each other slightly. If you want neat, round cookies, give each scoop a gentle tap or nudge with a spoon.
- Bake until the edges are set and the centers are slightly puffed, around 10-12 minutes. Let them relax on the hot baking sheet for a short while, then shift them onto a wire rack to finish cooling.
- While the cookies cool, beat the butter and cream cheese together until smooth and creamy. Gradually mix in the powdered sugar, vanilla, and optional lemon juice. Whip for a few minutes until light, fluffy, and silky. Scraping the bowl a few times ensures the frosting is perfectly smooth and ready to pipe.
- Pipe a generous swirl of frosting onto the flat side of one cookie, then sandwich it with another. Press lightly to secure without squishing the fluffy center, we want that soft, creamy filling to shine. Enjoy!
Notes
- If your frosting feels too thick to pipe, add a tiny splash of milk or cream and whip for a few seconds to loosen it.
- For even more festive flair, roll the edges of the frosting in sprinkles, mini chocolate chips, or crushed nuts.


What temperature do I set the oven?
Hi Tracy! You’ll want to bake them at 350°F (180°C). Thanks for catching that, I’ll update the recipe!