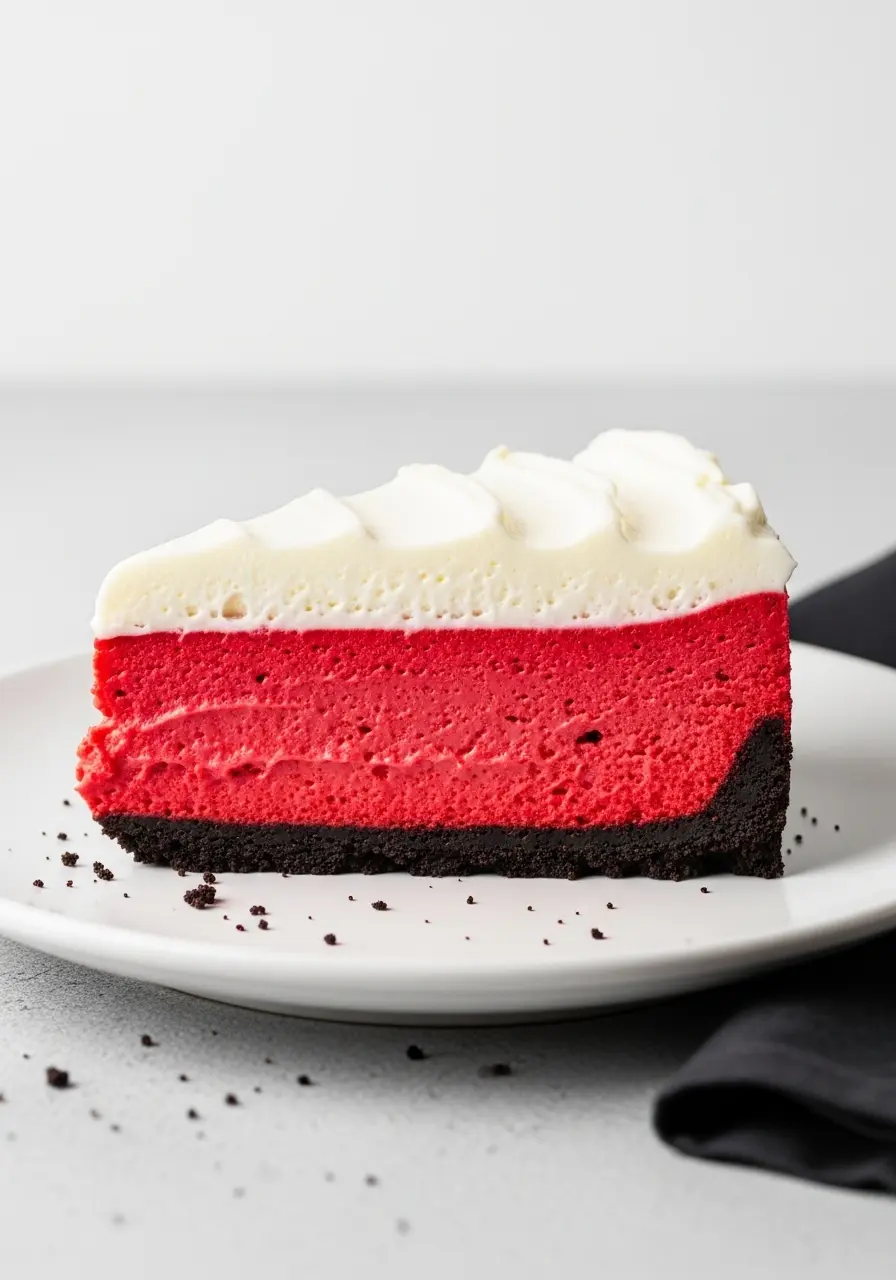
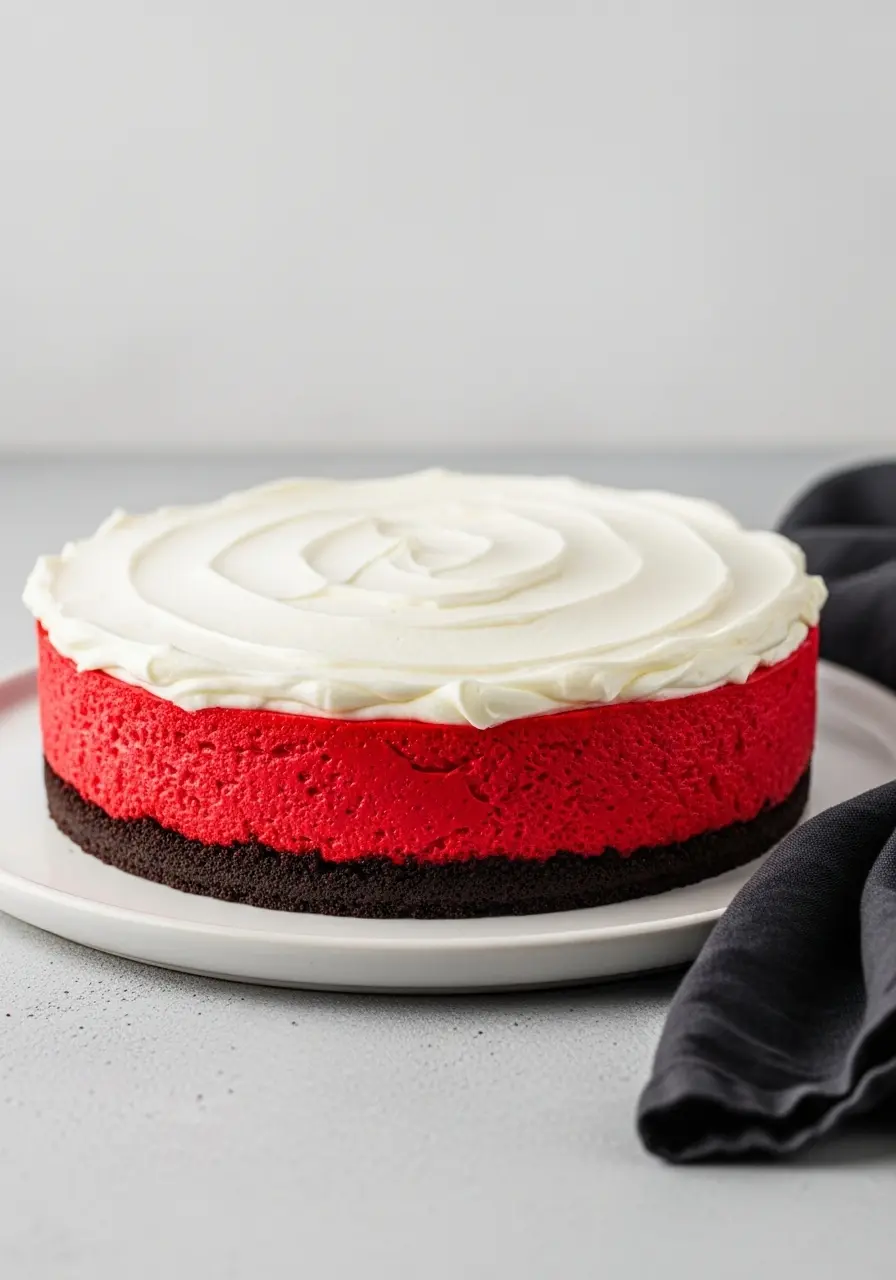
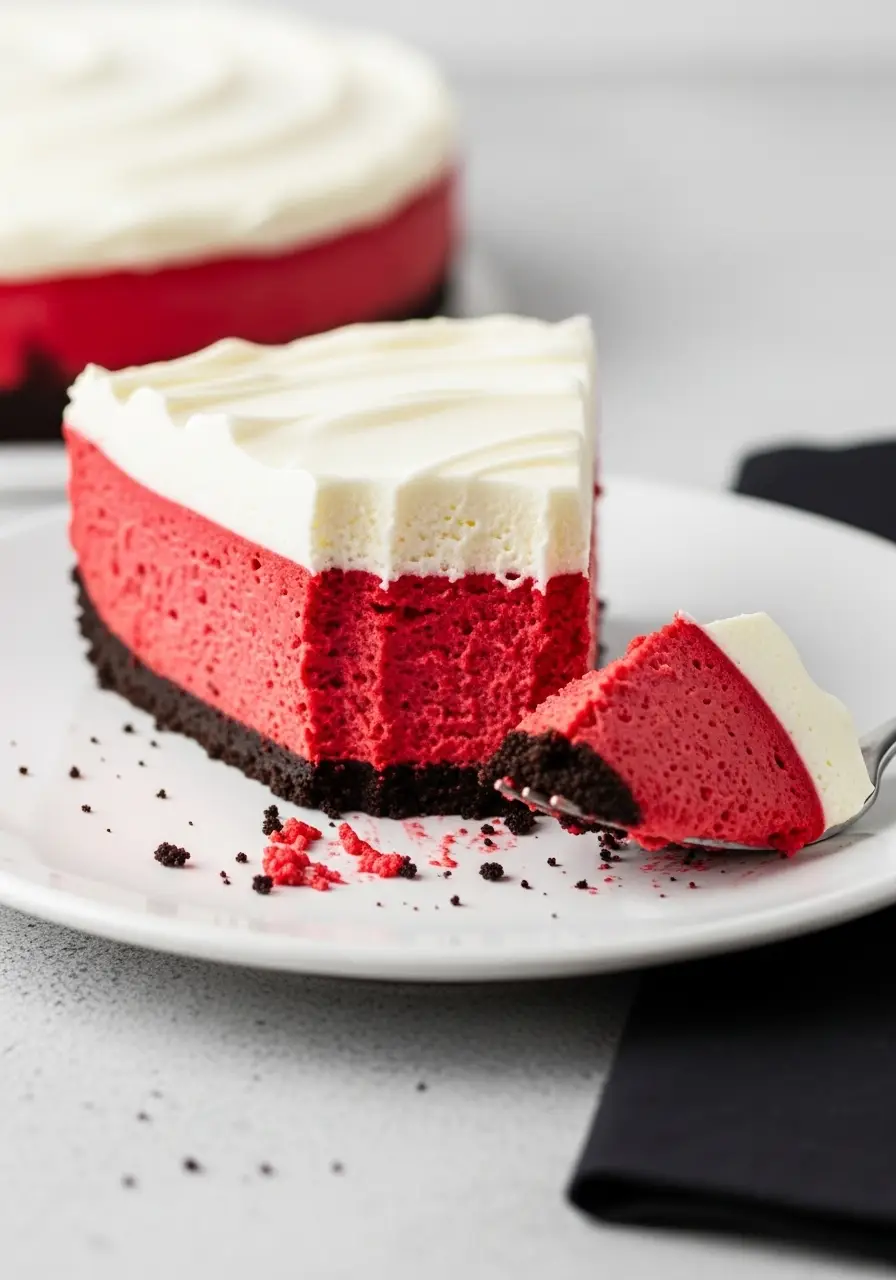
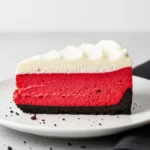
Hey friend! Can I be honest for a second? This Red Velvet Cheesecake might just be your new favorite way to cheat a little… and by cheat, I mean eat dessert for breakfast, lunch, and dinner without regret. It starts with a crunchy Oreo cookie crust that’s basically irresistible, a silky red velvet layer that somehow feels fancy but is so easy to whip up, and of course, a cloud of dreamy cream cheese frosting on top that makes every bite feel like a little celebration.
If you’ve ever thought cheesecake was complicated or stressful, let me tell you, this one changes the game. It’s simple, fun, and exactly the kind of dessert you can make while blasting your favorite playlist and pretending you’re a pastry chef. Seriously, once you try this, it’s going to become your go-to in all your cheesecake recipes rotation.
Why Everyone Will Love This Red Velvet Cheesecake
Velvety red velvet filling – smooth, rich, and perfectly balanced between sweet and tangy, with that signature red hue that makes every slice feel festive.
Customizable fun – sprinkle crushed Oreos, white chocolate curls, or fresh berries for your own signature touch.
Zero oven stress – no baking, no sweating over timing, just chill and enjoy.
Made for sharing– honestly, it’s impossible to eat just one slice.
Festive, eye-catching, and fun – perfect for holidays, birthdays, or whenever you want to impress without overcomplicating dessert.
The Ingredients You’ll Need
Oreos & Butter: The base of your crust, crush the cookies and mix with melted butter to make a crunchy, slightly sweet foundation that holds everything together.
Brown Sugar & Pinch of Salt: Just enough sweetness and a hint of salt to bring out all the chocolatey flavors in the crust.
Cream Cheese & Sour Cream: The heart of your filling, makes it silky, rich, and slightly tangy, so it doesn’t feel too heavy.
Light Brown Sugar & Vanilla Extract: Sweetness with depth and a touch of flavor magic to make your filling irresistible.
Cocoa Powder & Red Food Coloring: The signature red velvet flavor and color, cocoa gives it that subtle chocolatey note while the red wow factor makes it pop.
Cool Whip & Heavy Whipping Cream: These give your cheesecake that airy, light, no-bake texture that’s fluffy, creamy, and dreamy on every bite.
Powdered Sugar: Sweetens your frosting perfectly without leaving any grainy texture, helps your topping stay smooth and dreamy.
Step-by-Step Red Velvet Cheesecake
Step 1: Build Your Oreo Base
Grab those Oreos and crush them until they’re fine crumbs, You can do it in a ziplock bag and bash with a rolling pin because it feels kind of fun. Mix in the melted butter, brown sugar, and a pinch of salt until it’s like damp sand that sticks together when pressed.
Press it firmly into your dish, the firmer, the better, because this crust is your crunchy, chocolatey foundation. Pro tip: line the bottom of your pan with parchment paper so lifting it out later is a breeze. Pop it in the fridge for at least 15 minutes to chill while we work on the filling.
Step 2: Whip Up the Red Velvet Filling
In a bowl, beat the cream cheese until smooth, no lumps allowed! Add the sour cream, light brown sugar, cocoa powder, red food coloring, and vanilla. Mix until silky and beautifully red. Now gently fold in the Cool Whip to keep it light and airy. Quick tip: use a rubber spatula and fold slowly, you want that fluffiness to stay! Pour it carefully over your chilled crust, smoothing the top like frosting a cake. Cover tightly and let it rest in the fridge for no less than five hours.
Step 3: Make the Frosting Extra Dreamy
Beat the cream cheese until creamy and smooth. In another bowl, whip the cold heavy cream with powdered sugar and vanilla until stiff peaks form. Now fold the whipped cream into the cream cheese in two gentle batches, this keeps it airy and spreadable.
Step 4: Top Like a Pro
Spread your frosting over the set cheesecake with a spatula. Then, let it chill again until serving time so everything sets beautifully. Cut generous slices, serve chilled, and watch the reactions.
Tips for the Perfect Red Velvet Cheesecake
Soft cream cheese matters: Always use room temperature cream cheese for the filling and frosting, it whips up smoother and makes folding easier.
Chill, chill, chill: Don’t rush the fridge time. Letting the cheesecake set properly ensures clean slices and a perfectly firm filling.
Make it ahead: This cheesecake actually tastes better after a few hours in the fridge, perfect for preparing a day in advance for gatherings.
Customize the crust: Feeling adventurous? Swap some Oreos for chocolate graham crackers or add a sprinkle of finely chopped nuts for extra crunch.
Delicious Ways to Top It
- Crushed Oreos – echo the crust for extra chocolatey crunch.
- Mini red velvet crumbs – for that extra “wow” and texture on top.
- Drizzle of dark chocolate – fancy without effort.
- Toasted pecans or walnuts – subtle crunch that pairs beautifully with creamy filling.
Can’t get enough red velvet? Check out these red velvet whoopie pies for a soft, chocolatey treat, or dive into these red velvet cupcakes for bite-sized sweetness you’ll fall in love with!
How to Store This Red Velvet Cheesecake
Refrigerate for freshness: Keep it covered in the fridge, airtight is best, for up to 4–5 days. This keeps the filling creamy and the crust perfectly firm.
Freeze for longer storage: Slice the cheesecake first, then wrap each piece tightly in plastic wrap and place in an airtight container (without the toppings). Freeze for up to 2 months.
I’d love to hear from you! Did you try this red velvet cheesecake? Drop a comment below and tell me how it turned out, your little stories always make my day!
Red Velvet Cheesecake
Ingredients
Cookie Crust
- 22 Oreo cookies finely crushed
- 5 tablespoons unsalted butter melted
- 1 tablespoon light brown sugar
- A small pinch of salt
Red Velvet Filling
- 8 oz cream cheese softened
- ½ cup packed light brown sugar
- 1 cup sour cream
- 3 teaspoons unsweetened cocoa powder
- 1½ teaspoons pure vanilla extract
- 2 tablespoons red food coloring
- 8 oz Cool Whip thawed
Cream Cheese Frosting
- 4 oz cream cheese softened
- 1 cup cold heavy whipping cream
- ⅔ cup powdered sugar sifted
- 1 teaspoon vanilla extract
Instructions
- Start by turning the Oreos into fine crumbs. The easiest way is to pop them in a ziplock bag and crush them with a rolling pin, a little smashing therapy while you bake! Mix the crumbs with melted butter, brown sugar, and a pinch of salt until it sticks together like damp sand.
- Press it firmly into your pan so the crust stays solid and crunchy. Tip: lining the bottom with parchment paper makes lifting it out later effortless. Pop it in the fridge for at least 15 minutes while you make the filling.
- Beat the cream cheese until completely smooth, then stir in the sour cream, light brown sugar, cocoa powder, red food coloring, and vanilla until everything is silky and evenly colored. Gently fold in the Cool Whip, taking care not to deflate it, this keeps the filling light and fluffy. Pour it over the chilled crust, smoothing the top like frosting a cake. Cover and refrigerate for at least 5 hours so it sets just right.
- For the frosting, beat the cream cheese until soft and creamy. In a separate bowl, whip the chilled heavy cream with powdered sugar and vanilla until it forms stiff peaks. Fold the whipped cream into the cream cheese slowly to keep it airy and easy to spread.
- Spread the frosting over the cheesecake in an even layer, then chill again until ready to serve. Slice generous pieces, serve cold, and watch everyone’s faces light up with each creamy bite!
Notes
- Use a springform pan if you want a super clean slice, it makes serving easier.
- Add a tiny splash of milk if the frosting feels too thick to spread.