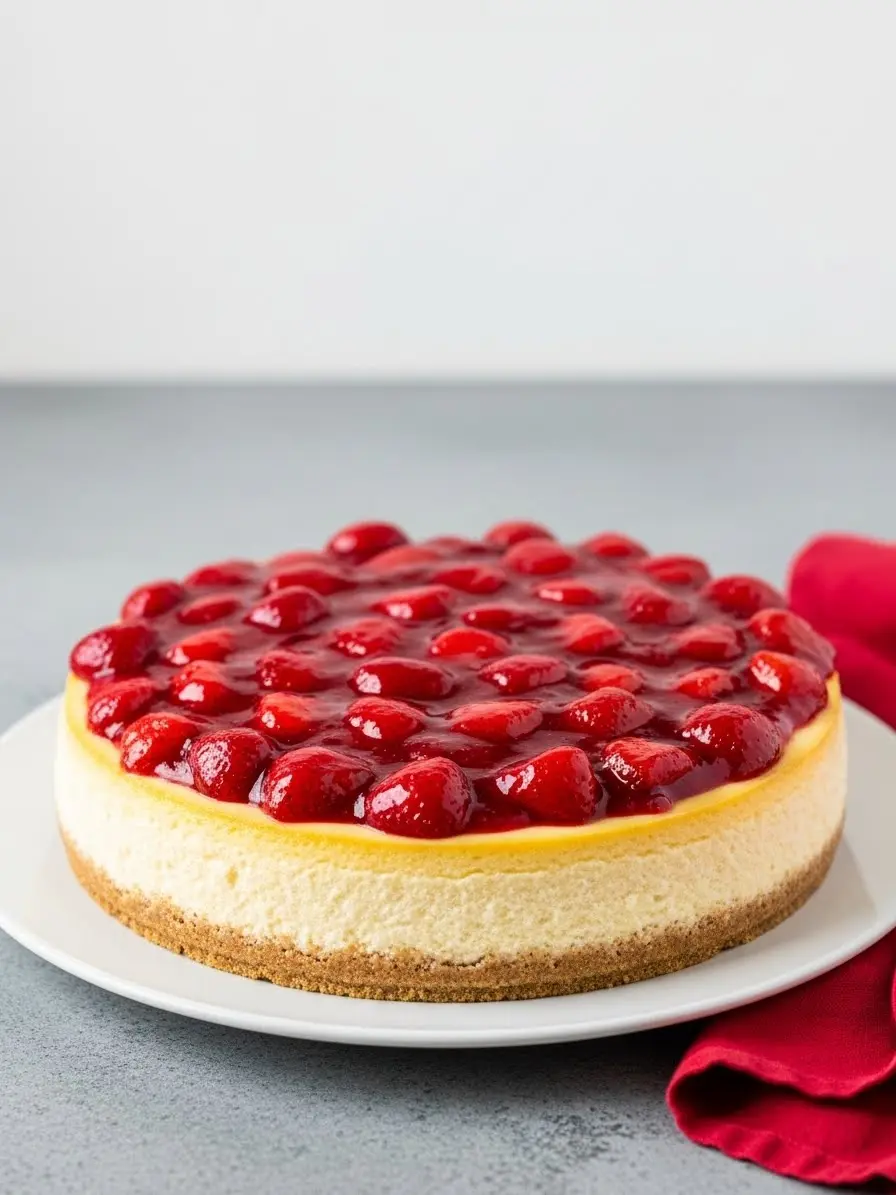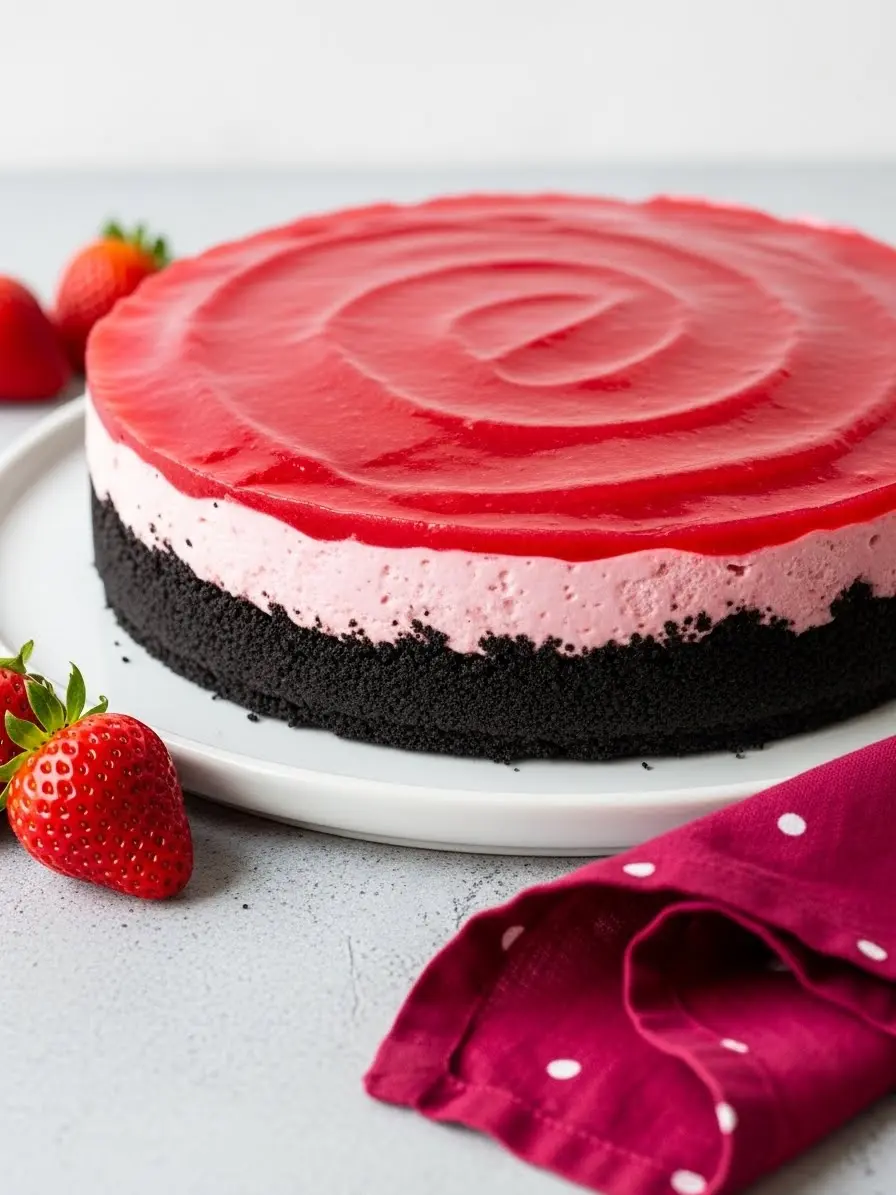
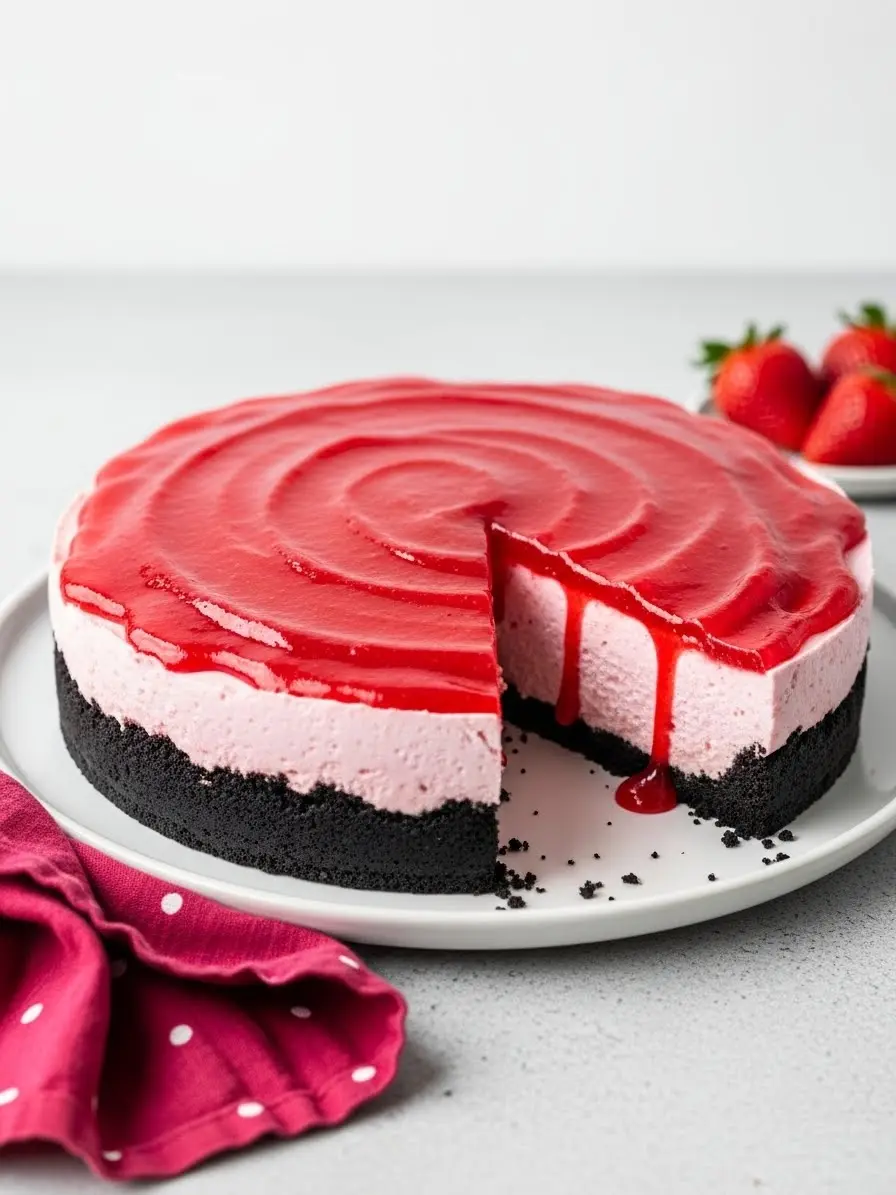
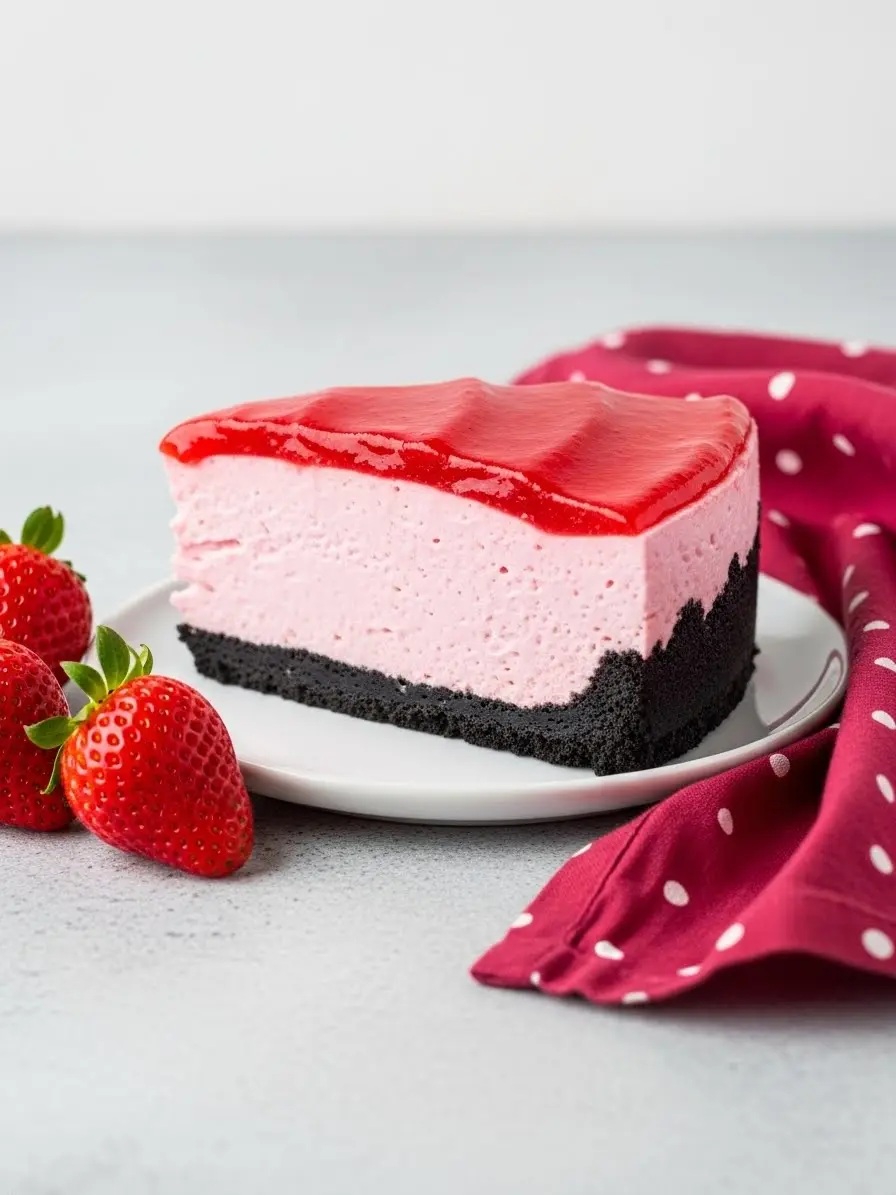
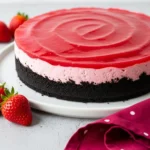
Imagine biting into a dessert that’s creamy, dreamy, and bursting with fresh strawberry flavor, that’s exactly what this No Bake Strawberry Cheesecake delivers. You don’t need an oven, and it’s surprisingly simple to make, but every bite feels indulgent and special.
Your friends and family will love the buttery Oreo crust, the smooth, velvety filling, and the shiny, juicy strawberry topping that makes it look as good as it tastes. This is one of those no-bake desserts that feels fancy enough for a dinner party, yet easy enough to whip up on a lazy weekend afternoon.
If you want a dessert that’s refreshing, impressive, and totally stress-free, this cheesecake is calling your name. You’ll want to make it again and again, and maybe even sneak a slice for yourself.
Why You Need This No Bake Strawberry Cheesecake in Your Life
Creamy clouds of goodness – Each bite is smooth, dreamy, and just melts in your mouth.
Totally customizable – Want it extra fruity, sweeter, or more chocolatey? Small tweaks, big impact, zero stress.
Perfect for any occasion – Weekends, birthdays, cozy nights in… this cheesecake fits every vibe.
Zero oven, zero stress – Seriously, this is a dessert you can pull off while binge-watching your favorite show.
All About the Ingredients
Oreo Cookies + Butter + Pinch of Salt: These three team up to make your crust dreamy and sturdy. The cookies give chocolatey crunch, the butter binds it all together, and that tiny pinch of salt makes the flavors pop.
Strawberries + Granulated Sugar (filling): Fresh strawberries sweetened just right create the bright, juicy heart of your cheesecake. The sugar helps bring out their natural flavor and keeps the filling balanced.
Cream Cheese + Powdered Sugar + Vanilla Extract: This trio is what makes the cheesecake creamy, smooth, and indulgent. The cream cheese is the star, powdered sugar sweetens without grit, and vanilla adds a subtle warmth that ties it all together.
Whipping Cream + Gelatin: Fluffy, dreamy whipped cream meets gelatin to create that melt-in-your-mouth, perfectly set texture, no oven required!
Strawberries + Sugar + Lemon Juice (topping): This combo becomes your gorgeous strawberry topping. Sweet, tangy, and vibrant, it gives your cheesecake that wow factor and makes each slice irresistible.
How to Make Your No Bake Strawberry Cheesecake
1. Chill Your Pan and Build the Crust
First things first: lightly grease a 9-inch springform pan, trust me, this step saves a lot of heartache later. Crush your Oreos until they’re fine crumbs; no food processor? No problem, a Ziploc bag and rolling pin work perfectly. Mix in the melted butter and a tiny pinch of salt to balance all that sweetness. Press it evenly into the pan. Tip: use the bottom of a flat glass to really compact the crust, it makes slicing a dream later. Pop it in the fridge while we move on.
2. Sweeten and Heat
Start by tossing your sliced strawberries into a blender and blitz until smooth.
Pour the strawberry sauce into a small saucepan with the granulated sugar. Warm gently over medium heat, stirring occasionally. Let it bubble just enough to thicken slightly and concentrate the flavor, this step brings out the natural sweetness and makes your strawberries taste like sunshine in every bite.
3. Bloom the Gelatin
Sprinkle the gelatin evenly over the warm strawberry mixture and stir until fully dissolved. This little step is what helps your cheesecake set perfectly without baking. Tip: sprinkle it slowly and evenly so it doesn’t clump, you’ll get a smooth, creamy filling every time.
4. Cool Before Folding
Remove the strawberry mixture from the heat and let it cool to just warm or room temperature. This prevents the whipped cream from deflating and keeps the filling light and airy. If you’re impatient, a quick 5- 10 minutes chill in the fridge works wonders.
5. Whip the Cream Cheese Base
In a large bowl, beat the cream cheese with the powdered sugar until silky and smooth. Add the vanilla extract to give it subtle warmth. In a separate bowl, whip the cream until soft peaks form, fluffy, cloud-like peaks that will make your filling dreamy.
6. Fold Everything Together
Gently fold the cooled strawberry mixture into the cream cheese base. Go slow, you want a uniform pink color without losing the airy texture. Then fold in the whipped cream carefully until the filling is smooth, creamy, and light.
7. Layer and Chill
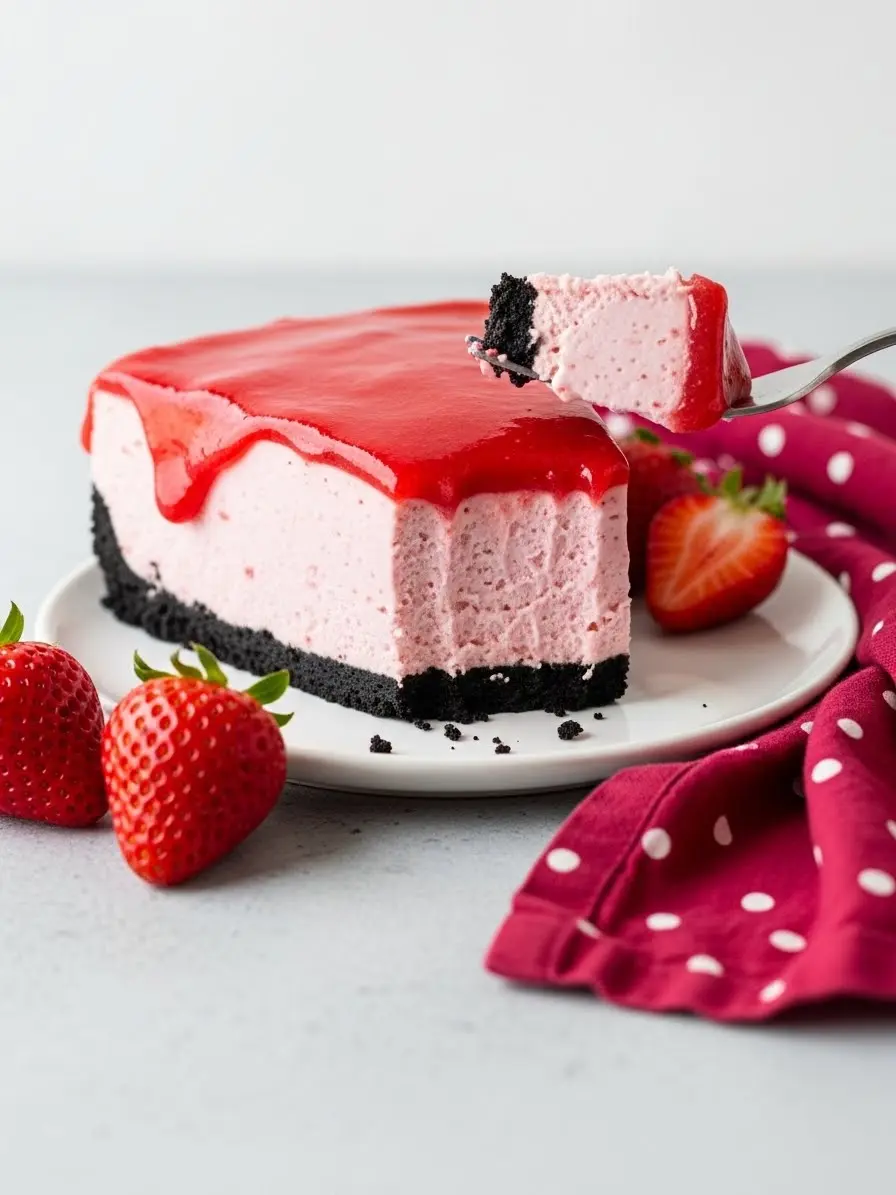
Spoon the filling over your chilled Oreo crust and smooth the top with a spatula. Cover loosely and refrigerate for at least 5 hours. This step lets the gelatin do its magic and ensures your cheesecake slices cleanly with that perfect, creamy texture.
5. Optional Strawberry Topping That Pops
For that “wow” factor, make a simple topping: combine diced strawberries, sugar, and lemon juice in a small saucepan. Cook gently over medium heat until the strawberries soften and release their juices, then let it cool completely. Put the mixture in a blender and blend until it’s silky and smooth. Spoon over your set cheesecake for a glossy, fresh finish. Pro tip: if you like it extra thick, pop it in the fridge for a bit before serving.
6. Slice, Serve, and Swoon
Use a warm knife for perfect slices (just run it under hot water and wipe dry between cuts). Each bite should give you creamy cheesecake, a buttery crust, and that fresh, fruity strawberry punch. This is the kind of dessert that makes people pause, and smile.
Watch Out For This
Adding warm strawberry sauce too soon: Pouring hot strawberry mixture into the cream cheese can deflate the whipped cream and make the filling lumpy. Always let it cool to just warm or room temperature.
Rushing the chill time: Patience is key! Cutting the cheesecake too soon can cause it to collapse or smear. Chill at least 5 hours, or overnight if possible, your slices will thank you.
Using cold cream cheese straight from the fridge: Cold cream cheese can make lumps in your filling. Let it sit at room temperature for 20–30 minutes so it blends into a silky, creamy base.
Leaving the topping too runny: Let the strawberry topping cool completely, or chill it for 10–15 minutes, so it doesn’t drip off the sides.
Topping Ideas to Try
- Chocolate-covered strawberry pieces – rich chocolate + strawberry = perfect combo.
- Crushed pistachios – color pop and nutty flavor that’s unexpected but amazing.
- Fresh strawberry halves – simple, classic, and adds a juicy pop.
- Crushed Oreo crumbs – gives a crunchy, chocolatey contrast.
- Cocoa powder dusting – subtle chocolate flavor, effortless.
Craving a warmer, more indulgent take on this classic? Check out my baked Strawberry Cheesecake for a slightly different texture and that golden, oven-baked charm, it’s just as irresistible!
Storing Your No Bake Strawberry Cheesecake
Refrigerate: Keep it covered in the fridge for up to 4–5 days. Tip: wrap the pan loosely with plastic wrap or use an airtight container to prevent it from absorbing fridge odors.
Freeze for longer storage: Slice into portions, wrap each slice tightly in plastic wrap, then place in a freezer-safe bag or container. It keeps well for up to 2 months.
Thawing tip: Move slices to the fridge overnight before serving. This prevents soggy edges and keeps the filling creamy.
Topping separately: Store any fresh strawberry topping or glaze in a small container separately. Add it just before serving to keep it fresh and vibrant.
Keep it stable: Avoid storing near strong-smelling foods (like onions or cheese), the cheesecake can absorb flavors and lose its delicate strawberry vibe.
If you’re loving all things strawberry, don’t miss my Chocolate Strawberry Cupcakes and Strawberry Crinkle Cookies, each one is bursting with fresh fruit flavor and perfect for any sweet craving!
Give this cheesecake a try, it’s creamy, fresh, and just a little slice of heaven! I’d love to hear how yours turns out, so leave a comment and share your cheesecake story.
No Bake Strawberry Cheesecake
Ingredients
Oreo Crust
- 34 Oreo cookies filling included
- ⅓ cup melted unsalted butter
- A small pinch of salt
For The Cheesecake Filling
- 16 oz strawberries sliced
- 5 tablespoons granulated sugar
- 1 tablespoon gelatin 1 packet
- 1 1/4 cups whipping cream
- ½ teaspoon vanilla extract
- 3/4 cup powdered sugar sifted
- 24 oz full fat cream cheese softened
For The Strawberry Drizzle, Optional
- 8 oz strawberries diced
- 5 tablespoons granulated sugar
- 1-2 tablespoon of lemon juice
Instructions
- Grease a 9-inch springform pan so your cheesecake comes out easily later. Crush the Oreos until they’re fine crumbs, no food processor? No problem! A Ziploc bag and rolling pin do the trick. Mix in the melted butter and a tiny pinch of salt to balance the sweetness, then press the crumbs evenly into the pan. For a smooth, sturdy base, press firmly with the bottom of a flat glass. Set it in the fridge to chill as you get the filling ready.
- Put your sliced strawberries in a blender and pulse until smooth. Pour the strawberry mixture into a small saucepan with the sugar and warm gently over medium heat, stirring now and then. Let it bubble lightly so it thickens just a touch, this brings out the natural sweetness and makes the strawberries taste bright and fresh.
- Sprinkle the gelatin over the warm strawberry mixture and stir until fully dissolved. Take your time with this step, it’s the secret to a creamy, perfectly set filling.
- Take the strawberry mixture off the heat and let it cool to warm or room temperature. This keeps your whipped cream fluffy when you fold it in. In a pinch, a quick 5–10 minute chill in the fridge works perfectly.
- In a large bowl, beat the cream cheese with the powdered sugar until smooth and creamy. Stir in the vanilla extract for a warm, subtle flavor. In a separate bowl, whip the cream until soft, fluffy peaks form, these airy clouds are what make your filling light and dreamy.
- Fold the cooled strawberry mixture gently into the cream cheese, taking your time so everything stays evenly pink and smooth. Then fold in the whipped cream carefully until the filling is fully combined, creamy, and light.
- Spoon the filling over the chilled Oreo crust and smooth the top with a spatula. Cover loosely and refrigerate for at least 5 hours, overnight is even better, so the filling sets perfectly and slices beautifully.
- For a simple, shiny strawberry topping, combine diced strawberries, sugar, and a bit of lemon juice in a small saucepan. Cook gently until the berries soften and release their juices, then let it cool completely before blending until smooth. Spoon it over your chilled cheesecake for a glossy, fresh finish.
- When it’s time to serve, use a warm knife for perfect slices. Enjoy!
Notes
- Chill the cheesecake overnight if you can, it slices cleaner and tastes even better the next day.
- If your cheesecake wobbles slightly, don’t panic, it will firm up more as it chills.
- Taste the strawberry mixture before adding sugar, some berries are naturally sweet enough.