Picture this: you’ve got a pumpkin on your mind, the holiday buzz is in the air, and you want a treat that tastes as wonderful as it looks. That’s where this no bake pumpkin pie comes in, silky, spiced, and ready to wow with almost zero effort. This isn’t just any pumpkin dessert; it’s the one your friends will ask for seconds of.
And here’s the best part: this pie fits right in with all your Thanksgiving desserts, but it’s so easy, you’ll find yourself making it on random cozy nights, too. Think of it as the shortcut recipe that never feels like a shortcut.
Reasons to Make This No Bake Pumpkin Pie
Silky, creamy, dreamy: The pumpkin filling is perfectly spiced and luscious, every bite melts in your mouth.
Perfect for any occasion: Thanksgiving, a casual weeknight treat, or a last-minute potluck, this pie fits every vibe.
Mix-and-match fun: Layer with crushed cookies, drizzle caramel, or sprinkle nuts. Each pie can be your own creative masterpiece.
If you want something bite-sized, you’ll adore my Mini Pumpkin Pies, all the cozy pumpkin flavor in cute little handheld treats.
The Good Stuff You’ll Need
- Salted butter: Gives the crust a rich, buttery flavor and helps hold it all together so it slices neatly.
- Graham cracker crumbs: The base of your pie, adding that classic crunch and slightly sweet flavor everyone loves.
- Brown sugar: Sweetens the crust naturally and gives it a tiny caramel-y note for depth.
- Pumpkin puree: The heart of the pie, bringing creamy texture and authentic pumpkin flavor.
- Cream cheese: Makes the filling luxuriously smooth and adds a subtle tang that balances the sweetness.
- Powdered sugar: Sweetens the filling and the whipped cream without any graininess, keeping everything silky.
- Vanilla extract: Adds warmth and rounds out the flavors, making the pie taste more homemade.
- Cinnamon: Classic fall spice that gives the filling a cozy, aromatic touch.
- Nutmeg: Just a pinch enhances the depth of flavor and gives it that signature pumpkin pie warmth.
- Ginger: Adds gentle spice that keeps the filling lively and layered in flavor.
- Heavy whipping cream: Whips up into fluffy cream to crown the pie, adding lightness and richness.
How to Make No Bake Pumpkin Pie
Step 1: Build Your Crust
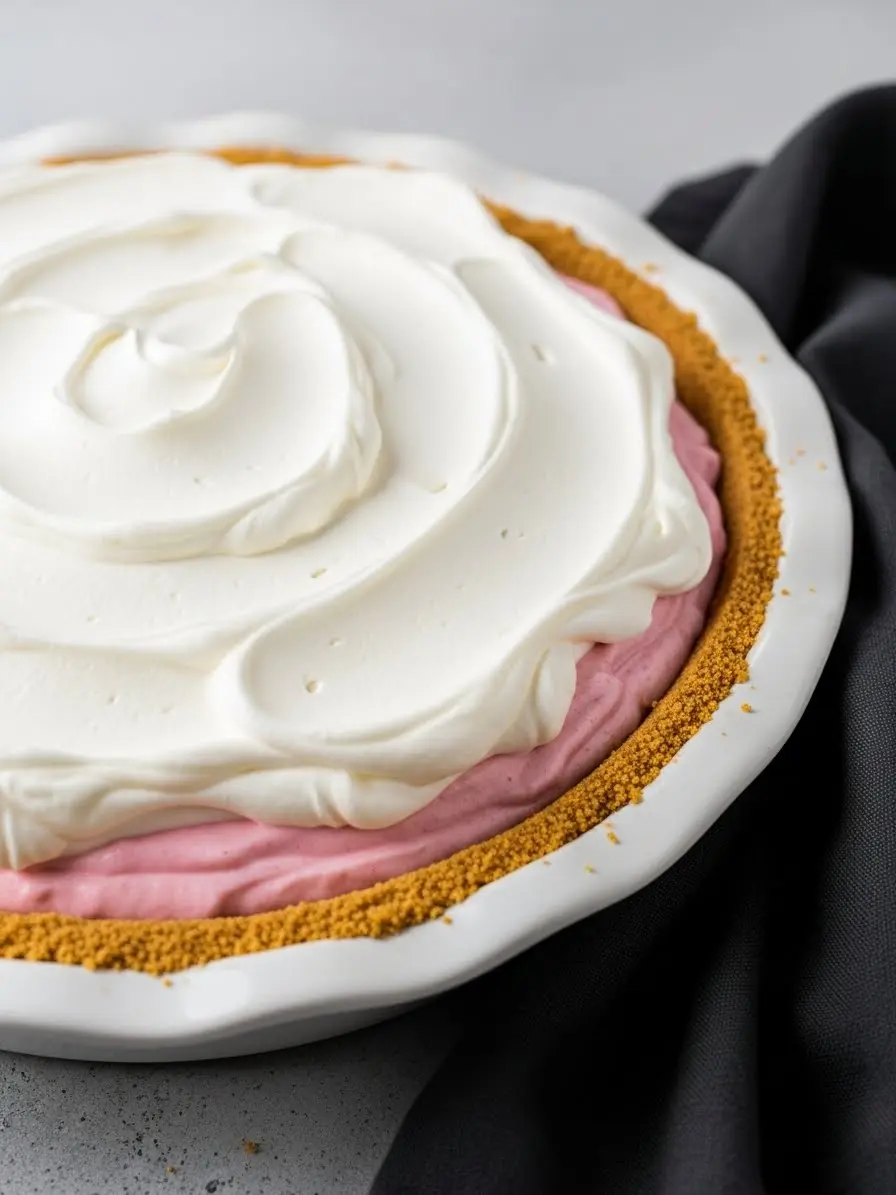
Grab your graham cracker crumbs, brown sugar, and melted butter. Mix them gently until every crumb is coated with butter and sweetness. Now, press the mixture into your 9 inch pie dish, bottom first, then up the sides.
Take your time; a firm press now means clean slices later. Place the crust in the oven for 8 minutes, until golden and smelling delicious, then let it cool.
Step 2: Whip Your Fluffy Finish
Time for the magic cream! Whip your cold heavy cream with powdered sugar until it forms soft, pillowy peaks. Watch closely, the difference between soft peaks and stiff peaks is subtle, but it makes the filling light and dreamy. Save half in the fridge for topping later, your pie deserves a little “wow” on top.
Step 3: Whip Up the Pumpkin Filling
In a mixing bowl, blend your pumpkin puree, cream cheese, powdered sugar, vanilla, and spices until silky smooth. No lumps allowed, this is the moment your pie starts to feel luxurious. Now, gently fold in half of your whipped cream. Go slow and steady; we want a light, airy filling. Folding rather than stirring keeps it extra fluffy.
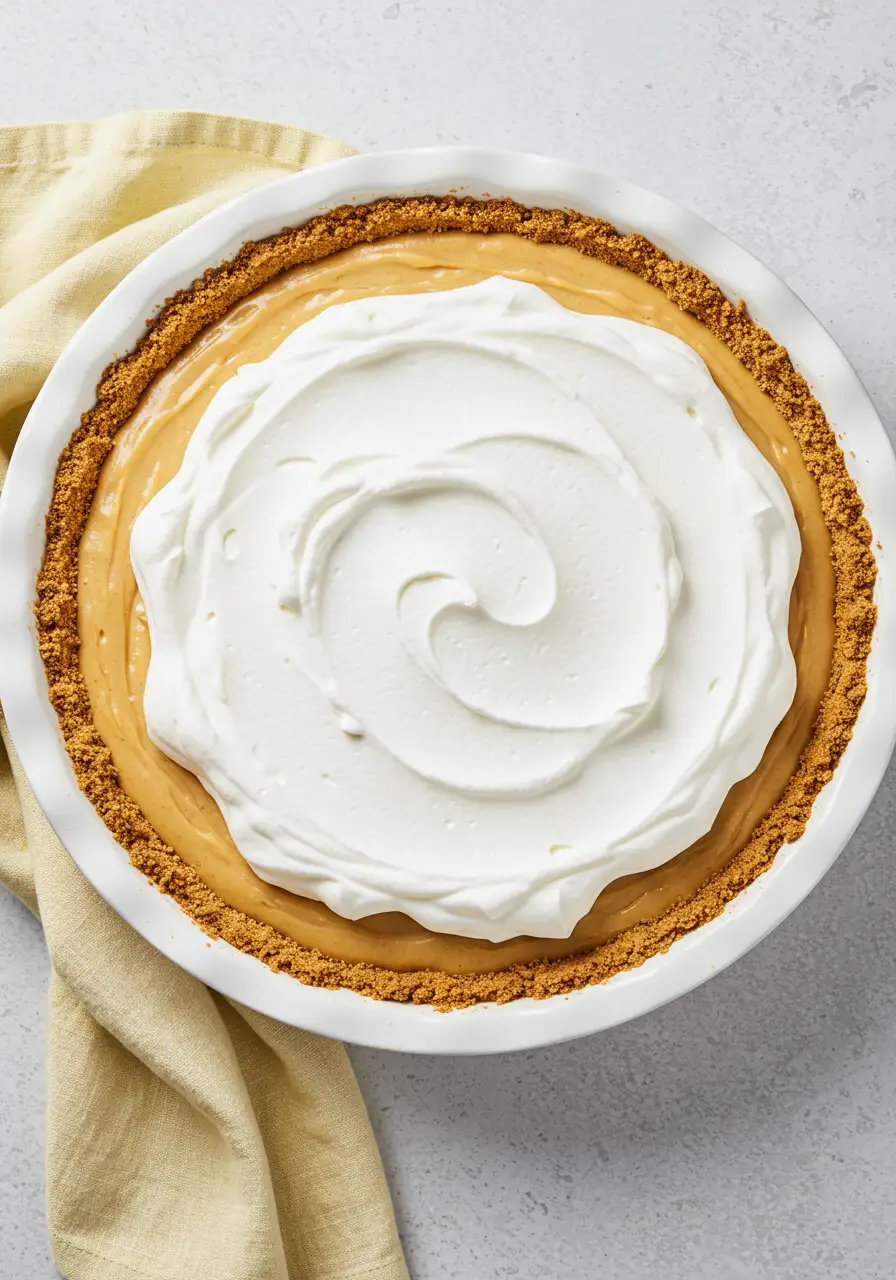
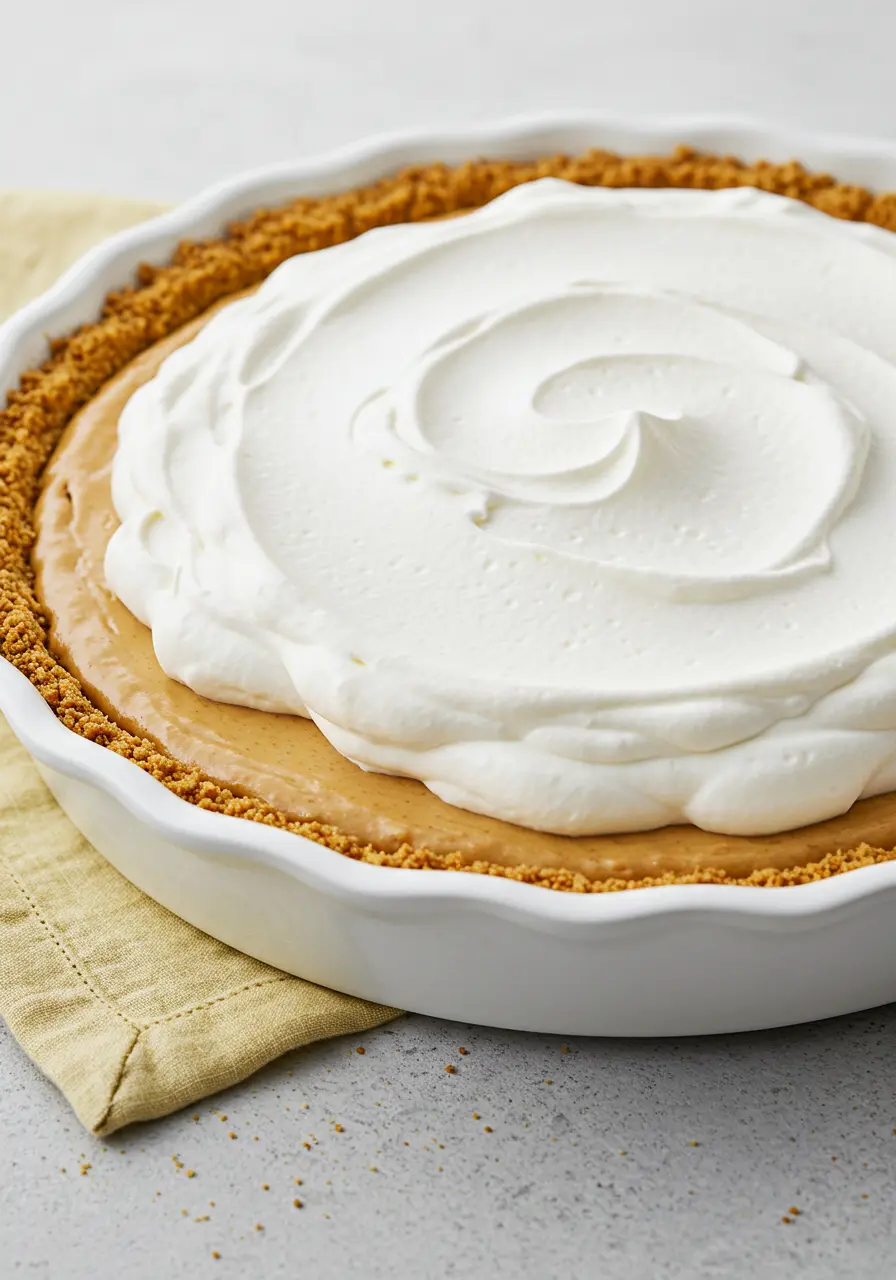
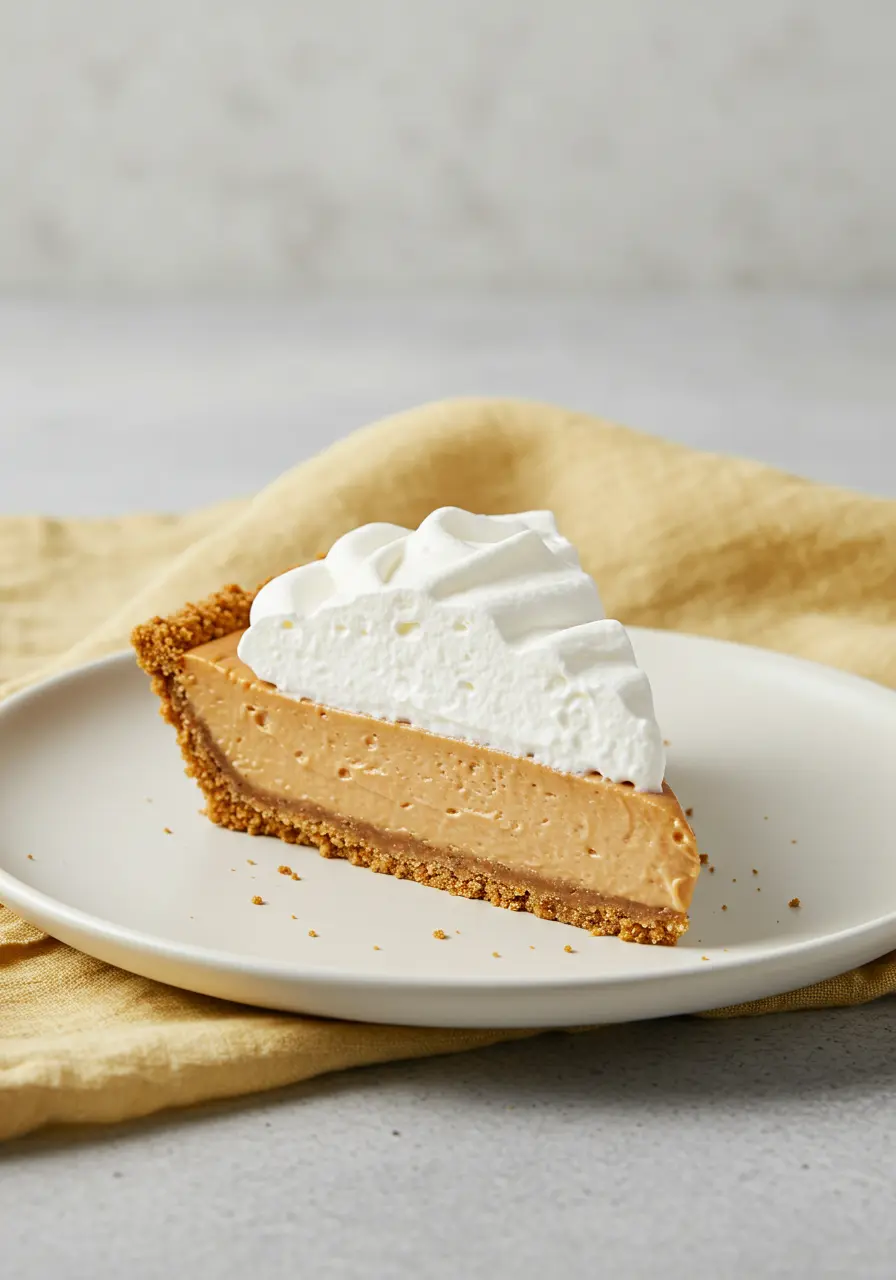
Step 4: Assemble the Pie Like a Pro
Pour the pumpkin filling into your chilled crust and smooth the top with a spatula. Don’t stress about perfection, slight waves make it look homemade and inviting. Cover loosely and let it chill in the fridge for at least 5 hours.
Take the reserved whipped cream out of the fridge. Spread it generously over the filling and enjoy.
Mistakes to Avoid
Skipping the chill time: Your filling needs to set properly, so don’t rush it. Patience here means clean slices and a creamy texture that holds beautifully.
Not packing the crust firmly: A loosely pressed crust can crumble when slicing. Take your time to press it evenly, it makes all the difference.
Using warm cream: Always start with cold heavy cream. Warm cream won’t whip properly, and you’ll end up with a sad, runny topping instead of fluffy clouds.
Not measuring ingredients properly: Even small differences in sugar, butter, or pumpkin puree can change texture and taste.
What to Serve With Your No Bake Pumpkin Pie
- Warm spiced coffee or latte – Cinnamon, nutmeg, or pumpkin spice in your cup echoes the flavors in the pie.
- Caramel drizzle or sauce – A little pour over each slice takes it to the next level of indulgence.
- Toasted pecans or walnuts – Adds crunch and a nutty contrast to the creamy filling.
- Vanilla ice cream – A scoop on the side makes every bite feel extra cozy and decadent.
- Apple or pear slices – Light, fresh fruit cuts through richness and complements the fall spices.
How to Store Your No Bake Pumpkin Pie
Refrigerate, always – This pie is creamy and delicate. Keep it covered in the fridge for up to 4–5 days to maintain perfect texture.
Use a pie dome or plastic wrap – Prevents fridge odors from sneaking in and keeps the whipped cream fluffy.
Freeze for longer storage – Secure firmly with a layer of plastic wrap followed by aluminum foil. Freeze for up to 2 months. Thaw in the fridge overnight before serving.
I’d love for you to try this recipe, it’s cozy, creamy, and perfect for sharing with someone special. Whip it up, savor every bite, and leave a comment to tell me how it turned out.
More Pie Recipes to Treat Yourself
No Bake Pumpkin Pie Everyone Can Make
Ingredients
For the crust
- ⅓ cup salted butter melted
- 1 ½ cups graham cracker crumbs
- ¼ cup brown sugar
For the filling
- 1 cup pumpkin puree
- 12 oz cream cheese softened
- ¾ cup powdered sugar sifted
- 1½ teaspoon vanilla extract
- 1 teaspoon cinnamon
- ½ teaspoon nutmeg
- ½ teaspoon ginger
For the Fluffy Finish
- ¾ cup cold heavy whipping cream
- ¼ cup powdered sugar sifted
Instructions
- Start by mixing the graham cracker crumbs, brown sugar, and melted butter in a bowl until every crumb is coated and smells like pure cozy goodness. Press this mixture evenly into a 9-inch pie dish, making sure the bottom and sides are packed nicely. A flat-bottomed glass works perfectly for this.
- Bake for about 8 minutes until the crust turns golden and fragrant, then let it cool completely.
- Meanwhile, grab your cold heavy cream and powdered sugar and whip them until soft, fluffy peaks form. Set half aside in the fridge for the topping later, so your pie has that extra “wow” factor.
- In another bowl, combine the pumpkin puree, cream cheese, powdered sugar, vanilla, and spices. Beat until silky smooth and completely lump-free.
- Then gently fold in half of the whipped cream, taking your time so the filling stays light and airy. This little step keeps the pie creamy without deflating all that fluff.
- Pour the filling into your cooled crust and smooth the top with a spatula. Don’t sweat a few gentle waves, they make it look homemade and inviting. Cover loosely and chill in the fridge for at least 5 hours, letting the flavors meld and the filling firm up nicely.
- When it’s time to serve, spread the reserved whipped cream over the top and go ahead, dig in! Every bite is creamy, spiced, and utterly comforting.
Notes
- A gentle shake of the pie dish after pouring the filling helps it settle evenly.
- Pie can absorb fridge odors or dry out. Cover loosely with plastic wrap or a pie dome to keep it fresh.
- For extra flavor, a tiny pinch of salt in the filling enhances the sweetness.