So… you’re here for Molasses Cookies? Good. Let’s talk.
Not the store-bought kind. These aren’t those crumbly, boring cookies you instantly regret.
I’m talking about the real deal, soft, chewy Molasses Cookies. The kind that melts in your mouth, wrap you up in warm spices, and makes your entire kitchen smell like pure holiday magic.
If you’ve never made them from scratch before, or if you have, but want that recipe you’ll keep coming back to, you’re in the right place. Simple to make, but loaded with comforting flavor in every bite.
We’re keeping it real here. Simple steps. Big flavor.
Why are molasses cookies so good?
Made for fall and Christmas
They’ll fit in at a Halloween gathering, a Thanksgiving dessert table, or tucked into a Christmas cookie tin with a bow. One recipe, infinite holiday magic.
No weird ingredients. No fancy steps. Just real baking.
Simple ingredients, and a super satisfying process from start to finish.
One batch, and suddenly you’re everyone’s favorite person
Bring them to a party, share them with neighbors, or keep them all to yourself. Either way, prepare for compliments.
Kids love them. Adults ask for seconds.
Rare cookie that pleases both picky eaters and spice-loving grown-ups. (Bonus: they travel really well in lunchboxes.)
The Ingredients You’ll Need
- Unsalted Butter: I like using butter for that rich, classic flavor, it makes the cookies soft and gives them a little melt-in-your-mouth magic.
- Granulated Sugar: You’ll want this for sweetness and that signature crackly top. It helps make the edges just a bit crisp and golden.
- Brown Sugar: I recommend this for extra depth and chewiness.
- Egg: Maybe it’s not the flashiest ingredient, but it brings everything together and gives the cookies just the right texture.
- Vanilla Extract: It’s best if you use pure vanilla, it makes the spices feel warmer and rounder. Just a little really elevates the flavor.
- Molasses: This is where the magic happens.
- All-Purpose Flour: Nothing fancy here, just the classic base that keeps your cookies soft and structured.
- Baking Soda: Helps the cookies spread just enough and keeps them tender. You might not notice it, but it’s doing important behind-the-scenes work.
- Salt: I always add a pinch, it makes everything else taste better and balances the sweetness perfectly.
- Cinnamon: You can’t skip this one. It brings that cozy warmth that makes molasses cookies feel like fall and winter in one bite.
- Ginger: I like a bit of boldness, and this adds just the right kick to keep the flavor lively.
- Nutmeg: Just a little goes a long way. It adds that nostalgic, slightly sweet spice that rounds everything out.
What is the purpose of molasses in cookies?
Molasses isn’t just there for color, it totally transforms the cookie. It adds a deep, rich flavor that’s a little smoky, a little sweet, and super cozy. I like to think of it as the ingredient that makes these cookies feel like fall and winter.
It also keeps the cookies soft and chewy, which is kind of the whole point, right?
If you skip it, you’ll lose that signature texture and that nostalgic flavor that makes molasses cookies so special.
So yep, molasses is the soul of this cookie.
How to Make Molasses Cookies
Step 1: Spice prep, your flavor game plan
Start by grabbing a medium bowl and whisking together your flour, baking soda, salt, and those cozy spices, cinnamon, ginger, and nutmeg. This little blend is like your flavor playlist, setting the mood for every bite. Set it aside for now.
Step 2: The butter and sugar stage
Add the softened butter, white sugar, and brown sugar to a large bowl, or a mixer if you’re going all in. I like to beat this combo on medium speed until it’s light and fluffy, usually 2-3 minutes. This is where you build the cookie’s soul, so don’t just rush through it. Imagine you’re making frosting but for cookies.
Step 3: The magic trio, egg, molasses & vanilla
Add the egg, mix in the molasses, and round it out with a hint of vanilla. Beat everything on medium-high until it’s smooth and smelling like heaven.
Step 4: Bring it all together, slowly
Add your dry flour and spice mix in little by little, mixing gently on low speed. You want everything just combined, no overworking here. The dough should feel soft and a little sticky.
Step 5: Sugar bath and chill time
Pour some extra granulated sugar on a plate. Scoop dough balls about the size of a walnut (or your favorite cookie scoop), then roll them in sugar. Place these shiny balls on your lined baking sheet, making sure they have some breathing room (at least 2 inches apart).
Now here’s the pro tip: pop them in the fridge for at least 40 minutes, this chills the dough and locks in flavor, plus keeps your cookies from turning into flat discs. Patience here pays off big time.
Step 6: Oven magic
Heat your oven to 350°F (175°C). When your dough balls are chilled and ready, slide the tray in and bake for 10 minutes. Look for cookies with slightly crispy edges but centers that still look soft.
Step 7: Cooling and celebration
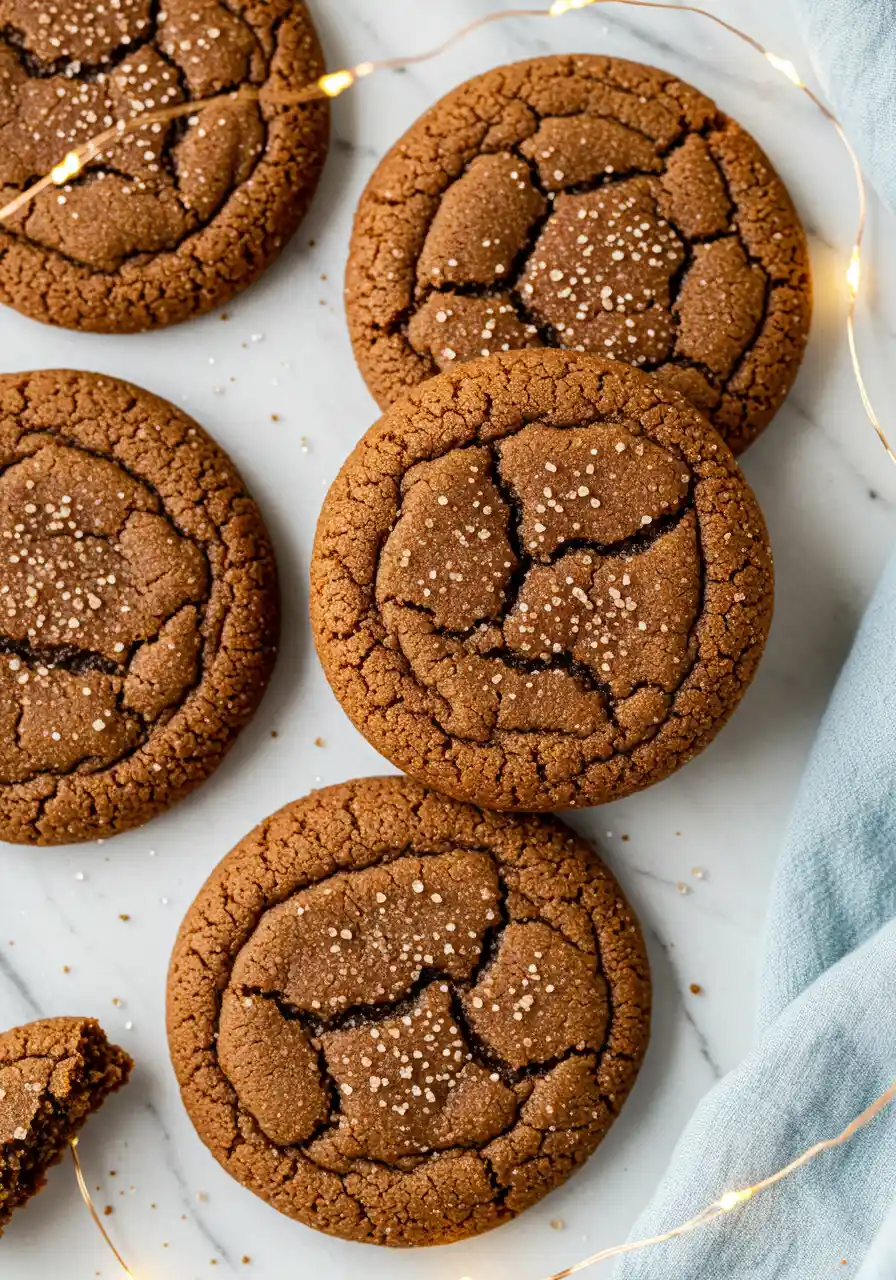
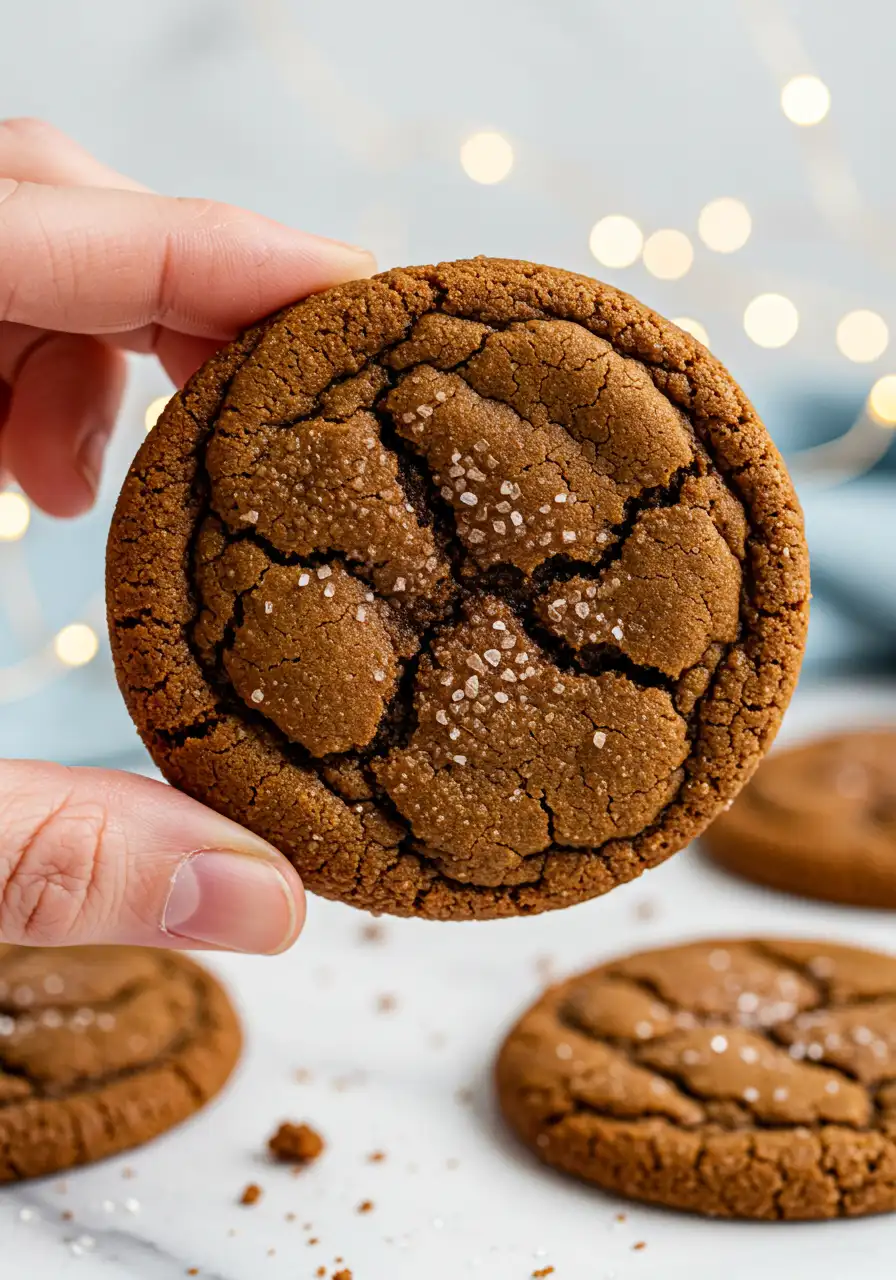
Let your cookies hang out on the baking sheet for a few minutes after baking. This helps them set without breaking when you move them. Let them finish up on a cooling rack so they set just right. Watch how those crackled tops and chewy centers come to life as they cool, it’s the best part.
Mistakes to Avoid When Baking Molasses Cookies
Skipping the chill time
I get it, waiting is hard. Trust me, chilling the dough isn’t optional. It helps the cookies keep their shape and develop deeper flavor. If you skip this, you might end up with pancakes instead of cookies!
Using room-temp butter that’s too soft or melted
Butter should be soft enough to press but not greasy or melted. Too soft, and your dough gets too loose, making your cookies spread too much. If your butter feels oily or looks shiny, pop it in the fridge for a bit before mixing.
Not measuring flour properly
I can’t stress this enough, too much flour and your cookies turn into little rocks. I recommend spooning your flour into the measuring cup and leveling it off, rather than scooping straight from the bag. Precision here makes a world of difference.
Opening the oven door too often
I get it, the smell is irresistible. But every peek cools the oven and can cause cookies to bake unevenly or flatten out too soon. Try to resist until the 8 minutes mark.

What to Serve With Molasses Cookies
- A warm mug of chai or spiced tea: The cinnamon and ginger in the tea echo the cookie spices, creating a flavor hug in a cup.
- Creamy vanilla bean ice cream: Cold and smooth contrasts perfectly with warm, chewy cookies, a total crowd-pleaser.
- Hot apple cider: Tart, sweet, and cozy, it’s like fall and winter wrapped up in a glass, best enjoyed with a cookie on the side.
- A dollop of whipped honey butter: Sweet, creamy, and just a little fancy, perfect if you want to take your cookie snack up a notch.
- Coffee with a dash of cinnamon or nutmeg: Kick your regular cup up a notch by sprinkling in warm spices that match the cookie’s vibe.
How to Store Molasses Cookies
Keep them airtight at room temperature: Store in a container with a tight seal to keep cookies soft and chewy for up to 5 days. Tip: Adding a slice of bread helps maintain moisture, it’s like a secret baking hack!
Freeze for longer freshness: Freeze baked cookies in a single layer on a tray, then transfer to a freezer bag. Thaw at room temp, they’ll taste freshly baked even weeks later.
Chill the dough for future baking: Roll your dough into balls, freeze them flat, and store in a zip-top bag once solid. Bake straight from frozen, adding a minute or two to baking time.
Avoid the fridge trap: Refrigerating baked cookies can dry them out fast, best to keep them cozy at room temp or frozen instead.
FAQs
Why did my molasses cookies turn out flat?
If your molasses cookies turned out flat, it’s usually because the dough was too warm or the butter too soft, making them spread too much. Chilling the dough before baking helps keep their shape, so don’t skip that step! Also, be sure to measure your flour properly, too little flour can make cookies spread more than you want.
Why are my molasses cookies bitter?
If your molasses cookies taste bitter, it might be the type of molasses you’re using, some brands are stronger or more bitter than others. I recommend tasting your molasses before adding it to the dough so you can adjust if needed. Also, too much baking soda can create a bitter aftertaste, so stick to the recipe amounts.
Why is my molasses cookie dough so sticky?
Molasses cookie dough tends to be sticky because of the molasses and butter, which keep the cookies soft and chewy. Lightly flour your hands or scoop to keep things from sticking. Sticky dough means you’re on track for deliciously tender cookies!
If you’re into cozy cookies like this, you’ve got to check out my pumpkin snickerdoodle cookies next, soft, spiced, and so perfect for fall vibes!
The Best Molasses Cookies You Can Bake This Fall
Ingredients
- 1 cup unsalted butter softened
- ¾ cup granulated sugar
- ¼ cup light brown sugar packed
- 1 large egg at room temperature
- 1 teaspoon pure vanilla extract
- ¼ cup molasses
- 1 ¾ cups all-purpose flour
- 1 ½ teaspoons baking soda
- Pinch of salt
- 1 teaspoon ground cinnamon
- 1 teaspoon ground ginger
- ¼ teaspoon ground nutmeg
Instructions
- Combine the flour, salt, baking soda, and a blend of cinnamon, ginger, and nutmeg in a bowl. Give it a good whisk, then leave it for later.
- In a separate large bowl or mixer, beat the softened butter with both the granulated and brown sugars until the mixture becomes light and fluffy. This usually takes a couple of minutes and is the base for that tender cookie texture.
- Next, add the egg, molasses, and vanilla extract to the bowl. Mix on medium-high speed until the batter is smooth and fills your kitchen with that warm, inviting scent.
- Add the dry mix a bit at a time, blending in slowly on low speed. Mix just until combined, you want a soft, slightly sticky dough, so be careful not to overdo it.
- Now, pour some extra granulated sugar onto a plate. Scoop walnut-sized portions of dough, roll them into balls, then coat each one in the sugar.
- Arrange the dough balls on a lined baking sheet, making sure there’s about two inches of space between them. Chill the tray in the fridge for at least 40 minutes to firm up the dough and keep the cookies from spreading too much.
- Once the dough has chilled, preheat the oven to 350°F (175°C). Bake the cookies for about 10 minutes, keeping an eye out for edges that are set and slightly crisp, while the centers remain soft.
- Once baked, allow the cookies to cool on the baking sheet for a few minutes before transferring them to a wire rack. As they cool, you’ll see those lovely crackled tops form and enjoy that perfect chewy texture. The wait is totally worth it!
Notes
- If you want a chewy center, take the cookies out right before they look fully baked, they’ll keep cooking as they cool.
- Use parchment paper instead of silicone mats for a crispier bottom on your cookies.