

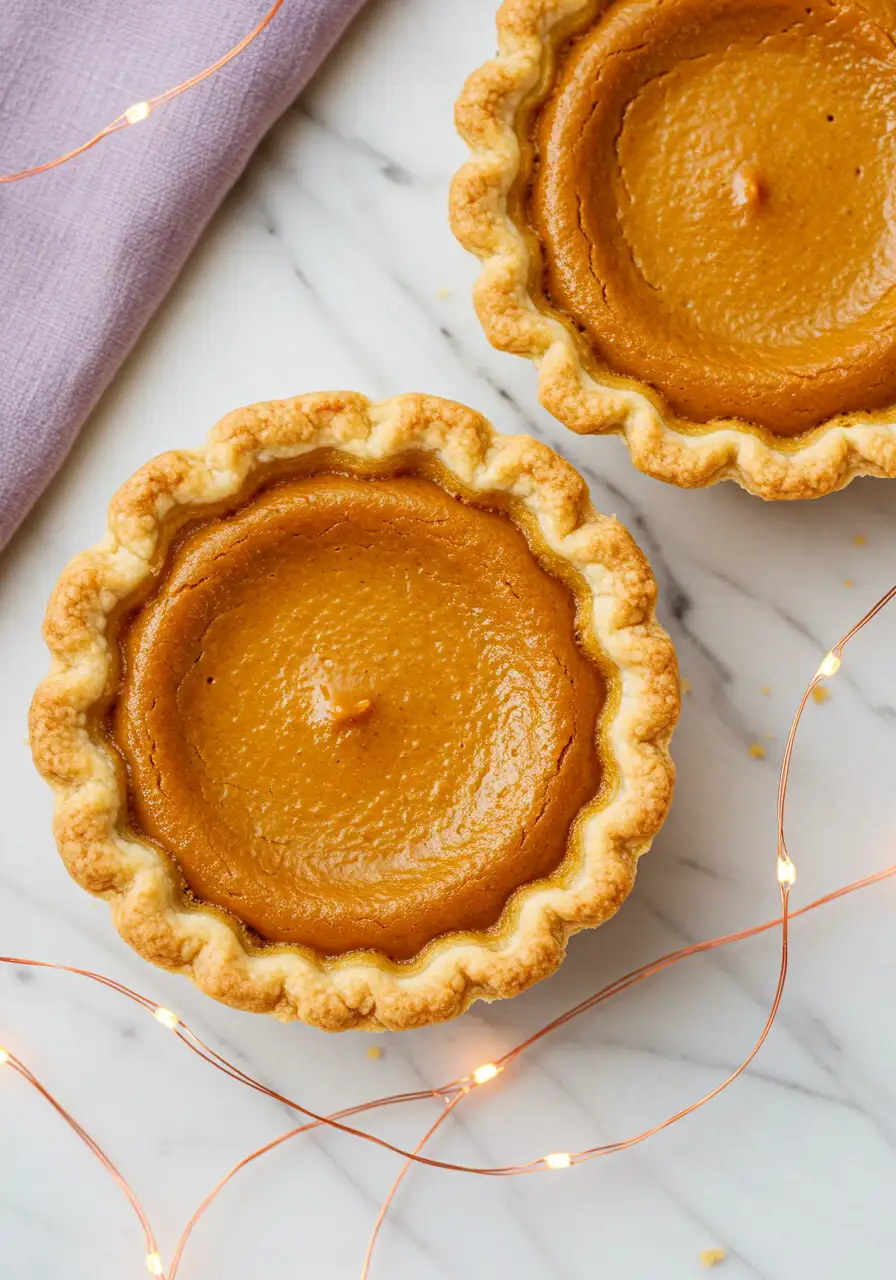
You know how sometimes a full slice of pie feels like too much… but skipping dessert feels impossible? That’s exactly why I love these Mini Pumpkin Pies. They’ve got all the creamy, spiced goodness of my classic pumpkin pie recipe, but in the cutest, most snackable form. Honestly, they feel like the dessert version of cozy fall sweaters, comforting, familiar, and just the right size to make you happy.
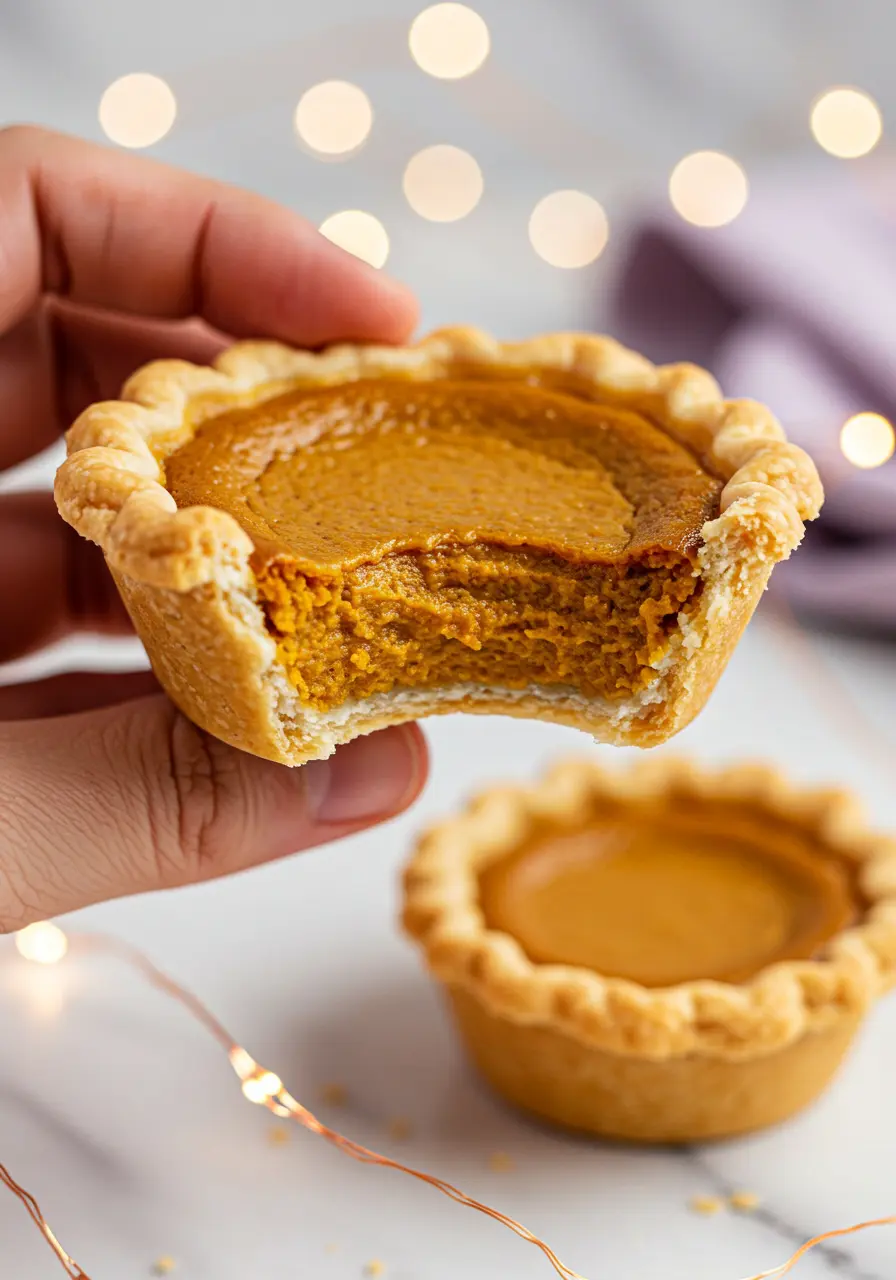
What makes these little guys so special is that you still get everything you love about pumpkin pie: that golden, flaky crust, the smooth pumpkin filling, and the warm spices that taste like autumn in every bite.
The only difference? No sharing required. Everyone gets their own personal pie, and trust me, it’s a game-changer at parties. These mini pies don’t just make serving easier, they turn dessert into a moment. And when it comes to fall treats, I promise these will be the ones everyone remembers.
Why Mini Pumpkin Pies Are a Must-Bake
Effortless hosting win: No messy slicing, no uneven portions. Put a tray of these on the table and suddenly you look like the friend who “totally has it all together.”
Portable fall treats: Perfect for bake sales, potlucks, or just sneaking one while watching your favorite cozy show. They go where you go.
Impress without trying too hard: Your friends will think you spent all day baking, but it’s actually super quick.
Flexible for toppings: Sprinkle a little cinnamon, a dash of powdered sugar, or even a drizzle of chocolate, make them your own little masterpiece.
The Ingredients You’ll Need
- Pumpkin puree: I recommend using smooth pumpkin puree, it’s the heart of the pie and gives that cozy, comforting flavor you can’t resist.
- Sweetened condensed milk: Always use this for creamy sweetness that makes the filling luxuriously smooth without extra fuss.
- Eggs + extra yolk: I recommend room-temperature eggs, they hold the filling together and give it that silky, just-set texture you can’t get any other way.
- Store-bought pie crust (chilled): Always keep it cold, the buttery, flaky base makes every bite a mini indulgence.
- Ground cinnamon: I recommend adding this for that classic warming spice that instantly feels like autumn.
- Ground ginger: You can’t skip this little kick, it makes the flavors pop without being overpowering.
- Ground nutmeg: I always add just a pinch, it’s a tiny sprinkle of magic that deepens the flavor beautifully.
- Pinch of salt: To balance the sweetness and spices, so every bite tastes perfectly harmonious.
For another cozy pumpkin treat, you might want to sneak a peek at my pumpkin whoopie pies, they’re fun, fluffy, and perfect for sharing.
How to Make Mini Pumpkin Pies
Step 1: Warm up the oven and prep your tin
Start by preheating your oven to 400°F (200°C). While that’s happening, grab your muffin tin and give each cup a light spray of non-stick cooking spray, or a tiny dab of butter if you want a richer flavor.
Step 2: Shape your crust
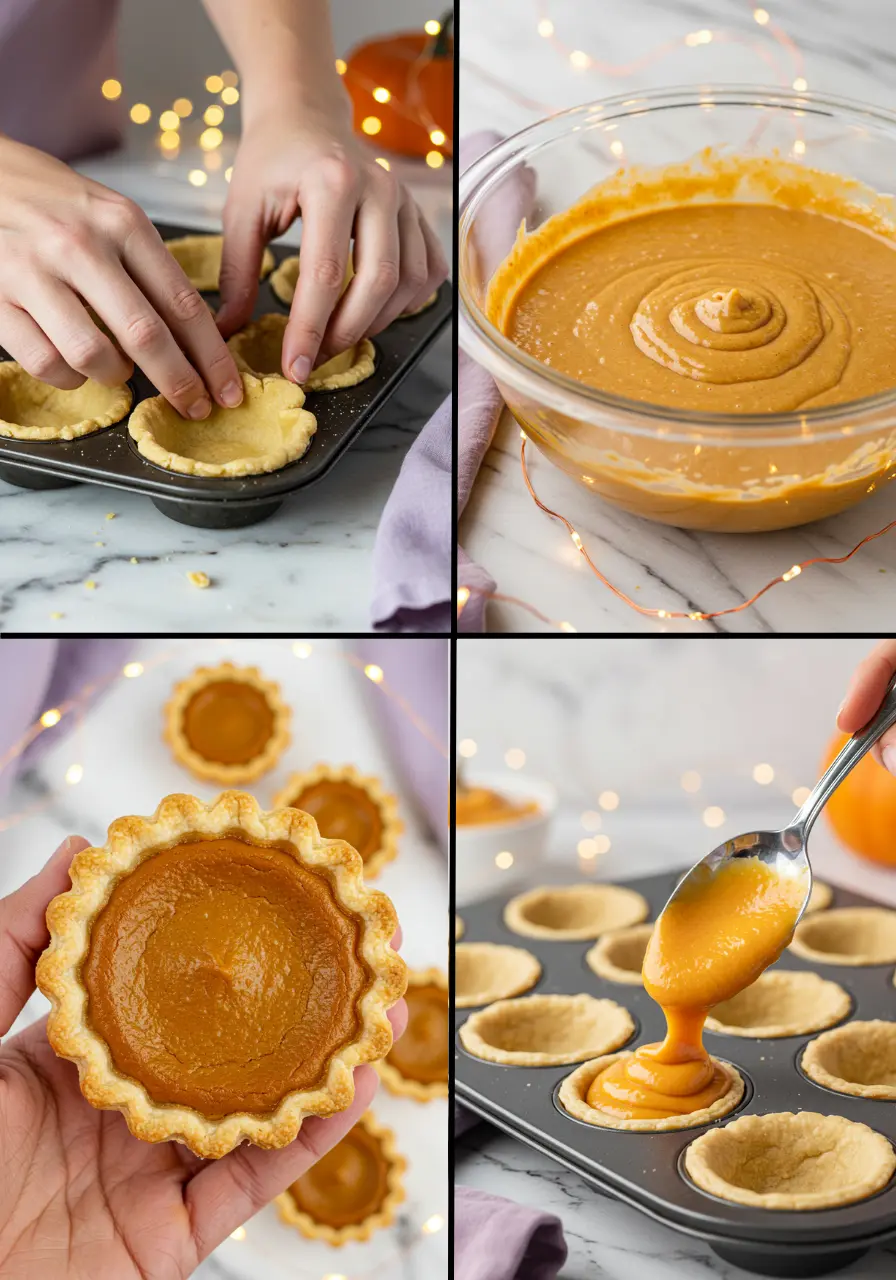
Take your chilled pie crust and unroll it gently. I like to use a cookie cutter, or even the rim of a drinking glass, to cut out circles slightly bigger than your muffin cups. Press each circle in lightly, letting the edges fold naturally, it doesn’t have to be perfect; those little rustic folds are part of the charm.
In a medium bowl, mix together the pumpkin puree, sweetened condensed milk, eggs + yolk, cinnamon, ginger, nutmeg, and a pinch of salt. Pro tip: beat gently, you want it smooth, not frothy.
Step 4: Fill like a pro
Spoon the filling into each crust. I usually fill just below the top so it has room to rise slightly without spilling. Tip: a small offset spatula or the back of a spoon works wonders for leveling each mini pie.
Step 5: Bake in two stages
Pop the tin in the oven at 400°F for 10 minutes, this jumpstart gives the crust a head start and sets the filling lightly. Then reduce the heat to 325°F (160°C) and bake for another 10 minutes.
Step 6: Cool and admire
Allow the mini pies to settle on a cooling rack for no less than 10 minutes. This helps the filling firm up perfectly, and it’s also the perfect time to sneak a taste of the edges (don’t worry, I won’t tell).
These mini pumpkin pies are ready for the spotlight!
Common Issues and How to Fix Them
Crust shrinks or puffs up too much → I always recommend chilling your pie crust well before pressing it into the muffin tin. If it still shrinks, gently press it back into place right before filling. You can also prick the bottom with a fork to keep it from puffing.
Filling is too runny → You can’t skip this one: make sure your eggs are at room temperature. They help the filling set perfectly. If it’s still loose, let the pies bake a couple extra minutes at the lower temperature, patience is your friend here.
Crust edges brown too fast → Always keep an eye on the edges. If they start turning too dark, a small strip of foil or a pie shield works wonders without affecting the filling.
Filling cracks on top → This usually happens if the oven is too hot or baking too long. I recommend following the two-stage bake (high, then lower) and letting the pies cool slowly, it helps them set gently and keeps the top smooth.
What to Serve with Mini Pumpkin Pies
- Soft, cinnamon-spiced whipped cream : Light and fluffy, it melts easily over the warm filling.
- Warm maple latte or chai tea: Cozy drinks that echo the spices in the pies and add that autumn hug-in-a-cup feeling.
- Candied pecans or toasted walnuts: Crunchy, nutty, and slightly sweet, a perfect contrast to the creamy filling.
- Apple slices lightly sautéed in butter & cinnamon: Caramelized apple slices bring a sweet, spiced layer that makes the pumpkin flavor even cozier.
How to Store Mini Pumpkin Pies
Room temperature (short term): Keep them in an airtight container for up to 2 days. A speedy delight to enjoy yourself or share generously next door.
Refrigerator (best for freshness): Store in an airtight container for up to 5 days. Tip: let them come to room temp or pop in the microwave for a few seconds before serving to restore that cozy, freshly-baked feel.
Freezer (for later indulgence): Wrap each pie individually in plastic wrap and place in a freezer bag. Freeze for up to 2 months. Pro tip: thaw overnight in the fridge, then warm for a minute for that “just baked” vibe.
More Mini Treats You’ll Love
Mini Pumpkin Pies
Ingredients
- 1 can pumpkin puree 15 oz, unsweetened
- 1 can sweetened condensed milk 14 oz
- 2 medium eggs plus 1 extra yolk (room temperature)
- 1 box store-bought pie crust kept chilled
- A small pinch of salt
- 1 teaspoon ground cinnamon
- ½ teaspoon ground ginger
- ½ teaspoon ground nutmeg
Instructions
- Set the oven to 400°F (200°C) and lightly butter or spray a muffin tin. Roll the chilled pie dough flat and cut circles a bit larger than the muffin wells, using whatever round cutter you have on hand. Press the crust into the cups and let the edges fold naturally; those little rustic folds give each mini pie a homemade charm.
- Place the pumpkin puree in a medium bowl, then pour in the condensed milk. Add the eggs along with the extra yolk, followed by the cinnamon, ginger, nutmeg, and a light touch of salt. Whisk everything together until the batter turns silky and evenly mixed. Be gentle, you want a silky filling, not a frothy one.
- Spoon the filling into each prepared crust, filling just below the top to leave room for a gentle rise.
- Bake at 400°F for 10 minutes to set the crust and start cooking the filling, then reduce the oven to 325°F (160°C) and bake for another 10 minutes. Keep an eye on the crust edges, if they start browning too fast, cover them loosely with foil.
- Once baked, transfer the mini pies to a cooling rack for at least 10 minutes to allow the filling to firm up. Admire the warm, golden edges for a moment, then treat yourself.
Notes
- Wrap several in parchment paper, finish with a twine bow, and you’ve got an instant autumn treat to give.
- You can add a pinch of ground cloves or allspice to the filling for a subtle, warm depth of flavor.
- Also you can add a drop of vanilla or maple extract to the filling for a warm, inviting smell.


yum!!!!!!!!!I love it it tasted like heaven but pie!!!!!!!!!10 out
of 10!
Belle, you’re the sweetest! Thank you so much for trying my recipe!