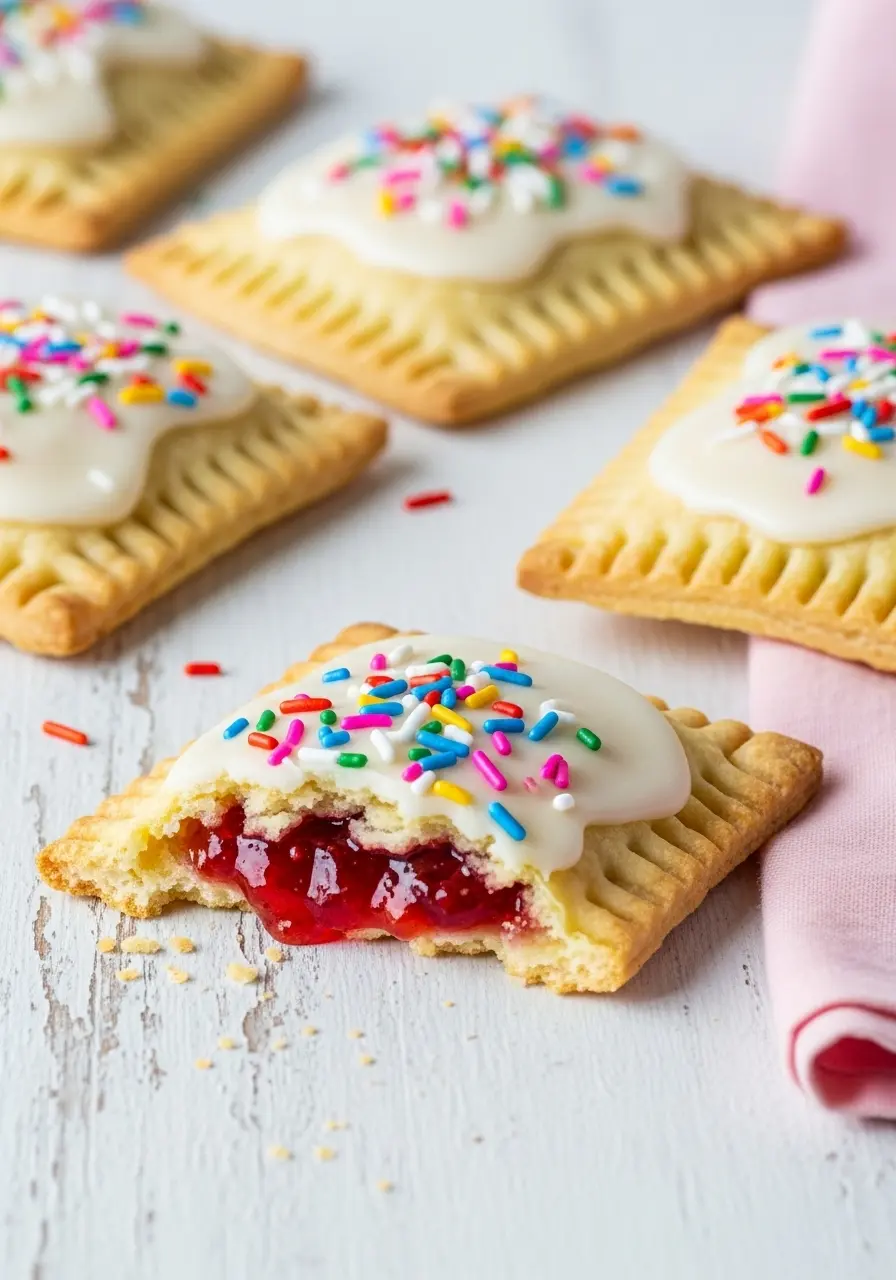
Remember those shiny foil-wrapped pastries you used to beg for as a kid? Well, this time, we’re skipping the toaster aisle and making the magic happen right in your kitchen. These Homemade Pop Tarts are what childhood dreams look like, but with grown-up flavor and flaky, buttery pastry that melts in your mouth.
They’re the kind of breakfast pastries that make you want to slow down, pour a cup of coffee, and actually enjoy your morning. And the best part? This poptart recipe isn’t complicated, it’s comfort food dressed in nostalgia, baked with love, and finished with colorful sprinkles that just make you smile.
Why You Need to Try Homemade Pop Tarts
Fun to make, rolling, cutting, and decorating these is strangely satisfying.
Perfect morning pick-me-up, because mornings should start with something that makes you smile.
Because homemade always wins, no foil wrappers, no mystery ingredients, just pure deliciousness.
Impress without stress, tastes fancy, but the steps are simple enough for a beginner baker.
Breakfast that feels like dessert, why choose between the two?
All the Good Stuff
- All-purpose flour: This is your go-to for a tender, flaky crust. Think of it as the backbone that holds everything together.
- Unsalted butter: Cold, cubed, and buttery, this is what gives your Pop-Tarts those dreamy, layered bites. Don’t rush it; keep it chilled!
- Salt: Just a tiny pinch brings out all the flavors and balances the sweetness. It’s the secret little flavor booster.
- Granulated sugar: Adds a gentle sweetness and helps your pastry get that beautiful golden glow.
- Ice water: Keep your dough together without melting the butter. Using ice-cold water is the trick for a perfectly flaky crust.
- Strawberry preserves: The star of the show! Sweet, fruity, and nostalgic, it’s what makes each bite pure happiness.
- Powdered sugar: For a smooth, dreamy glaze that’s easy to spread and just melts in your mouth.
- Milk: Just a splash to thin the icing so it spreads like a dream without being runny.
- Vanilla extract: A little bit goes a long way, it gives your glaze a cozy, homemade flavor.
- Colorful sprinkles: Fun, cheerful, and totally optional, but come on, who can resist a little sparkle on breakfast?
How to Make Homemade Pop Tarts
Step 1: Get Your Dough Ready
Toss your flour, sugar, and salt into a food processor and pulse a few times to combine. Add the cold, cubed butter and pulse again until the mixture looks like coarse breadcrumbs. Don’t worry about little chunks of butter, those are your secret to flaky layers. Slowly pour in the ice water and add the vanilla, pulsing just until the dough comes together. Light hands are key here, overmixing is a no-go if you want tender, melt-in-your-mouth pop-tarts.
Step 2: Chill Like a Pro
Form your dough into a ball, wrap it in plastic, and let it chill for 30 minutes. This is the “secret trick” to get that buttery, flaky texture. It gives you a little break to grab a coffee or sneak a taste of the preserves.
Step 3: Roll It Out Your Way
Flour your surface lightly and roll your dough into a rectangle about ¼ inch thick. Don’t aim for perfection, a little rustic charm makes them feel homemade and inviting.
Step 4: Cut Your Pop-Tarts
Use a rectangle stencil if you have one, or eyeball it with a knife, no judgment here! Cut as many rectangles as you can, then roll out the leftover scraps for a second batch. Think of it as a little dough adventure, every leftover piece is another opportunity for a mini treat.
Step 5: Prep for the Filling
Line a baking sheet with parchment paper or lightly spray it with non-stick spray. Arrange half of your rectangles on the tray; these are your Pop-Tart bottoms.
Step 6: Add the Good Stuff
Spoon strawberry preserves into the center of each bottom rectangle. Keep it simple, just enough to get a deliciously fruity bite, but don’t overload, or it’ll sneak out in the oven. Pro tip: leaving a tiny border around the edges makes sealing easier.
Step 7: Seal and Vent
Place the remaining rectangles on top. Press the edges together gently with a fork to lock in that jam. Then poke a few small vent holes in the tops so your filling doesn’t escape.
Step 8: Bake to Golden Glory
Slide your tray into a preheated 400°F (200°C) oven. Bake for 13-15 minutes, or until golden brown and heavenly-smelling. Cool completely before moving on.
Step 9: Icing Magic
Mix your powdered sugar, milk, and vanilla extract into a smooth glaze. Add milk slowly to control consistency, you want it thick enough to stay put, but still drizzly.
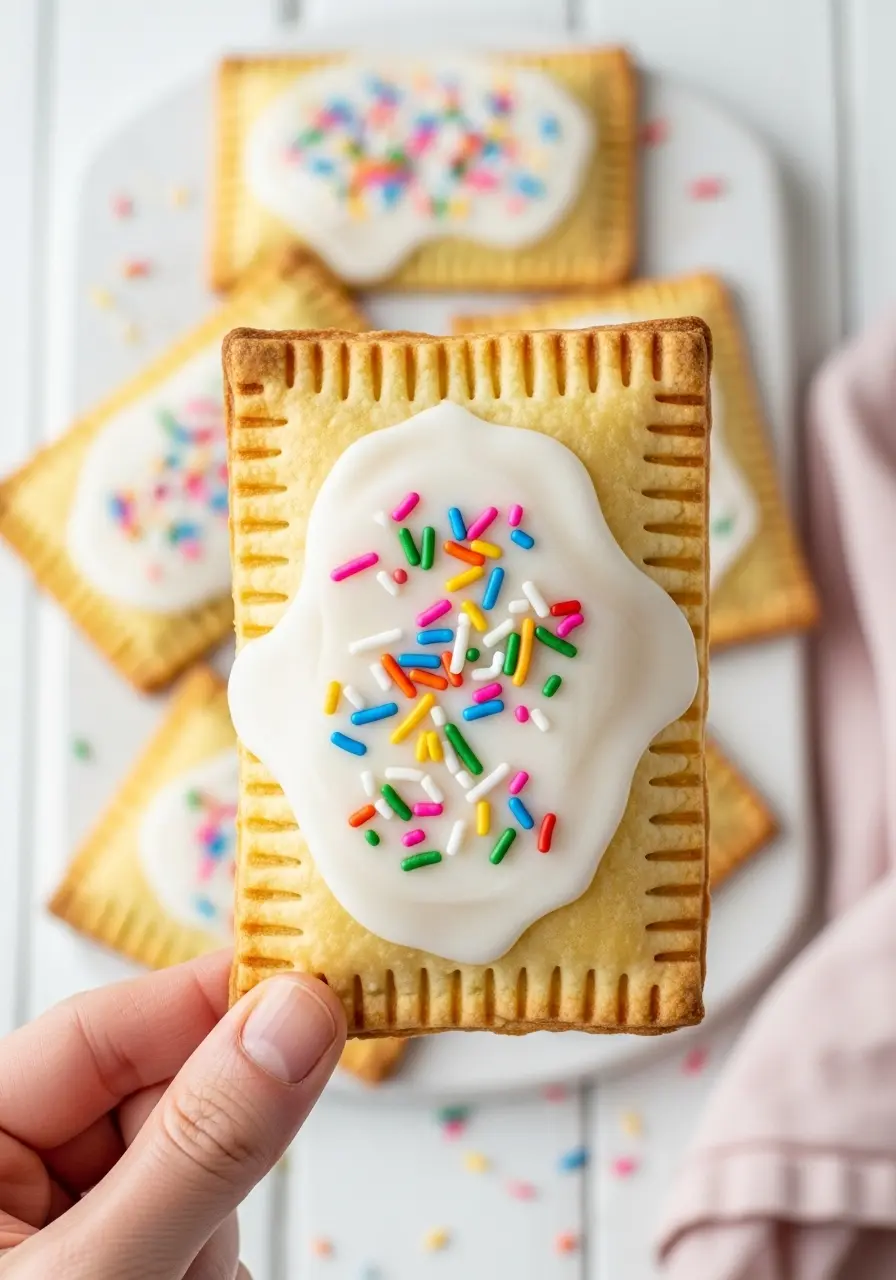
Step 10: Sprinkle & Smile
Add colorful sprinkles on top because breakfast should be fun, not boring. Take a moment to admire your work… and yes, tasting is mandatory. These pop-tarts are the kind of treat that makes mornings feel special.

Avoid These Common Mistakes
Skipping the chill: That 30 minute chill in the fridge is crucial. Dough that’s too warm = flat, greasy, and sad tarts. Think of it as giving your butter a nap so your pastry can shine.
Not sealing edges properly: Pressing the tops down with a fork is non-negotiable. Miss this, and you’ll have jam escaping in the oven. Extra tip: a tiny water brush along the edge before sealing can help them stick better.
Icing too soon or too runny: Don’t glaze hot Pop-Tarts; the icing will melt off. Let them cool completely. Also, add milk slowly to control the consistency, thick but spreadable works best.
Rushing the bake: Peek too often and you risk uneven browning. Let the oven do its magic and only check near the end for that gorgeous golden color.
Creative Homemade Pop Tarts Ideas
Peanut Butter & Jam: Classic combo! Peanut butter on the bottom, your favorite jam on top, and maybe a few chopped peanuts for crunch.
Apple Pie Pop-Tarts: Dice apples and toss them with cinnamon and a little brown sugar for a mini apple pie experience.
Lemon Cream Delight: Lemon curd inside with a light drizzle of vanilla glaze, tangy, fresh, and irresistible.
Cookie Dough Pop-Tarts: Edible cookie dough filling with a sprinkle of chocolate chips, yes, you can totally do it!
Can’t decide? Try them all, your mornings just got a whole lot happier!
Storing Your Homemade Pop Tarts
Room-Temperature Happiness: Keep cooled Pop-Tarts in an airtight container on the counter for 1–2 days. Perfect for mornings when you want breakfast in a flash without compromising that flaky texture.
Chill for Longevity: Pop them in the fridge for up to a week.
Keep Icing Perfect: Place a piece of parchment paper between layers if stacking to prevent sticking. Your colorful sprinkles will thank you.
Breakfast Treats You’ll Love
Irresistible Homemade Pop Tarts
Ingredients
For the Pastry
- 2 ½ cups all-purpose flour
- 1 cup unsalted butter cubed and cold
- 1 teaspoon salt
- 1 ½ tablespoons granulated sugar
- ½ cup ice water
For the Filling
- Strawberry preserves just enough to fill each tart
For the Icing
- 1 cup powdered sugar sifted
- 1 tablespoon milk
- ¾ teaspoon vanilla extract
- Colorful sprinkles for topping
Instructions
- Start by tossing your flour, sugar, and salt into a food processor and giving it a few quick pulses. Drop in the cold, cubed butter and pulse again until the mixture looks like tiny crumbs, those little butter bits are what make your Pop-Tarts perfectly flaky.
- Slowly pour in the ice water and add the vanilla, pulsing just until the dough comes together. Be gentle, we want tender, buttery layers, not a tough crust.
- Shape the dough into a ball, wrap it in plastic, and pop it in the fridge for about 30 minutes. Chilling is the secret to that flaky texture.
- Lightly flour your workspace and roll out the dough into a rectangle about ¼ inch thick.
- Cut your dough into rectangles. You can use a stencil, or just go freehand, it’s all good! Make as many as you can, then reroll the scraps for a second batch. Every leftover piece is another little treat waiting to happen.
- Line a baking sheet with parchment or lightly spray it, then lay out half of your rectangles. Spoon some strawberry preserves into the center of each piece. Keep a small border around the edges so the filling doesn’t sneak out, just enough to get that sweet, fruity bite in every Pop-Tart.
- Top each filled rectangle with another piece of dough and press the edges gently with a fork to seal in the jam. Don’t forget to poke a few small holes in the top so steam can escape while baking.
- Bake in a preheated oven at 400°F (200°C) for 13–15 minutes, until they’re golden and the kitchen smells amazing. Let them cool completely before adding icing, patience here really pays off.
- Mix powdered sugar, milk, and vanilla into a smooth glaze, adding milk slowly until it’s thick but drizzle-able. Spread or drizzle the icing over each cooled pop-tart, then sprinkle on the colorful toppings. These pop tarts are flaky, fruity, and perfect for making mornings feel extra special.
Notes
- A light dusting of flour on your rolling pin prevents sticking without drying the dough.
- You can add a tiny pinch of cinnamon or nutmeg to the dough for subtle warmth.