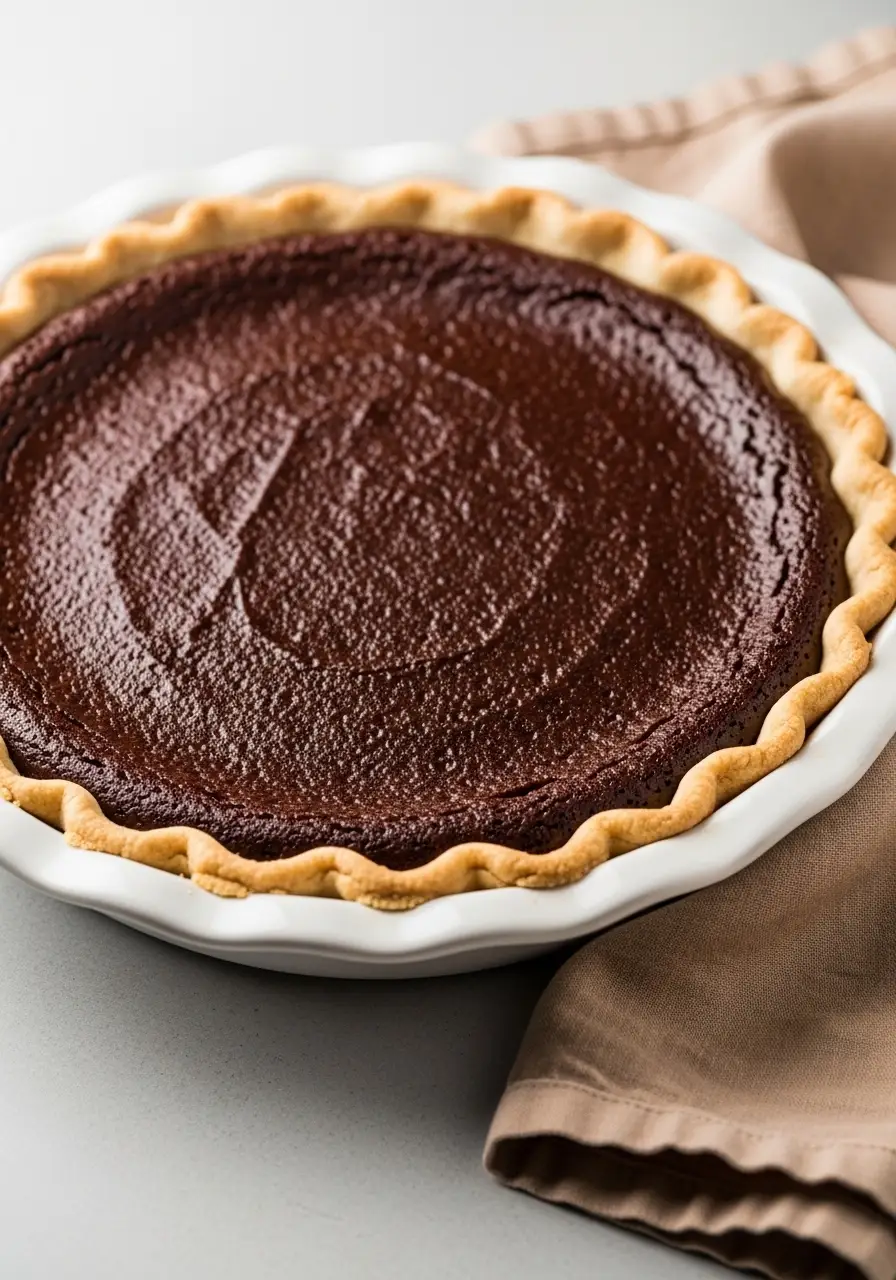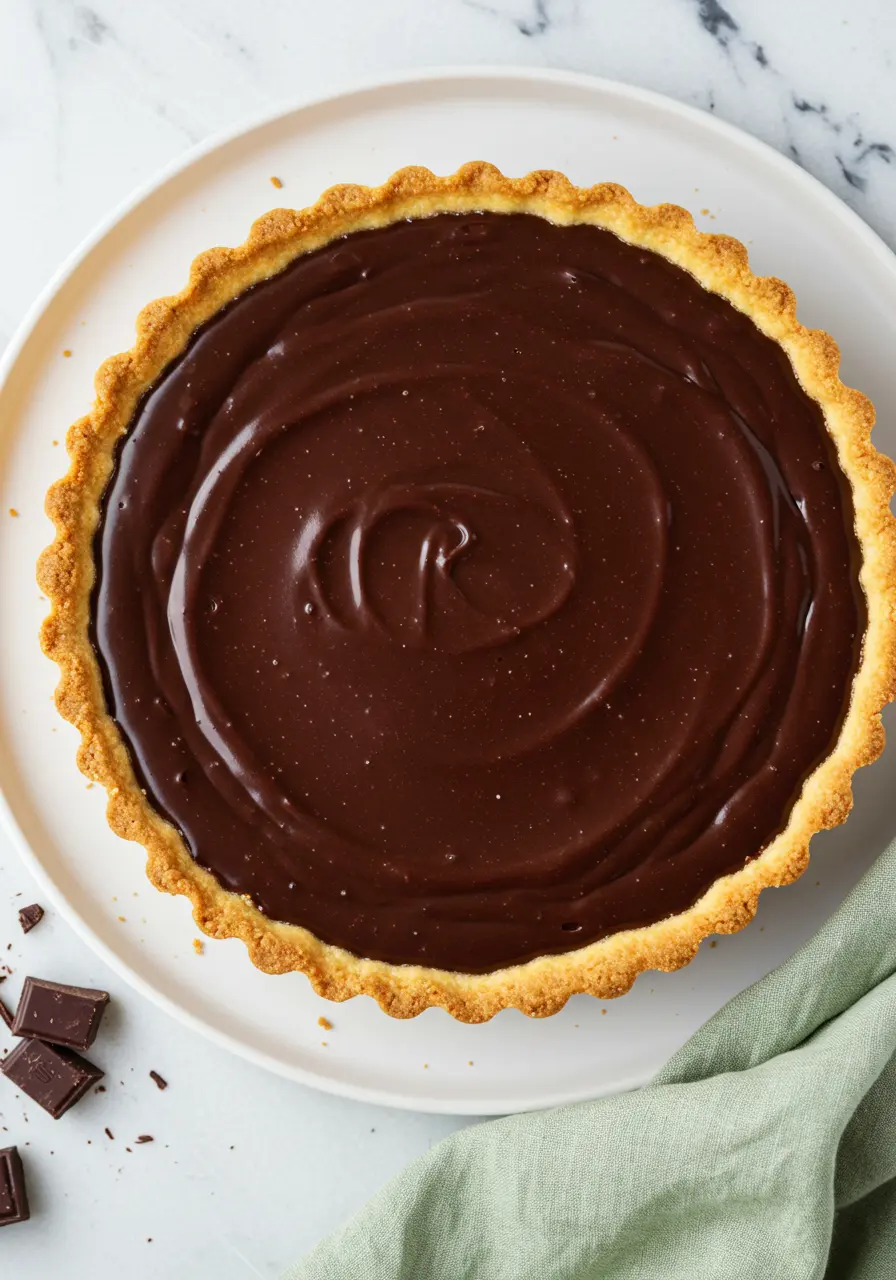
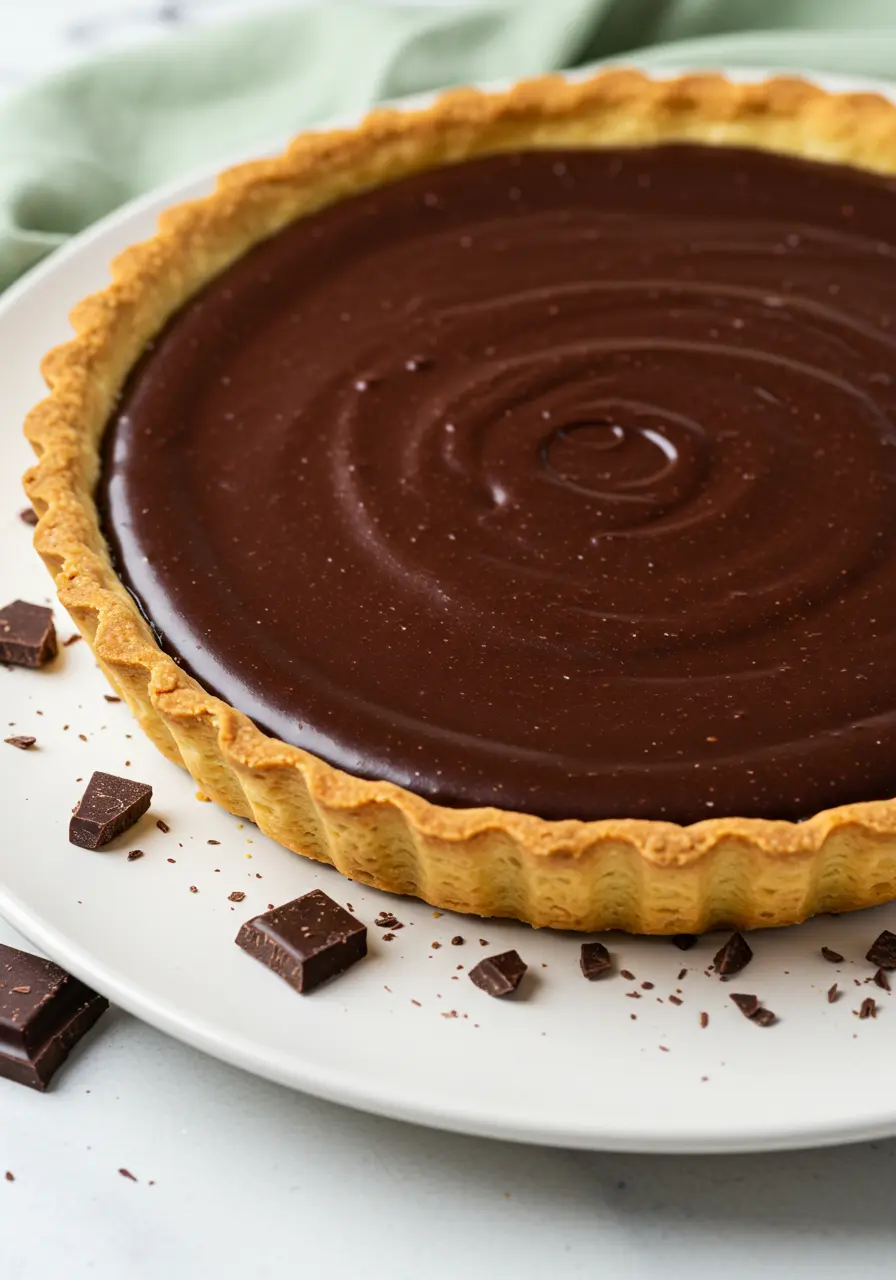
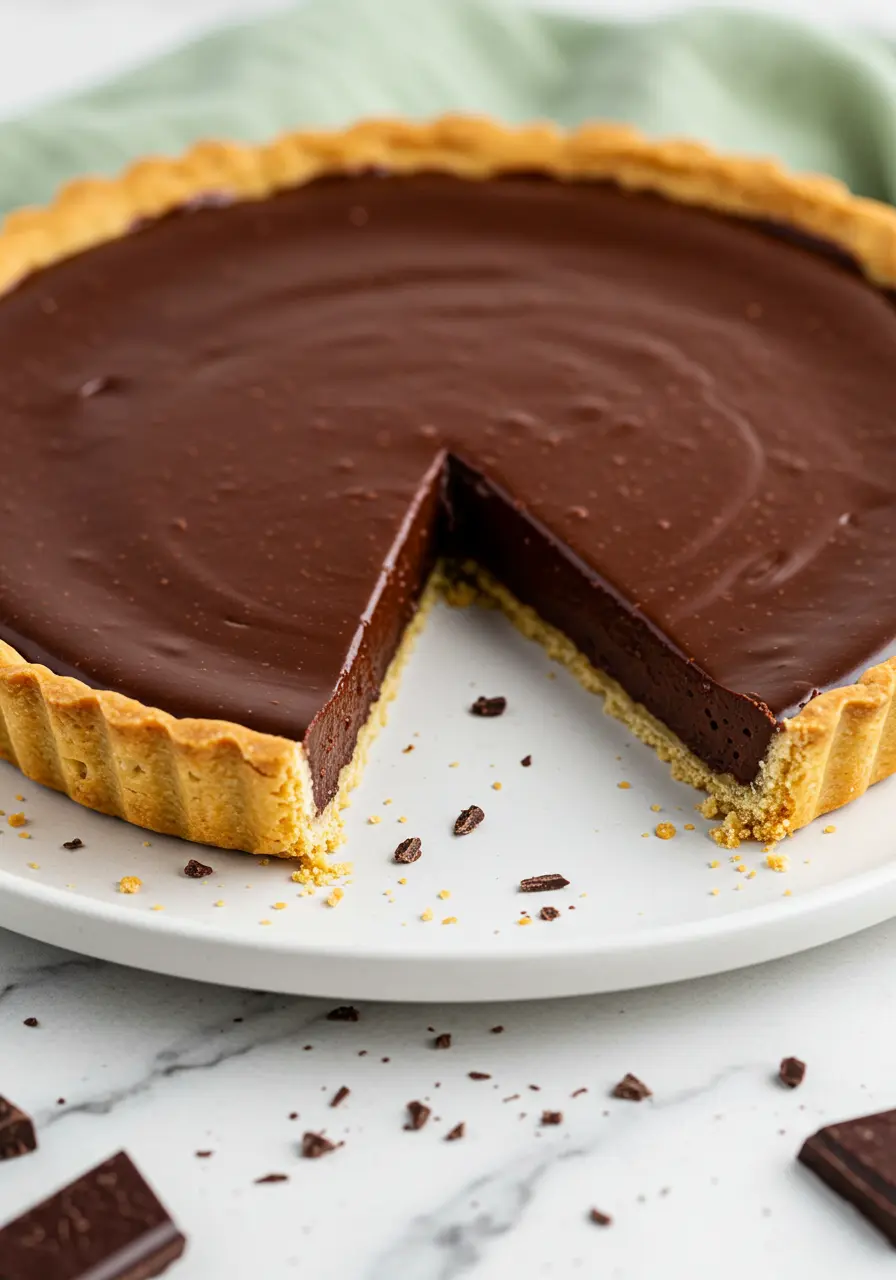
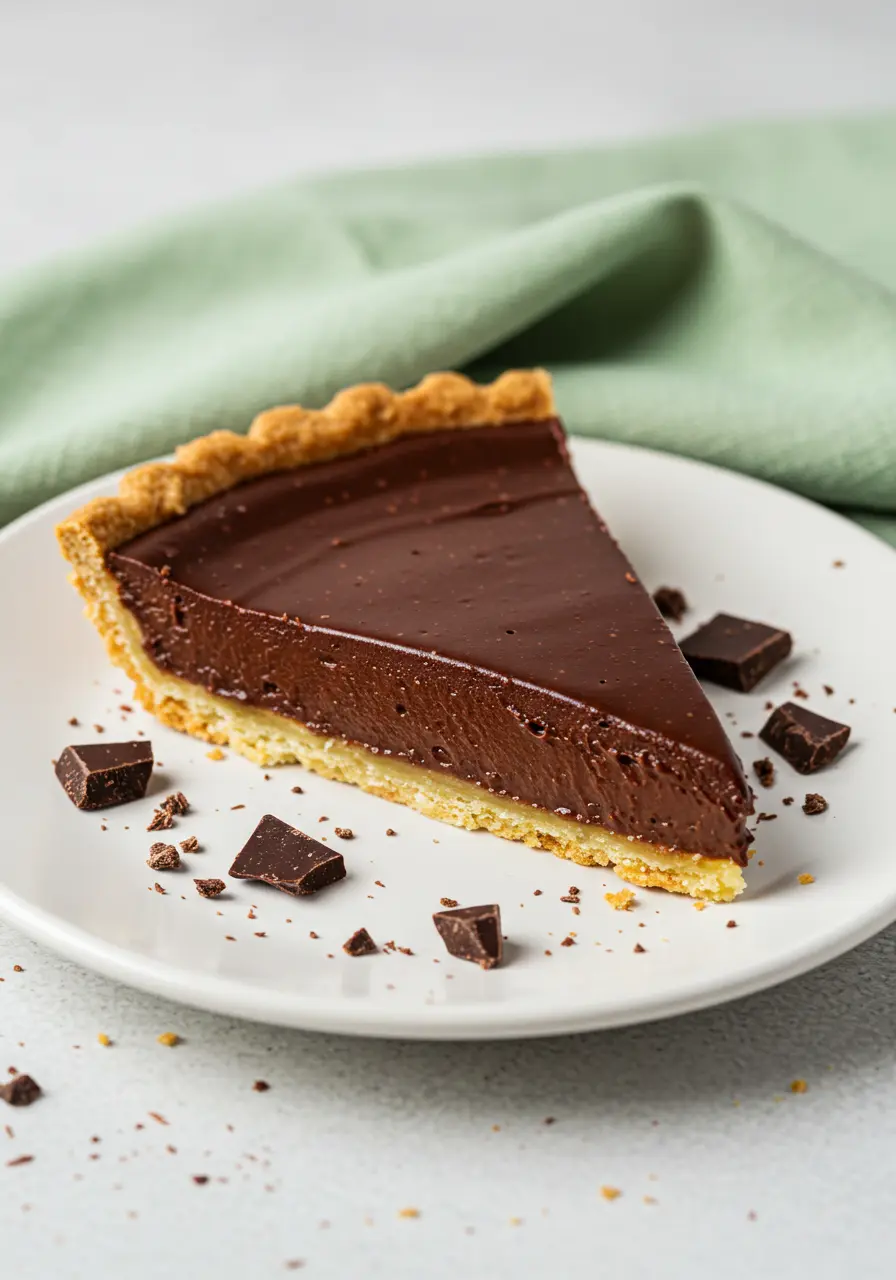
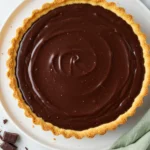
If there’s one dessert that feels both fancy and fuss-free, it has to be a Chocolate Tart. Imagine a crisp, buttery crust holding a silky, rich chocolate filling, finished with a glossy glaze that makes it look like it came straight out of a bakery window.
The best part? You don’t need to be a pastry chef to pull it off. With just a handful of simple ingredients and clear steps, you can create a show-stopping tart that’s perfect for dinner parties, celebrations, or even just a cozy weekend treat. Once you try it, this recipe might just become your go-to whenever a serious chocolate craving strikes.
After this tart, you might want to sneak a slice of my flourless chocolate cake, it’s ultra-rich, super fudgy, and totally irresistible!
Reasons to Bake This Chocolate Tart
Ridiculously easy, yet fancy-looking – Impress your friends or family without sweating over complicated steps.
Silky, dreamy chocolate filling – Smooth, rich, and so satisfying it melts in your mouth.
Buttery, crisp crust – The perfect contrast to that luscious chocolate center.
One tart, endless occasions – Perfect for birthdays, dinner parties, or a cozy chocolate treat just for you.
Double as a gift – Beautiful enough to wrap and give to a friend or neighbor.
Bake once, enjoy twice – Tastes even better the next day after the flavors meld.
What You Need for This Chocolate Tart
- All-purpose flour: I recommend using it as the base for the crust: it gives structure and holds all the buttery goodness together.
- Sugar (white and brown): For a tender, melt-in-your-mouth texture in the crust.
- Light brown sugar: Always adds a subtle caramel flavor: makes the crust cozy and flavorful.
- Salted butter: I recommend using cold, diced butter: it creates a flaky, rich crust that’s pure magic.
- Dark chocolate: Always choose good-quality chocolate: it’s the heart of your tart and gives thats deep, decadent flavor.
- Half & half cream: It’s best if you use this for a silky, smooth filling that isn’t too heavy.
- Egg: Always helps the filling set perfectly: keeps it creamy but sliceable.
- Vanilla extract: I recommend this small touch: it rounds out the chocolate and adds warmth.
- Espresso powder (optional): It’s best if you include a pinch: it subtly intensifies the chocolate flavor.
- Pinch of salt: Always enhances the overall flavors: makes the chocolate taste even richer.
- Semi-sweet chocolate: I recommend using this for the glaze: it melts beautifully and gives a shiny finish.
- Hot water: It’s best if you use warm water to melt the chocolate: ensures a glossy, pourable glaze.
Let’s get baking.
How to Make Chocolate Tart
Step 1: Get your oven and pan ready
Preheat your oven to 350°F (175°C). I always like to place an 8-inch tart pan on a baking sheet, it makes moving it in and out of the oven way easier and keeps any buttery crumbs from spilling in your oven.
Step 2: Build the crust
In a medium bowl, mix the flour, powdered sugar, and light brown sugar. I recommend rubbing them together with your fingertips, it’s oddly satisfying and helps avoid lumps. Add the cold, diced butter and gently work it in until the mixture looks like coarse breadcrumbs.
Step 3: Shape the crust
Pour the crumb mixture into your tart pan and press it evenly along the bottom and up the sides. Use the bottom of a measuring cup or glass to press it firmly without squishing it too hard. Prick the base a few times with a fork to avoid air bubbles.
Step 4: Bake the crust
Bake for 10–12 minutes, until the edges are lightly golden and you can already smell that cozy, buttery aroma. Transfer to a wire rack and let it cool completely.
Step 5: Prepare the filling
In a small saucepan, gently heat the half & half cream with the granulated sugar over medium-low heat until it just begins to simmer, don’t let it boil. Remove from heat and stir in the chopped dark chocolate. Let it sit for a minute, then whisk until smooth and glossy.
Step 6: Temper the egg
Beat the egg with a pinch of salt in a medium bowl. Slowly add the warm chocolate mixture, a little at a time, whisking constantly. This avoids scrambling and gives a perfectly silky custard. Add the vanilla extract and, if you like, a pinch of espresso powder, it’s subtle but makes the chocolate flavor pop like magic.
Step 7: Fill the crust
Pour the chocolate custard into the cooled crust. Smooth it gently with a spatula. Tiny tip: if your crust has uneven edges, you can lightly press the custard to level it, it makes for a prettier finish later.
Step 8: Bake gently for the perfect set
Bake the tart for about 12 minutes, then turn off the oven and leave it inside for another 6 minutes. This gentle finish helps the edges set while keeping the center slightly wobbly and custardy. Let it cool completely on a wire rack, then refrigerate for 3 hours.
Step 9: Make the glossy glaze
In a small saucepan, combine the semi-sweet chocolate and hot water over medium heat. Whisk until smooth, then stir in the butter until thick and shiny. Tip: if the glaze seems too thick, add a tiny splash of more hot water, just a few teaspoons, to make it pourable without losing its glossy look.
Step 10: Glaze like a pro
Pour the warm glaze over the chilled tart, tilting gently so it spreads to the edges. Let it set for about 50 minutes at room temperature. Slice carefully with a warm knife (dip it in hot water and wipe dry between cuts for clean edges).
Mistakes to Avoid When Making Chocolate Tart
Using warm butter for the crust: Always use cold, diced butter. Warm butter will make the crust greasy and dense instead of light and flaky.
Overworking the crust: It’s tempting to keep pressing and mixing, but stop when it just holds together. Overworking leads to a tough crust.
Boiling the cream: Keep an eye on it! Boiling cream can separate and affect the smoothness of your chocolate filling. Simmer gently instead.
Skipping the chilling time: Don’t rush the fridge step. The tart needs time to set properly; otherwise, the filling might be too soft to slice neatly.
Fun Toppings for Your Chocolate Tart
- Crushed roasted nuts – Almonds, hazelnuts, or pistachios add texture and a nutty flavor.
- Freeze-dried raspberries – Tart, vibrant, and perfect for a pop of color.
- White chocolate shavings – Adds a pretty contrast and extra chocolate layer.
- Caramel drizzle – Sweet, gooey, and irresistible.
- Edible gold leaf – For a fancy, “wow” factor that’s surprisingly easy.
- Mini chocolate chips – Extra chocolatey and fun for every bite.
- Whipped cream dollops – Light, airy, and perfect for serving alongside.
- Cocoa powder dusting – Simple, elegant, and rich in aroma.
- Candied orange peel – Adds a subtle citrus twist that pairs beautifully with dark chocolate.
I’ve got another recipe you might really enjoy! It’s similar in feel, but a bit richer and definitely more impressive, my chocolate mousse cake. I think you’ll absolutely love it!
Tips to Keep Your Chocolate Tart Perfect
Refrigerate it – Always keep your tart in the fridge; the filling stays silky and the crust stays crisp.
Cover it lightly – Use a loose tent of foil or a cake dome to prevent the glaze from absorbing fridge smells.
Slice when chilled – Cutting cold gives cleaner slices and prevents the filling from wobbling too much.
Bring to room temp before serving – Let each slice sit for 5–10 minutes to unlock the full flavor and creamy texture.
Freeze for longer storage – Wrap tightly in plastic wrap and foil; thaw overnight in the fridge for a ready-to-enjoy treat.
Avoid stacking – Keep tarts on a flat surface to protect the glaze from smudging; presentation matters!
I promise, once you try this chocolate tart, it might just become your new favorite dessert. Give it a go, enjoy every silky, chocolatey bite, and let me know how it turns out in the comments below. I love hearing your baking stories and little tweaks!
Perfect Dark Chocolate Tart With Simple Steps
Ingredients
- For the crust
- ¾ cup all-purpose flour spooned and leveled
- ¼ cup salted butter cold and cut into small cubes
- 2 tablespoons powdered sugar
- 2 tablespoons light brown sugar
For the filling
- 5 ounces dark chocolate finely chopped
- 1 ⅓ cups half & half cream 10% works best
- ⅓ cup granulated sugar
- 1 large egg
- ½ teaspoon vanilla extract
- A pinch of salt
- A pinch of espresso powder optional
For the glaze
- 2 oz semi sweet chocolate chopped
- 1 tablespoon salted butter
- 3 tbsp hot water
Instructions
- Preheat your oven to 350°F (175°C) and place an 8-inch tart pan on a baking sheet. This little trick makes it easier to move in and out of the oven and keeps any crumbs from spilling.
- In a medium bowl, mix together the flour, powdered sugar, and light brown sugar. Rub them gently with your fingers to break up lumps and blend everything evenly. Add the cold, diced butter and work it in lightly until the mixture looks like coarse breadcrumbs.
- Transfer the crumb mixture into your tart pan and press it evenly along the bottom and sides. You can use the bottom of a cup or glass to help press it down without squashing it too much. Prick the base a few times with a fork to prevent air pockets from forming while baking.
- Bake the crust for 10–12 minutes, or until the edges turn a light golden color and your kitchen fills with that warm, buttery aroma. Let the crust rest until completely cooled on a wire rack, then proceed with the filling.
- While the crust cools, gently heat the half & half cream and granulated sugar in a small saucepan over medium-low heat until it’s just starting to simmer, avoid boiling. Remove from heat, add the chopped dark chocolate, and let it sit for a minute. Then whisk until the mixture is silky smooth and glossy.
- In a separate bowl, beat the egg with a pinch of salt. Slowly pour the warm chocolate mixture into the egg, whisking constantly to prevent the egg from scrambling. Stir in the vanilla extract and, if you like, a tiny pinch of espresso powder.
- Pour the chocolate custard into the cooled crust and smooth the top gently with a spatula. If the edges of your crust are uneven, lightly press the custard to level it for a neat, professional-looking finish.
- Bake the tart for about 12 minutes, then turn off the oven and leave it inside for another 6 minutes. This gentle approach ensures the edges are set while the center remains soft and custardy. Once done, let the tart cool completely on a wire rack, then refrigerate for at least 3 hours so it firms up nicely.
- For the glaze, melt the semi-sweet chocolate with hot water in a small saucepan over medium heat, whisking until smooth. Add the butter and stir until the glaze becomes thick, shiny, and luxurious. If it seems too stiff, a few teaspoons of hot water will loosen it just enough to pour smoothly.
- Pour the warm glaze over the chilled tart, tilting the pan so it spreads evenly to the edges. Allow it to set at room temperature for about 50 minutes. When slicing, dip a knife in hot water and wipe it dry between cuts for perfectly clean, beautiful slices.
Notes
- Cooling the crust fully before adding the filling prevents a soggy bottom and keeps everything crisp.
- For extra shine on the glaze, a quick gentle brush with a little melted butter after it sets works wonders.
- The crust can be baked a day ahead, just cover and store it until ready to fill, which saves time on busy baking days.