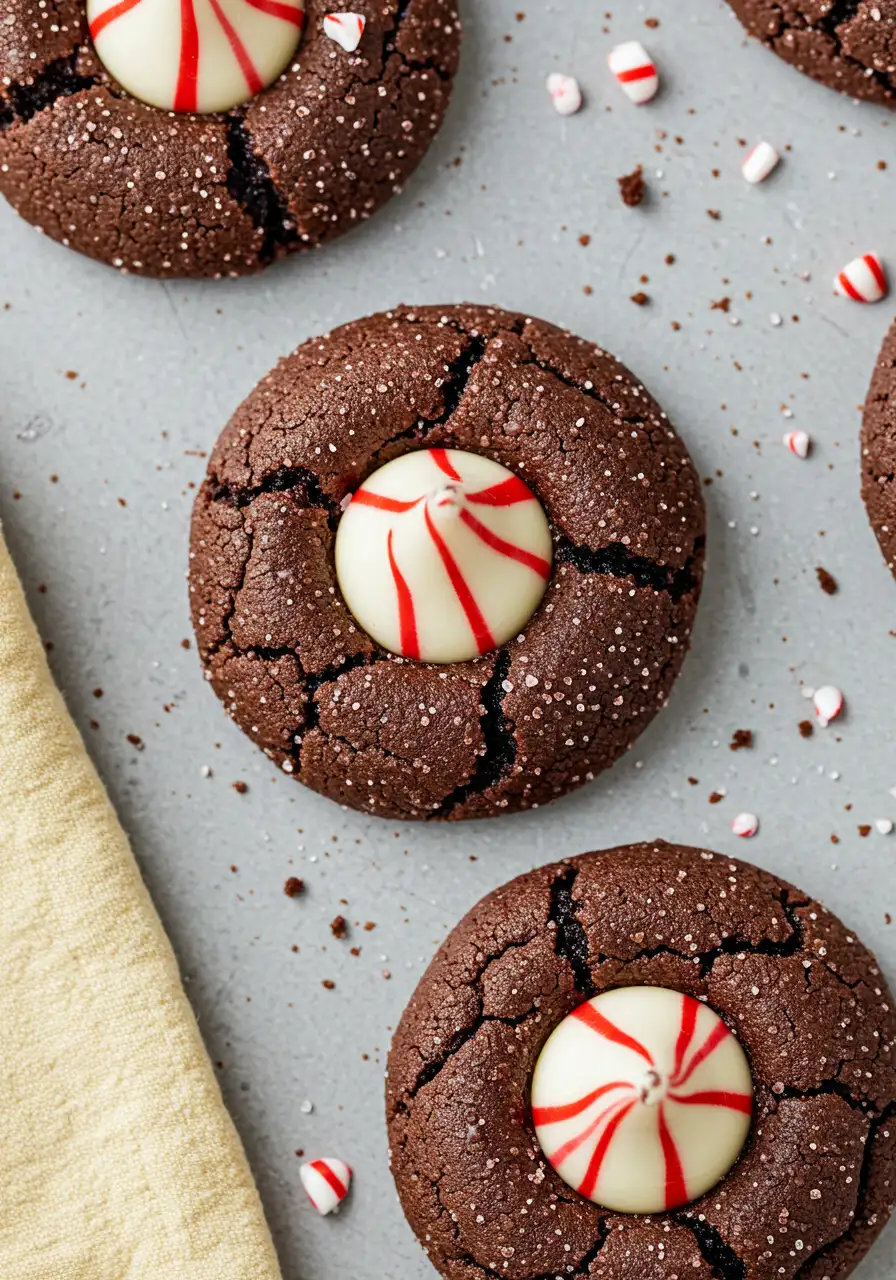
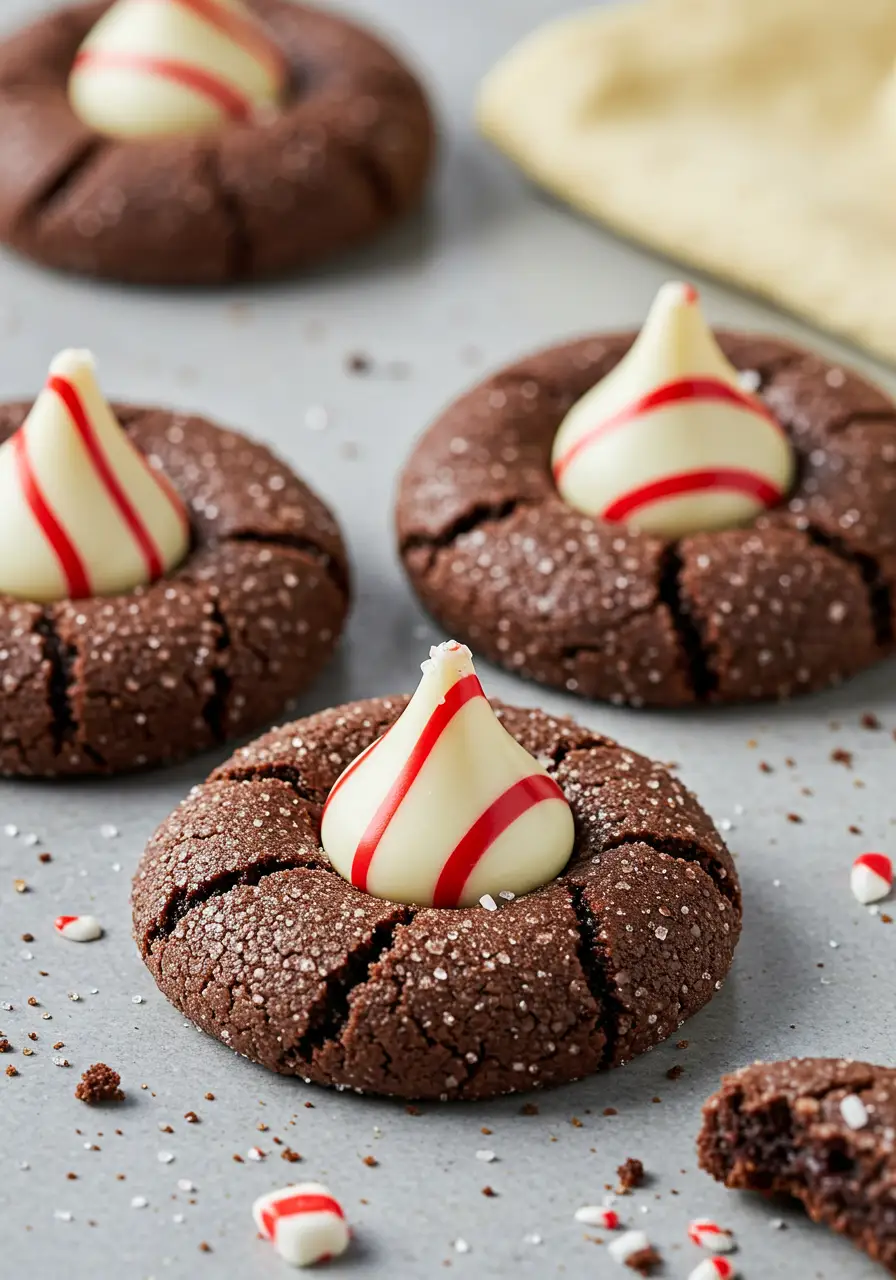
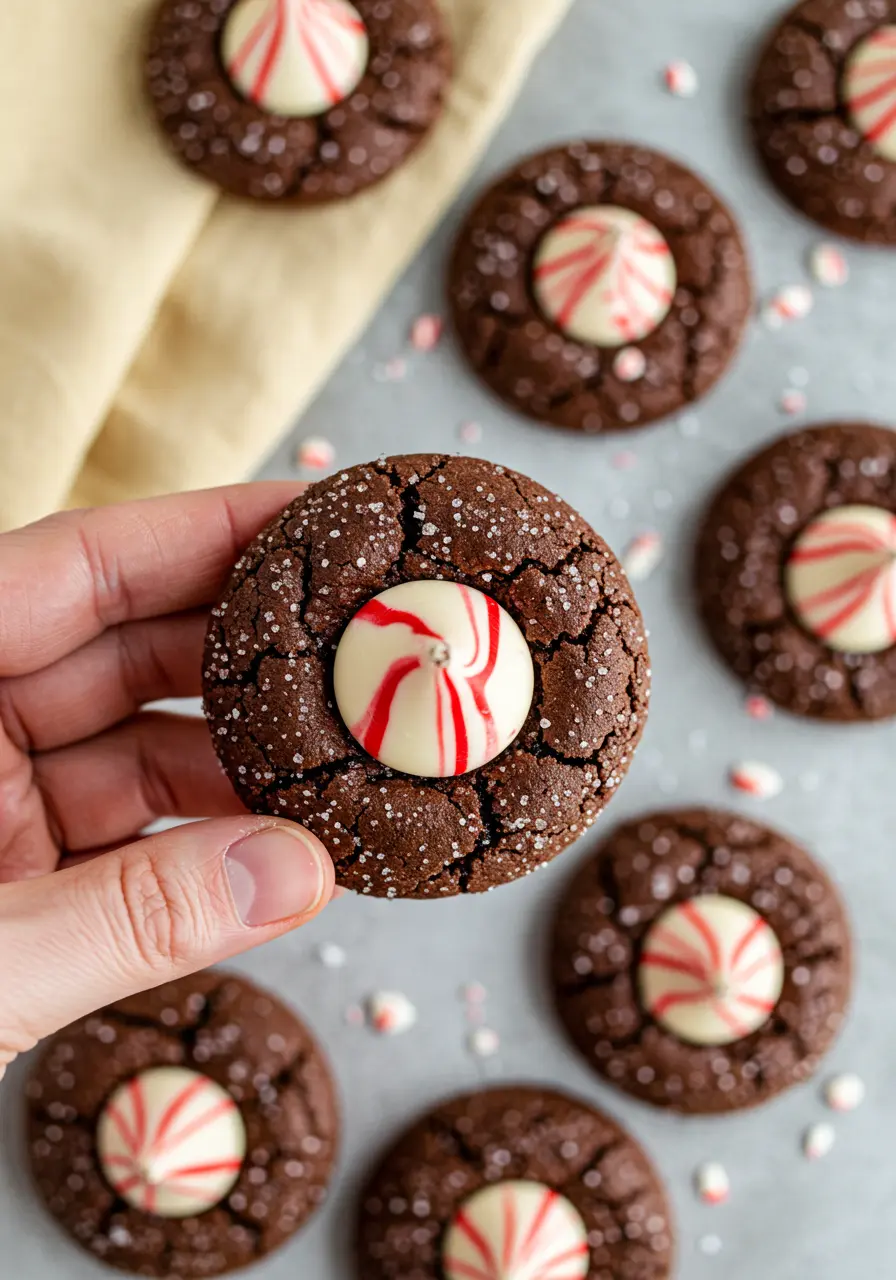
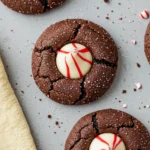
Here’s the truth: some cookies don’t just taste like dessert, they taste like Christmas itself. These chocolate peppermint blossoms are exactly that. The first bite hits with that deep cocoa flavor, then comes the cool, minty kiss on top, and suddenly, it’s officially holiday baking season in your kitchen.
You’ll make them every year when you want something festive but effortless, soft, sugar-rolled chocolate cookies that look fancy without trying. They’re the kind of kiss cookies that make people ask, “Wait, did you really bake these?” (And yes, you did.)
Whether you’re filling cookie boxes, planning Christmas treat ideas, or just need an excuse to bake something that tastes like joy, this recipe checks every box. Simple ingredients, classic flavors, and that nostalgic sparkle that only peppermint and chocolate together can bring.
Here’s Why These Chocolate Peppermint Blossoms Are a Must-Try
Zero holiday stress. You don’t need fancy tools or tricky steps, just two bowls, and a few minutes of mixing.
Soft and fudgy every time. The dough bakes into a perfectly tender, brownie-like cookie that melts the moment you bite in.
Look bakery-made, without the effort. Rolled in sugar, topped with a kiss, they sparkle on any cookie tray.
Perfect for gifting. Pack them in a cute box or jar, and you’ve got the easiest homemade present ever.
The Ingredients You’ll Need
- All-Purpose Flour: The base of the cookies, it gives structure and keeps them soft but not cakey. Make sure to measure it properly (spoon and level!) so your dough doesn’t turn too dry.
- Baking Soda: Helps the cookies rise just enough to stay thick and fudgy. It’s what keeps them from turning flat.
- Salt: Never skip it. It might seem tiny, but it balances all the sweetness and brings out the chocolate flavor beautifully.
- Dutch-Process Cocoa Powder: Gives a deeper, smoother chocolate taste and that rich dark color.
- Unsalted Butter: Adds flavor and helps create that soft, tender texture. Using unsalted lets you control the salt balance perfectly.
- Light Brown Sugar: Brings moisture and chewiness with a light caramel note that pairs so well with chocolate.
- Granulated Sugar: Adds sweetness and that slight crisp edge. You’ll also roll the dough in it for that sparkly, sugary finish.
- Pure Vanilla Extract: Adds warmth and rounds out the chocolate flavor.
- Egg: The binder that keeps your dough smooth and helps the cookies hold their shape while baking.
- Candy Cane Kisses: The festive final touch!
For more chocolatey mint goodness, check out my chocolate peppermint cookies, they’re just as festive and fun to bake.
How to Make Chocolate Peppermint Blossoms
Step 1: Get your oven ready
Set your oven to 350°F (180°C) and line a baking tray with a sheet of parchment paper. This simple step not only keeps your cookies from sticking but also makes cleanup much easier.
Step 2: Cream the butter and sugars
Grab a large bowl and mix your softened butter with the brown sugar and granulated sugar. Beat it until it’s fluffy, light, and just a little glossy. This is where the cookie’s magic starts, the fluffier the mix, the softer the cookie!
Step 3: Add the egg and vanilla
Pop in your egg (room temperature is key here) and your vanilla extract. Beat until smooth and creamy. Quick tip: scraping down the sides of your bowl once or twice ensures no pockets of butter hide out, every bite is evenly soft.
Step 4: Fold in the dry ingredients
Whisk the flour, cocoa powder, baking soda, and salt together in a separate mixing bowl until the mixture is uniform. Slowly mix them into your wet ingredients. The dough should be soft and thick.
Step 5: Shape and coat the cookies
Roll the dough into balls. Roll each one in a little extra granulated sugar, it gives a subtle sparkle and that delicate crisp edge. Place them on the sheet with some space to spread; these cookies love breathing room.
Step 6: Bake with care
Bake for 8–9 minutes. Look for puffy tops that are just set, maybe a tiny glossy hint in the center.
Step 7: Add the peppermint kiss
After letting the cookies rest on the sheet for 4 minutes, press a candy cane kiss gently in the center. You’ll see it soften but not melt away, that’s the perfect peppermint swirl.
Step 8: Cool and admire
Move your cookies to a wire rack to finish cooling. This keeps the bottoms soft but not soggy, and your peppermint tops stay pretty.
For another chocolatey mint treat, check out my peppermint brownies.
Avoid These Baking Traps
Overmixing the dough: Once you add the flour and cocoa, mix just until combined. Overmixing can make the cookies tough instead of soft and fudgy.
Not measuring flour correctly: Too much flour = dry cookies. Use the spoon-and-level method to get the perfect soft texture every time.
Baking too long: These cookies continue baking a little on the tray after you take them out. Pull them when the tops are set but slightly soft, they’ll finish perfectly as they cool.
Pressing the peppermint kiss too soon: Wait 4-5 minutes after baking before adding it. Doing it too early melts it completely and loses that pretty center.
Serving Ideas for Chocolate Peppermint Blossoms
- A warm mug of hot cocoa: Extra chocolatey or with a hint of peppermint, the ultimate cozy combo.
- Steaming cups of coffee or latte: The rich bitterness of coffee balances the sweet chocolate and mint perfectly.
- Glass of cold milk: Classic and simple, can’t go wrong with a tall, cold glass.
- Peppermint tea or chai latte: Adds a gentle spice or minty kick for grown-up festive vibes.
How to Store Chocolate Peppermint Blossoms
Airtight container at room temperature: Keep the cookies in a sealed container for 2–3 days, soft, fudgy, and ready for snacking.
Layer with parchment paper: If stacking, place parchment sheets between layers so the peppermint kisses don’t stick or smudge.
Freeze for later: Pop baked cookies in a freezer-safe bag or container for up to 2 months. Thaw at room temp for a few minutes, and they’re almost as fresh as day one.
Avoid the fridge: Refrigeration can dry them out, room temp or frozen is your friend.
Can’t wait for you to try these chocolate peppermint blossoms! Bake a batch, enjoy the festive smells, and let me know how yours turn out in the comments.
Holiday Sweets to Make Next
Easy Chocolate Peppermint Blossoms
Ingredients
- 1 ½ cups all-purpose flour spooned and leveled
- 1 teaspoon baking soda
- 1 teaspoon salt
- ½ cup Dutch-process cocoa powder
- ¾ cup unsalted butter softened
- ⅔ cup light brown sugar
- ⅓ cup granulated sugar more for coating
- 1 ½ tablespoons pure vanilla extract
- 1 large egg at room temperature
- 23 candy cane kisses
Instructions
- Warm the oven to 350°F (180°C), then cover a baking tray with parchment paper to ready it for baking. For extra-even baking, you can let the sheet warm in the oven for a minute before adding the cookies, it helps them spread perfectly.
- In a large bowl, cream together the softened butter, brown sugar, and granulated sugar until smooth, light, and fluffy. This is the step that gives the cookies their soft, tender texture.
- Add the room-temperature egg and vanilla extract, mixing until everything comes together in a creamy, uniform dough. Be sure to scrape down the sides of the bowl a couple of times so every bit of butter and sugar is fully incorporated.
- In another bowl, whisk the flour, cocoa powder, baking soda, and salt. Gradually fold the dry ingredients into the wet mixture until you have a soft, slightly thick dough that’s ready to shape.
- Roll the dough into balls, then roll each one lightly in granulated sugar for a subtle sparkle and a delicate, lightly crisp edge. Arrange them on the prepared baking sheet, leaving space between each cookie so they can spread evenly.
- Bake for 8–9 minutes, keeping an eye on them. The tops should be puffy and slightly set. Don’t worry if they seem a bit soft, they continue to set as they cool on the sheet.
- Let the cookies rest on the pan for about 4 minutes, then gently press a candy cane kiss into the center of each cookie. The chocolate will soften slightly.
- Carefully place the cookies on a wire rack so they can cool down evenly and fully. Enjoy!
Notes
- For a more intense chocolate flavor, try sprinkling a pinch of espresso powder into the dry ingredients.
- Make sure your baking sheet is completely cool between batches to prevent spreading too much.
- If your dough sticks to your hands, lightly flour them or use a cookie scoop.