
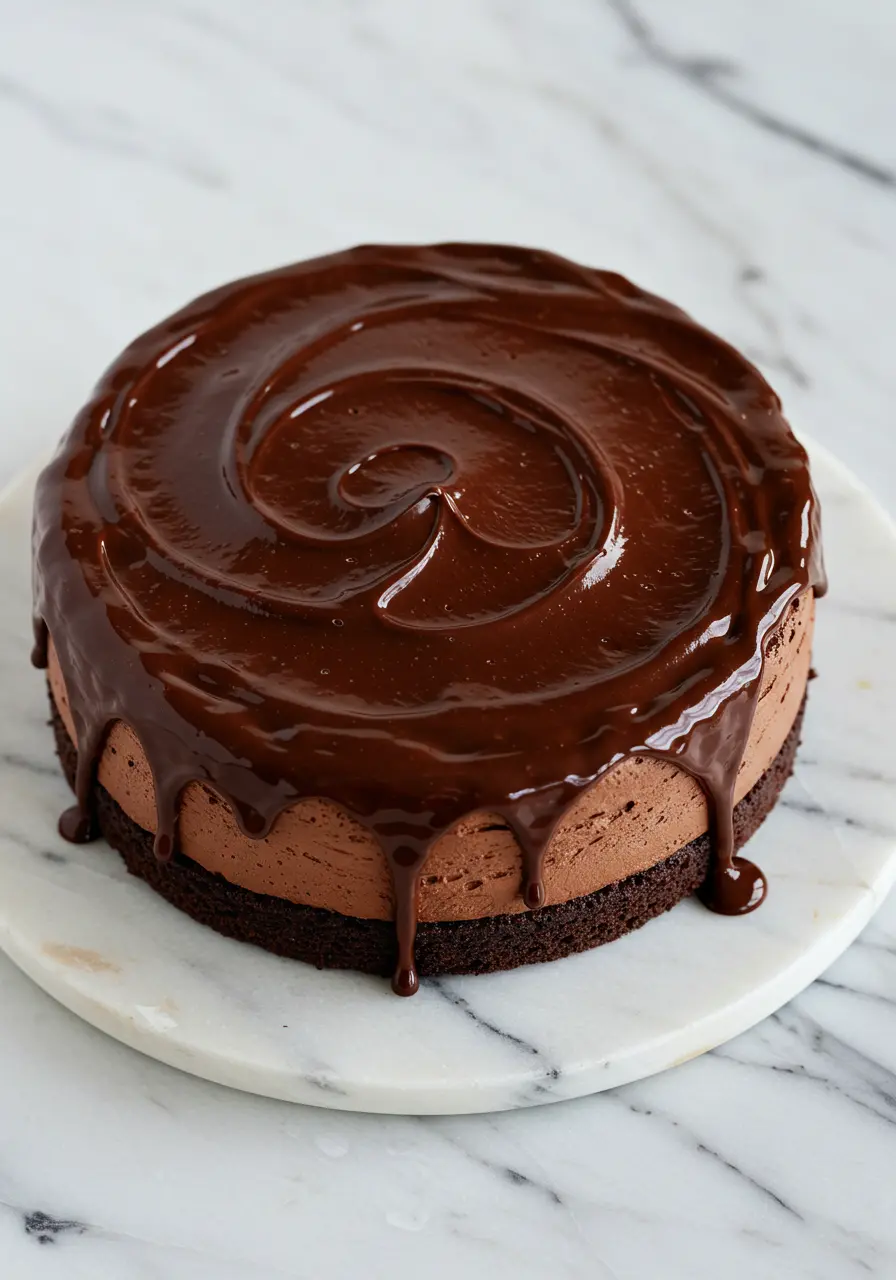
I have a confession to make, I’m completely obsessed with chocolate. Not the casual “Oh, I love chocolate” kind of way, but the “Will unapologetically eat ganache straight from the spoon” kind of way. So, when I first set out to create the perfect Chocolate Mousse Cake Recipe, I knew it had to be next-level indulgent, something that delivers that deep, velvety chocolate experience in every single bite.
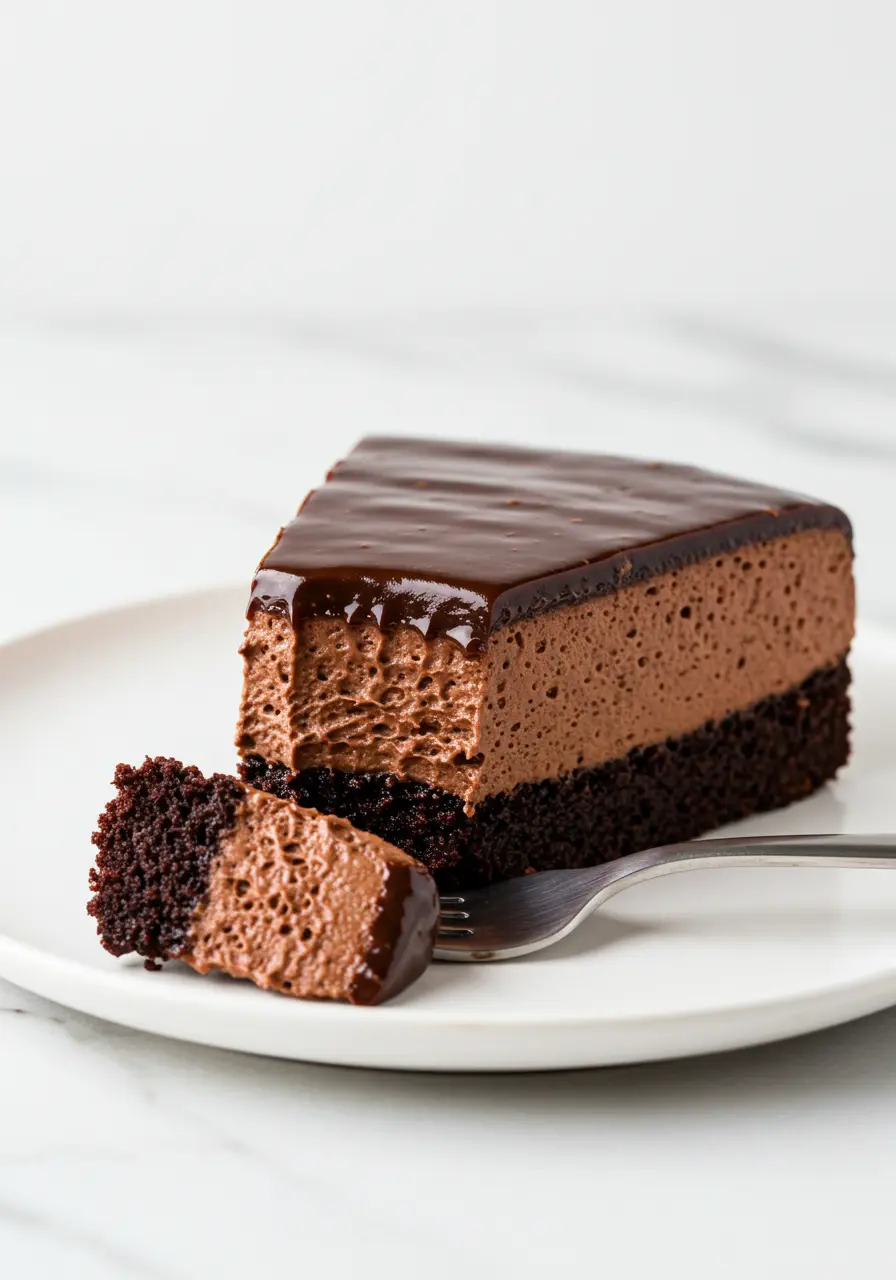
This isn’t just any cake. It’s a dark chocolate mousse cake that feels like a love letter to all chocolate lovers.
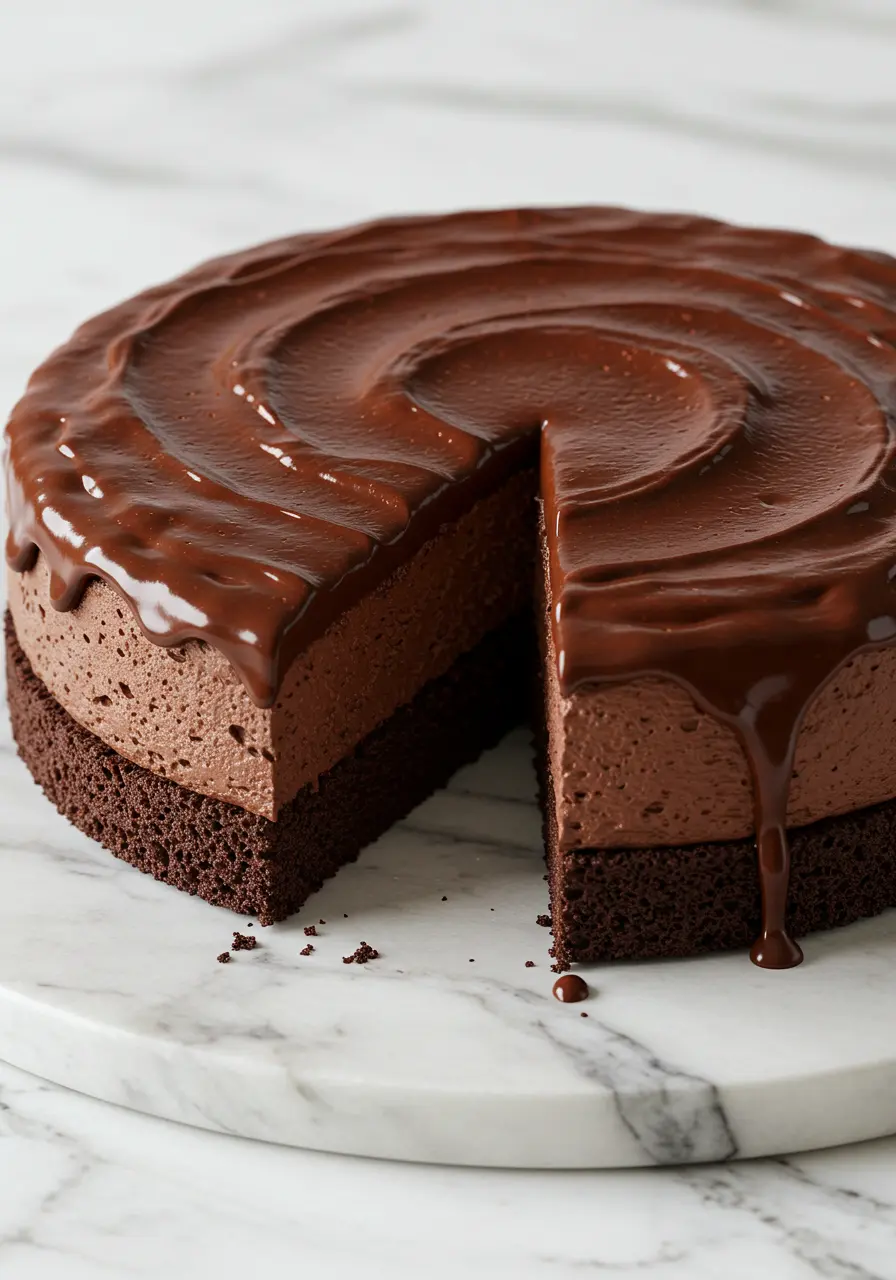
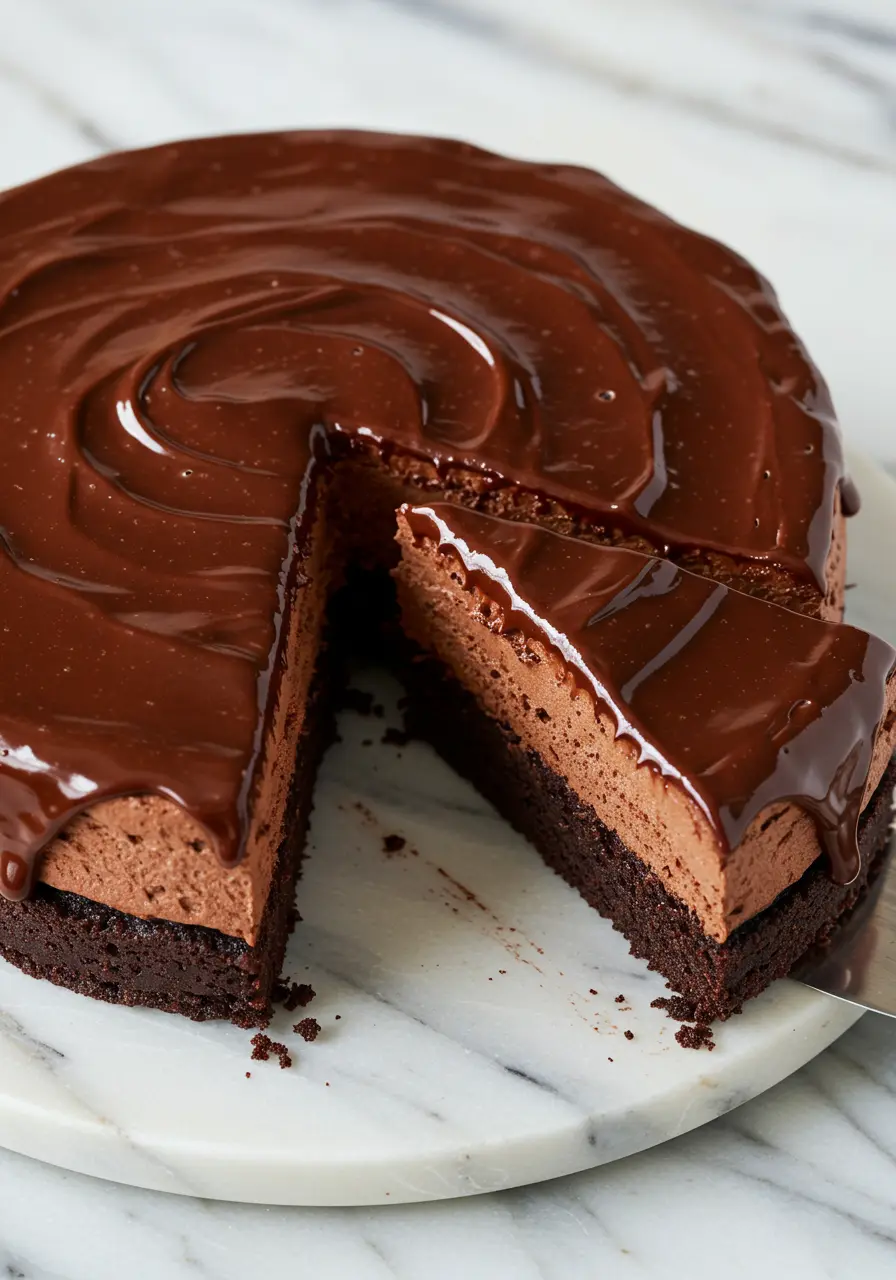
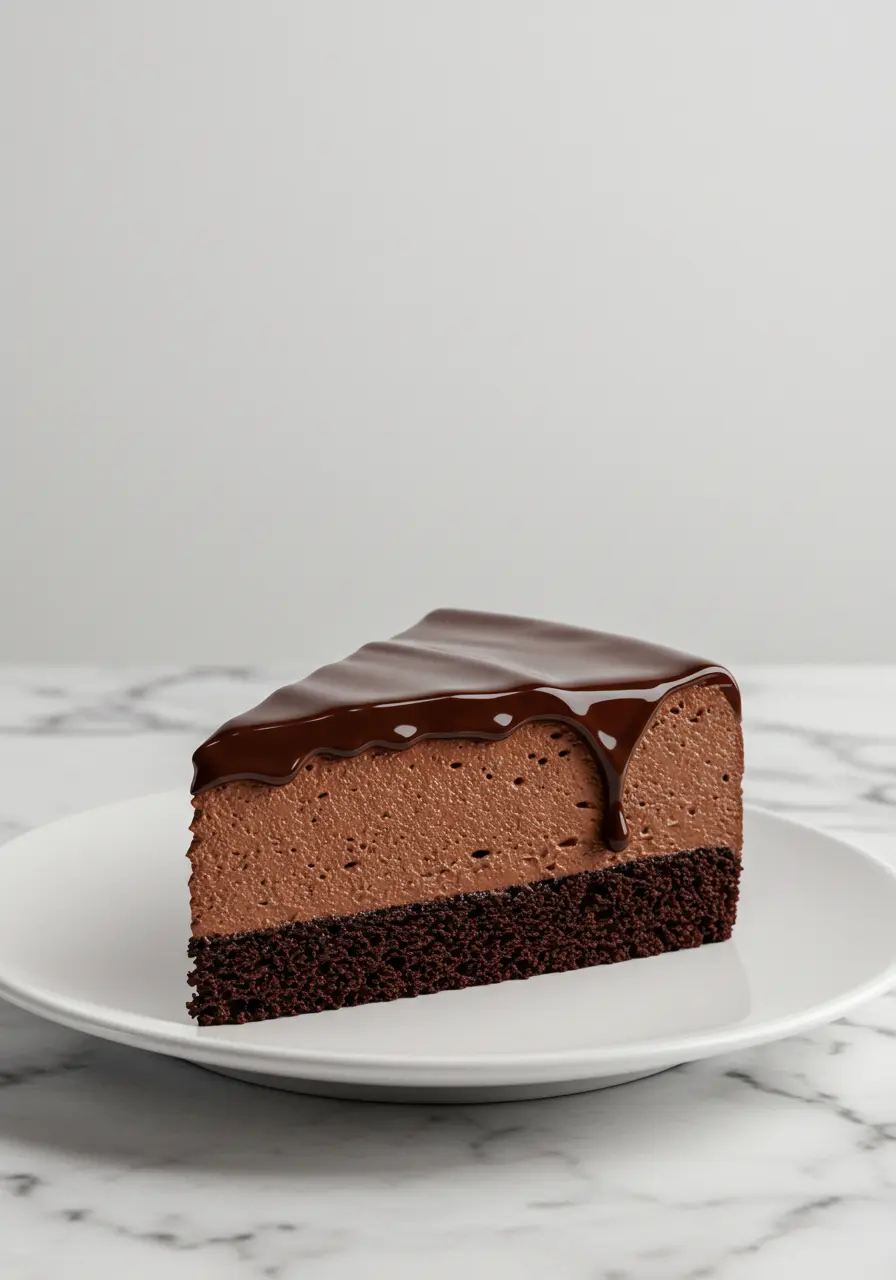
The base? A rich, moist chocolate cake infused with espresso to bring out the cocoa’s boldness.
The middle? A silky, airy chocolate mousse so light, it’s like biting into a chocolate cloud.
And the grand finale? A glossy ganache that drapes over the top like a luxurious chocolate blanket.
But here’s the kicker, you don’t need to be a pastry chef to make this masterpiece.
Jump to
Whether you’re celebrating a special occasion or just craving an unforgettable chocolate dessert, this cake is shockingly simple to put together. So, grab your whisk, and let’s make some chocolate magic happen!
The Ingredients You’ll Need
Each ingredient in this Chocolate Mousse Cake Recipe plays a key role in creating the perfect balance of flavor and texture. Here’s why they matter:
- All-purpose flour – The foundation of the cake, giving it structure and a soft crumb.
- Dutch-processed cocoa powder – Deepens the chocolate flavor and gives the cake a rich, dark color.
- Baking powder & baking soda – The leavening duo that helps the cake rise and stay light.
- Fine sea salt – Enhances the chocolate flavor and balances the sweetness.
- Granulated sugar – Provides sweetness while helping to retain the cake’s moisture.
- Egg & egg yolk – Provide structure, richness, and a tender texture.
- Pure vanilla extract – A warm, aromatic boost that enhances all the flavors.
- Vegetable oil – Ensures the cake remains tender and moist for an extended period.
- Sour cream – Adds richness and helps create an ultra-tender crumb.
- Buttermilk – Gives the cake a slight tang and keeps it light and fluffy.
- Hot brewed espresso – Intensifies the chocolate flavor without making the cake taste like coffee.
- Dark chocolate (60%) – The heart of the mousse, providing a deep and intense chocolate taste.
- Powdered sugar – Lightly sweetens the mousse without affecting its smooth texture.
- Vanilla extract – Adds depth and enhances the chocolate’s natural richness.
- Heavy cream – Gives the mousse its airy, cloud-like texture.
- Gelatin powder – Ensures the mousse holds its shape while staying soft and creamy.
- Water – Used to dissolve the gelatin for a smooth consistency.
How to Make Chocolate Mousse Cake
The process is simple, but to get that perfect bakery-style texture, it’s all about the little details.
Let’s walk through it step by step so you can nail it on the first try.
Preparing the Chocolate Cake Layer
Start by preheating your oven to 350°F (180°C). Grab a 9-inch springform pan and line the bottom with parchment paper. A light coat of cooking spray on the sides will help with an easy release later.
Now, let’s build the batter. In a large mixing bowl, whisk together the eggs, buttermilk, vegetable oil, vanilla extract, and sour cream. This combination keeps the cake super moist and tender. Add the granulated sugar and keep whisking until everything is well blended.
Sift in the Dutch-processed cocoa powder (no skipping this step, it ensures a lump-free batter).
Then, add the flour, baking powder, baking soda, and fine sea salt. Lightly stir until the dry ingredients are just combined. You don’t need to overmix here, just make sure there are no big flour pockets.
Now comes the game-changer: hot brewed espresso. Pour it in and whisk until the batter is smooth and glossy. This step deepens the chocolate flavor, making it bold without tasting like coffee.
Transfer the batter to your prepared pan and bake for 22-25 minutes, or until a toothpick inserted in the center comes out with just a few moist crumbs. After baking, allow the cake to cool entirely in the pan.
Making the Chocolate Mousse
First, bloom the gelatin. In a small bowl, mix the gelatin powder with water and let it sit for about 10 minutes. This step is key, it ensures a smooth and stable mousse.
Meanwhile, melt the dark chocolate. In a heatproof bowl, combine the dark chocolate (60%) and a bit of heavy cream.
You can melt it in the microwave using 10- to 15-second bursts, stirring in between. Once it’s silky smooth, set it aside to cool slightly.
Now, it’s time for the whipped cream. In a large mixing bowl, combine cold heavy cream, sifted cocoa powder, powdered sugar, and vanilla extract. Whip until soft peaks form, it should look like creamy, fluffy yogurt.
Melt the bloomed gelatin in the microwave for just a few seconds until it turns liquid (but don’t overheat it!). Stir it into the melted chocolate to create a smooth, velvety base.
To keep the mousse light and airy, start by mixing a small amount of the whipped cream into the chocolate mixture.
This step tempers the chocolate, making it easier to incorporate without deflating the mousse.
Then, gently fold in the rest of the whipped cream using a rubber spatula, working carefully to maintain the fluffy texture.
Assembling the Cake and Mousse
If the cake has domed slightly on top, use a serrated knife or cake leveler to gently trim it so you have a flat surface.
For a professional-looking finish, line the inside of your springform pan with a sheet of acetate (cake collar). This creates clean edges and helps hold the mousse in place.
Now, pour the chocolate mousse over the cooled cake, filling the pan to the top. Smooth it out with an offset spatula so the surface is even.
Refrigerate for at least 6 hours, but overnight is even better for the perfect texture.
Making the Chocolate Ganache
This step is pure chocolate magic. In a heatproof bowl, combine the dark chocolate (60%) and heavy cream.
Microwave for about 60-70 seconds, then let it sit for 10 minutes. This allows the chocolate to melt gradually, creating a silky smooth ganache. Stir until glossy and lump-free.
If the ganache is too thick, you can warm it for a few seconds to loosen it up. If it’s too thin, let it cool for a few minutes until it thickens slightly.
Adding the Ganache and Finishing Touches
Once the mousse is fully set, carefully remove the springform pan and peel away the acetate sheet.
Slowly pour the slightly warm ganache onto the center of the cake, using an offset spatula to nudge it toward the edges so it drips down naturally.
For the best texture, refrigerate the cake for another 30 minutes to let the ganache firm up.
When you’re ready to serve, slice with a sharp knife, wiping the blade between cuts for clean slices.
And that’s it, you just made a chocolate mousse cake that looks like it came straight from a bakery!
4 Mistakes to Avoid When Making Chocolate Mousse Cake
Even the best bakers have run into a few bumps when making a chocolate mousse cake, it’s all part of the process! But don’t worry, I’ve got you covered.
Not Letting the Cake Cool Completely
Why it’s a problem: If your cake is even slightly warm when you pour the mousse on top, the heat will melt the mousse and ruin the texture. Instead of a light and airy layer, you’ll end up with a dense, runny mess.
How to avoid it: Be patient! After baking, let the cake cool in the pan for at least an hour at room temperature. If you’re short on time, pop it in the fridge for 30 minutes, but make sure it’s fully cooled before moving on.
Overmixing the Mousse
Why it’s a problem: Folding the whipped cream into the melted chocolate too aggressively can deflate the mousse, making it dense and heavy instead of light and airy.
How to avoid it: Use a gentle folding motion with a rubber spatula. Think of it as scooping under and over, rather than stirring. Stop as soon as the chocolate and cream are fully combined, you don’t need to keep going!
Not Using a Cake Collar (or Alternative)
Why it’s a problem: Without a cake collar (acetate strip), the mousse can stick to the sides of the pan, making it difficult to release the cake cleanly. When you remove the pan, you might end up with messy, uneven edges.
How to avoid it: If you don’t have an acetate strip, you can DIY it with a strip of parchment paper or plastic wrap. Just line the inside of your pan before adding the mousse, and you’ll get clean, professional-looking sides when you unmold the cake.
Pouring Hot Ganache Over the Mousse
Why it’s a problem: If your ganache is too warm, it can melt the top layer of the mousse, causing it to lose its structure and mix into the ganache instead of staying separate.
How to avoid it: After melting your chocolate and heavy cream, let the ganache sit for 10 minutes to cool slightly before pouring. It should be warm and pourable, but not steaming hot. If it’s too thick, microwave it for just 5 seconds at a time until it reaches the right consistency.
What to Serve with Chocolate Mousse Cake
- Citrus Segments: Try orange or blood orange slices for a zesty twist.
- Espresso or strong coffee: Its rich bitterness deepens and intensifies the chocolate flavor.
- Vanilla Bean Ice Cream: A classic, creamy contrast to the deep chocolate.
- Toasted Almonds or Hazelnuts: Sprinkle on top for a nutty crunch.
How to Store Chocolate Mousse Cake
In the Fridge (Best for Freshness)
Cover the cake loosely with plastic wrap or an inverted cake dome to prevent it from absorbing fridge odors.
Store for up to 4 days, but for the best texture, enjoy within 48 hours.
In the Freezer (For Longer Storage)
Freeze the whole cake or individual slices, just wrap them tightly in plastic wrap and then in foil.
Store for up to 2 months without losing flavor.
To serve, thaw in the fridge overnight, then let it sit at room temp for 15 minutes before eating.
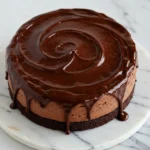
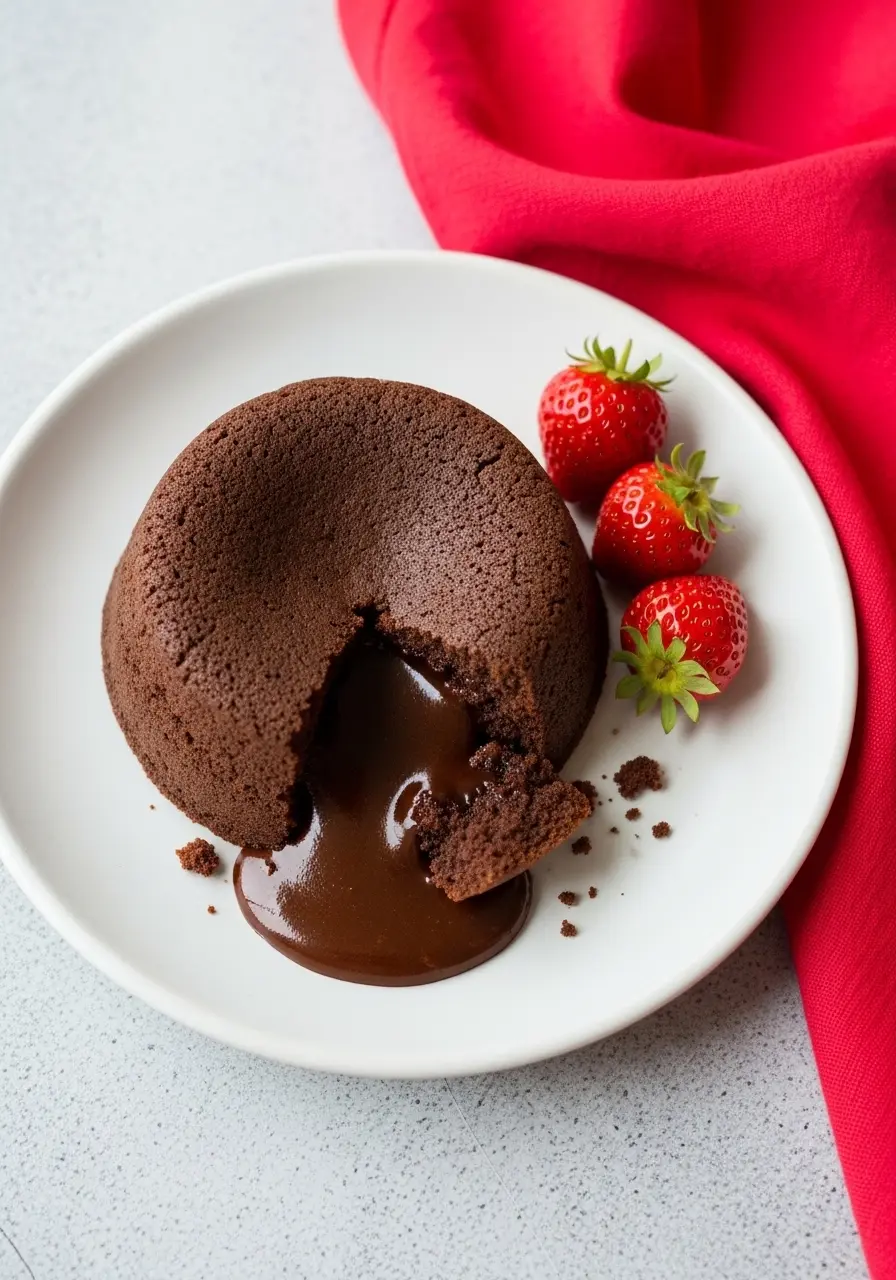
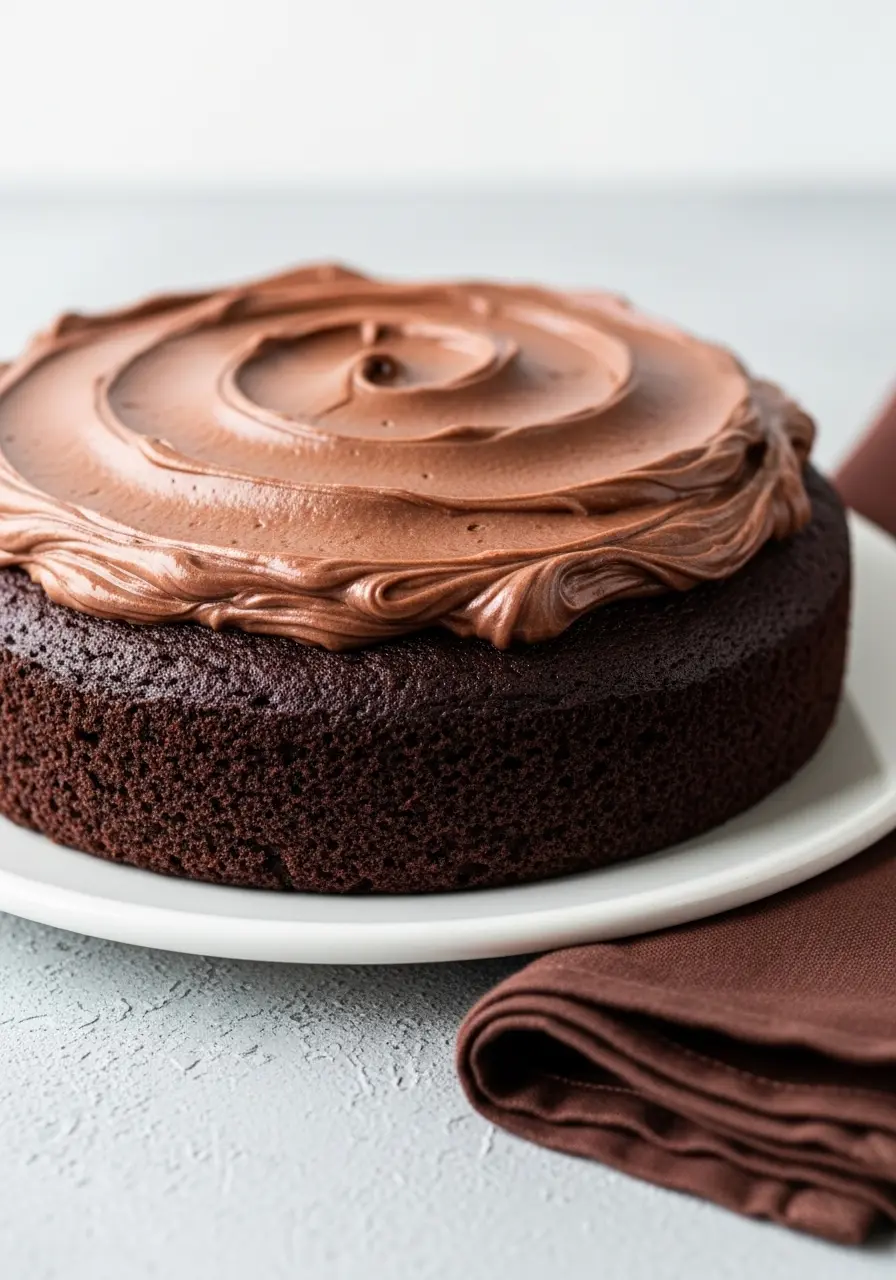
More Moist Cakes to Try
Super Easy Chocolate Mousse Cake Recipe: Rich & Creamy
Ingredients
For the Chocolate Cake:
- 1 cup 125g all-purpose flour
- 6 tablespoons 40g Dutch-processed cocoa powder
- ½ teaspoon baking soda
- 1 teaspoon baking powder
- ¼ teaspoon fine sea salt
- ¾ cup 150g granulated sugar
- 1 large egg + 1 egg yolk
- 1 teaspoon pure vanilla extract
- ⅓ cup 80ml vegetable oil
- ⅓ cup 80g sour cream
- ⅓ cup 80ml buttermilk
- ½ cup 120ml hot brewed espresso
For the Chocolate Mousse:
- 7 oz 200g dark chocolate (60%)
- 3 tablespoons 24g powdered sugar
- 1 teaspoon vanilla extract
- 4 oz 120ml heavy cream
- 1 ¾ cups 420ml heavy cream
- 2 ½ tablespoons 16g cocoa powder
- 6 g gelatin powder
- 40 g water
For the Chocolate Ganache:
- 5 oz 140g dark chocolate (60%)
- 5 oz 140ml heavy cream
Instructions
- Preheat your oven to 350°F (180°C) and prepare a 9-inch springform pan by lining the bottom with parchment paper and spraying the sides with cooking spray. This will make the cake easy to remove later.
- In a large mixing bowl, whisk together the eggs, buttermilk, vegetable oil, vanilla extract, and sour cream to keep the cake moist and tender.
- Add the granulated sugar and continue whisking until everything is well combined.
- Sift in the Dutch-processed cocoa powder to avoid lumps, then add the flour, baking powder, baking soda, and sea salt. Mix gently until everything is just combined, don't overdo it!
- Now, pour in the hot brewed espresso. This adds a deep, rich chocolate flavor without making it taste like coffee. Stir until the batter is smooth and glossy.
- Pour the batter into your prepared pan and bake for 22-25 minutes, or until a toothpick inserted into the center comes out with just a few moist crumbs.
- Ensure the cake has completely cooled before layering the mousse.
- To make the mousse, start by blooming the gelatin. Combine the gelatin powder and water in a small bowl and let it sit for about 10 minutes.
- Meanwhile, melt the dark chocolate and heavy cream in a heatproof bowl, either in the microwave in short bursts or over a double boiler. After melting, let it sit for a moment to cool slightly.
- In another bowl, combine cold heavy cream, sifted cocoa powder, powdered sugar, and vanilla extract.
- Whip it to soft peaks, like creamy yogurt. Melt the bloomed gelatin in the microwave for a few seconds, then stir it into the melted chocolate mixture to create a smooth base.
- To keep the mousse light, mix a small amount of the whipped cream into the chocolate to ease the incorporation.
- Then, gently fold in the rest of the whipped cream until the mixture is smooth and fluffy.
- Once the cake has cooled, level it with a serrated knife if needed. Line the inside of the springform pan with acetate or parchment paper, creating a clean edge for the mousse.
- Pour the mousse over the cake, smoothing the top with an offset spatula. Let it chill in the refrigerator for no less than 6 hours for the best results.
- For the ganache, combine the dark chocolate and heavy cream in a heatproof bowl.
- Microwave for about 60 seconds, then let it sit for 10 minutes to melt. Stir until smooth. If the ganache is too thick, warm it for a few seconds; if it's too thin, let it cool a bit to thicken.
- Once the mousse has set, remove the springform pan and peel away the acetate.
- Pour the slightly warm ganache over the mousse, smoothing it out to the edges. Place in the refrigerator for 30 minutes to let the ganache firm up.
- Slice with a sharp knife, wiping the blade between cuts for clean edges, and enjoy your homemade chocolate mousse cake!
Notes
- Don’t skip sifting the cocoa powder, this ensures a smooth batter with no lumps.
- Be careful with the gelatin, overheating it can ruin the mousse’s texture.
- Let the cake cool completely before adding the mousse; if it’s warm, the mousse might not set properly.
- If the ganache is too runny, let it sit for a few minutes to thicken before pouring it over the cake.
- Use a sharp knife to slice the cake for clean, beautiful cuts without messing up the layers.


I made this yesterday and it was a huge hit with everyone!! It’s now on my favorites list for sure. Turned out just like the picture! I added fresh raspberries and whipped cream. YUM!
Kathy, that makes me so happy! Love the raspberry and whipped cream twist! So glad it’s a keeper