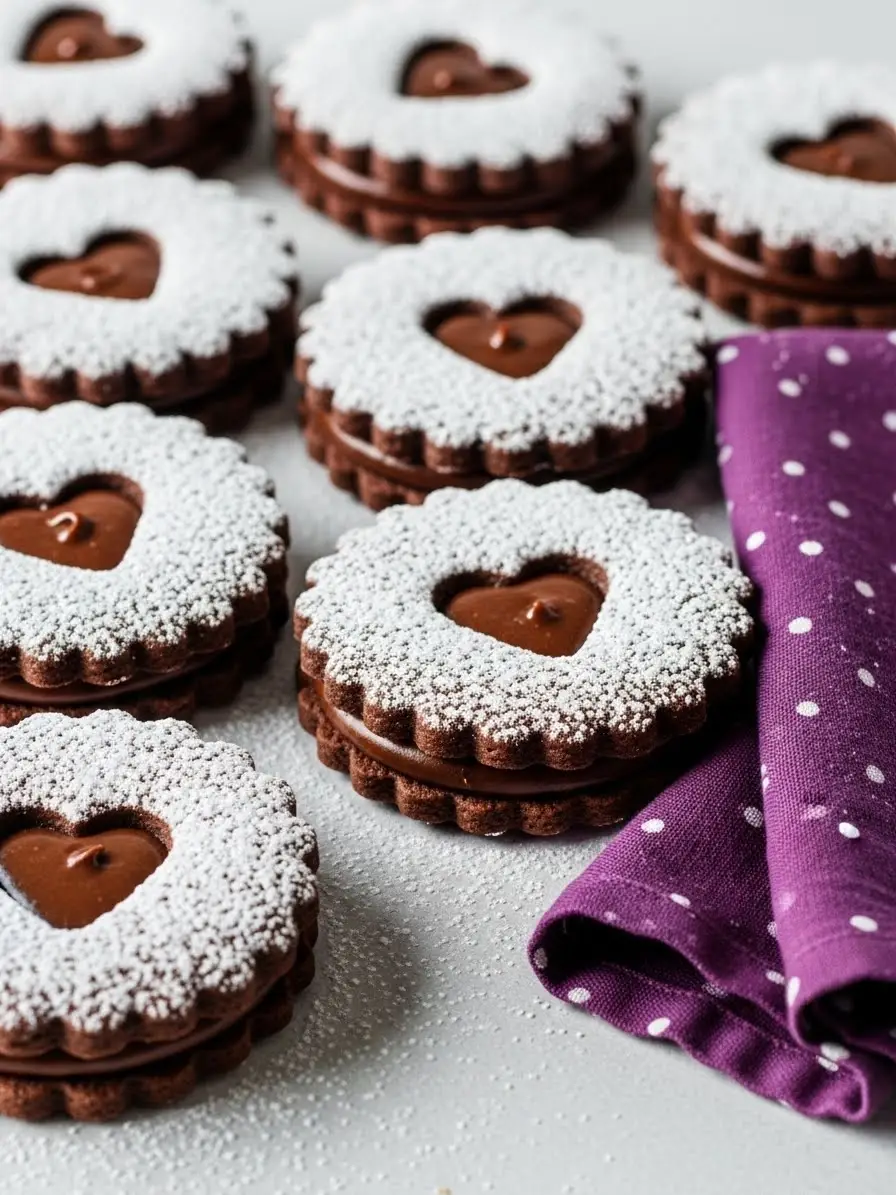
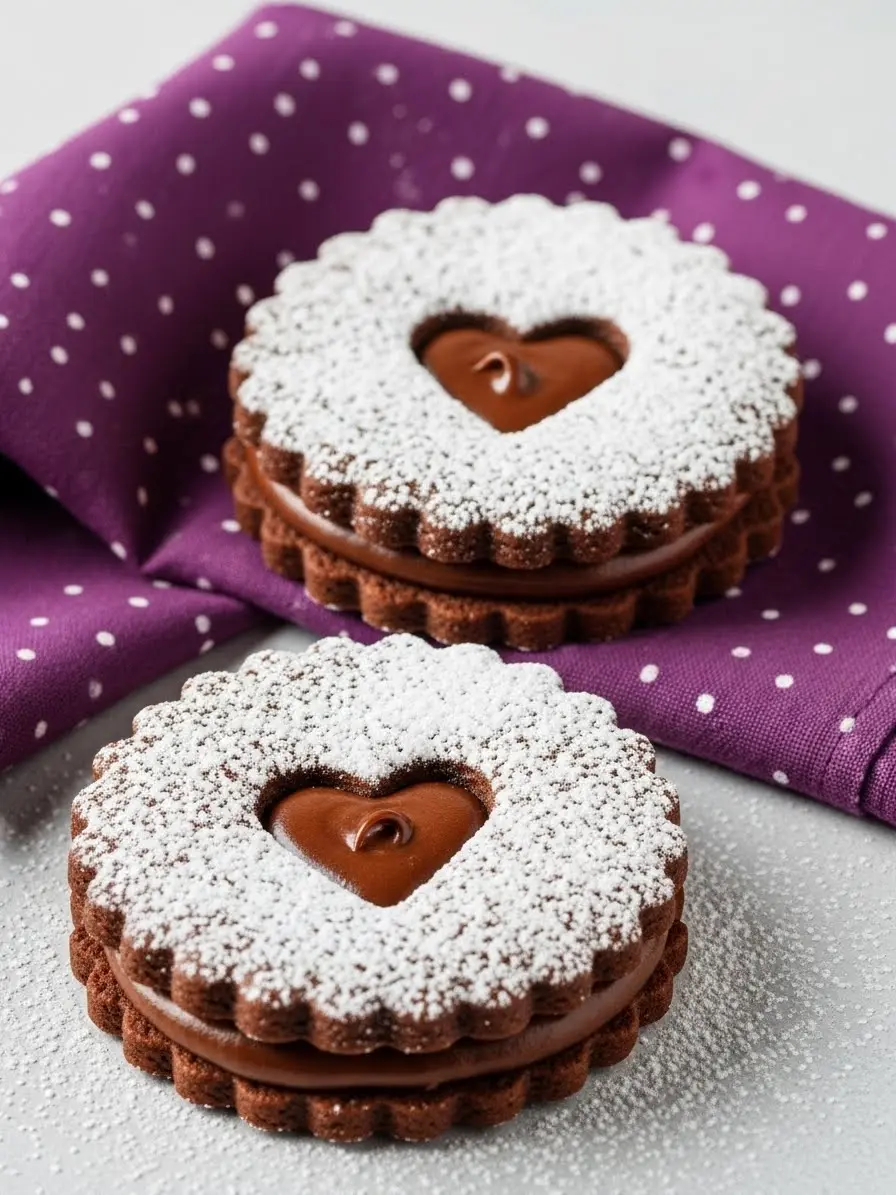
If you’ve ever wanted to bake Chocolate Linzer Cookies that are as adorable as they are delicious, you’re in the right place! These cute cookies aren’t just pretty to look at, they’re packed with rich chocolate flavor and a gooey chocolate-hazelnut center that will satisfy any sweet tooth.
Perfect for sharing during the holidays, these holiday cookies double as irresistible gifts or a festive treat for your family. Whether you’re a beginner or just looking for a foolproof way to impress, this recipe makes creating these chocolate treats simple, fun, and totally rewarding.
Why Chocolate Linzer Cookies Make Everything Better
Cute cookies that wow – perfect for the holidays, gift-giving, or just making your kitchen look irresistible.
Simple enough to bake anytime – no fancy techniques, no stress, just pure chocolate joy.
Impress without effort – they look professionally made, but you’ll actually feel like a baking superstar.
Feel-good baking – creating these cookies is half the fun, and sharing them with loved ones is the other half.
What Goes Into These Cookies
- Salted butter: Adds richness and flavor while making the dough soft and easy to work with.
- Granulated sugar: Sweetness that balances the chocolate and helps create that slightly crisp edge we all love.
- Brown sugar: Gives a hint of caramel flavor and keeps the cookies chewy in the center.
- Egg: Binds everything together and adds moisture so your cookies stay soft and not crumbly.
- Vanilla extract: A little magic for your cookies, it enhances the chocolate and makes the aroma irresistible.
- All-purpose flour: This is your cookie’s backbone, it gives the dough structure so your cookies hold together without being tough.
- Dutch-processed cocoa powder: Adds that rich, chocolatey depth that makes every bite feel indulgent.
- Espresso powder (optional): Just a pinch can make the chocolate flavor pop even more, no coffee taste, just extra richness.
- Baking powder: Helps your cookies rise a little and stay soft, so they’re tender but not flat.
- Chocolate-hazelnut spread: The gooey, dreamy filling that turns a regular cookie into a showstopper everyone will love.
How to Make Chocolate Linzer Cookies
Step 1: Make the Sweet, Fluffy Base
Grab a large bowl and toss in your salted butter, granulated sugar, and brown sugar. Beat them together on medium-high speed until light and fluffy. This is where your cookies start their magic, and your kitchen already starts smelling like a chocolate dream.
Step 2: Add Moisture and Flavor
Incorporate the egg and vanilla, mixing gently just until the mixture is unified. Don’t overdo it, just enough to bring the dough together. Bonus tip: leaving your egg at room temperature keeps the dough soft and smooth, which makes rolling out much easier later.
Step 3: Prep Your Dry Mix
In a medium bowl, whisk together all-purpose flour, Dutch-processed cocoa, espresso powder (if using), and baking powder. This ensures every bite is perfectly chocolatey and tender. Quick tip: sifting the cocoa really helps avoid any clumps and gives your dough a silky texture.
Step 4: Bring It All Together
At a low speed, gradually fold in the dry ingredients until the dough just comes together. You want it soft but not sticky, pliable but not messy. Divide the dough in half, pat each into a rough disk, and wrap in plastic. Chill in the fridge for 40 minutes, this is the secret to cookies that roll out beautifully and don’t spread too much.
Step: Roll and Chill Like a Pro
Take one of your chilled dough disks and place it on a large sheet of parchment paper. Give it a light dusting of flour so the rolling pin glides smoothly. Roll the dough out evenly to about 1/8-inch thickness, aim for a uniform layer so all your cookies bake perfectly.
Here’s a little hack: top the rolled dough with another sheet of parchment and slide it onto a baking sheet. Then roll out the second dough disk the same way and layer it on top of the first sheet (parchment in between, of course). Pop the whole stack into the fridge for another 40 minutes until the dough is firm and cool to the touch. This step makes cutting out clean, precise cookie shapes a breeze and keeps the dough from sticking or tearing.
Step 6: Cut and Customize
Set your oven to 350°F (175°C) and prepare your baking sheets with a layer of parchment paper. Cut out cookies using a 2-inch cutter, and for half of them, remove the centers with a smaller cutter (I love heart shaped ones, but you can use any type you want). Tiny trick: keep leftover scraps together, chill, and reroll, you won’t waste a bite, and it’s great for extra mini cookies!
Step 7: Bake With Care
Bake for 8–10 minutes, until the edges are just set but the centers stay soft. Pro tip: watch them closely in the last 2 minutes, they can go from perfect to overbaked fast. Let them cool completely on the sheets before moving them.
Step 8: The Fun Part
Spread your chocolate on the bottom of the whole cookies. Give the “window” cookies a gentle snow of powdered sugar, then put them on top to make your cookie sandwiches. Press gently so the filling peeks out just right. Personal tip: slightly warm the spread for 10 seconds in the microwave, it spreads beautifully without breaking the cookie.
Step 9: Celebrate Your Masterpiece
Step back and admire your chocolate linzer cookies. Cute, chocolatey, and perfect for holidays, gifting, or just sneaky midnight snacks.

Mistakes to Avoid
Over-flouring the rolling surface: A little dusting is fine, but too much flour can dry out the dough. Sprinkle lightly and keep extra nearby just in case.
Not cooling before assembling: If cookies are warm, the chocolate-hazelnut spread will melt and ooze everywhere. Let them cool completely, patience pays off!
Ignoring dough scraps: Don’t throw them away! Gather, chill, and reroll for extra mini cookies or decorations, they’re perfect for tasting along the way.
Using too much filling: remember that a small amount is all you need. Too much spread can make the cookies messy and harder to handle.
What to Serve With Chocolate Linzer Cookies
- A steaming mug of hot chocolate – extra chocolatey joy for chocolate lovers.
- Warm spiced chai or tea – the spices play beautifully with the rich melty center.
- Espresso or strong coffee – a little bitter kick makes the chocolate flavor pop.
- A glass of cold milk – classic, comforting, and always hits the sweet spot.
Storing Your Chocolate Linzer Cookies
Room temperature: They’ll stay fresh for 3–4 days when kept in a tightly closed container. Layer with parchment between cookies to prevent sticking and smudging the filling.
Refrigerator: Keep them in an airtight container for up to a week, and allow them to reach room temperature before serving.
Make ahead tip: Bake the cookies and store unfilled. Fill with chocolate spread right before serving to keep the centers fresh and prevent sogginess.
Give these cookies a try, I promise they’re as fun to bake as they are to eat! Drop a comment below and let me know how yours turned out.
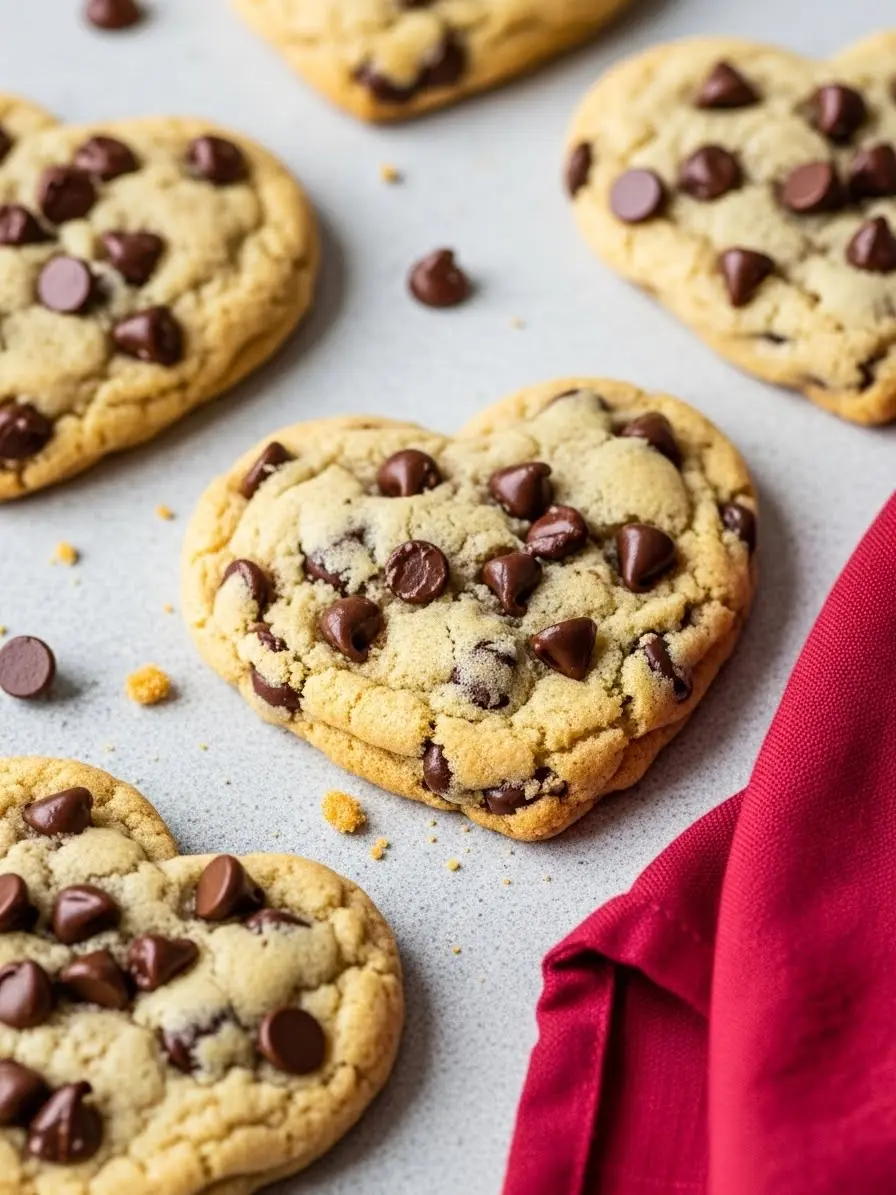
More Chocolate Cookies For You

Soft and Gooey Chocolate Linzer Cookies
Ingredients
- ¾ cup salted butter softened
- ¾ cup granulated sugar
- ¼ cup brown sugar
- 1 large egg at room temperature
- 1 ½ teaspoons pure vanilla extract
- 1 ½ cups all-purpose flour
- ¾ cup Dutch-processed cocoa powder
- ¼ teaspoon espresso powder optional
- ½ teaspoon baking powder
- ⅔ cup chocolate-hazelnut spread any brand you like
- Powdered sugar for dusting
Instructions
- Start by tossing your salted butter, granulated sugar, and brown sugar into a large bowl. Whip them together until the mixture turns light, creamy, and fluffy.
- Next, mix in your egg and vanilla extract just until everything comes together. No overmixing here, you want the dough soft and smooth.
- In another bowl, combine your all-purpose flour, Dutch-processed cocoa, espresso powder (optional), and baking powder. Sifting the cocoa first helps keep the dough silky and prevents little clumps from showing up in your cookies.
- Slowly fold the dry ingredients into the buttery mixture until it just forms a soft, manageable dough. It should be slightly tacky but easy to handle. Divide it into two portions, shape each into a disk, wrap in plastic, and chill in the fridge for about 40 minutes. This step is the secret to cookies that roll out evenly and hold their shape perfectly.
- Once chilled, lay one dough disk on parchment and lightly flour the top. Roll the dough out evenly until it’s about 1/8 inch thick. Cover it with another piece of parchment and transfer it to a baking sheet. Repeat with the second disk, stacking it on top with parchment in between. Chill the whole stack again for about 40 minutes until firm, this makes cutting shapes neat and effortless.
- Bring the oven up to 350°F (175°C), then prepare your baking trays with a layer of parchment. Cut your cookies using a 2-inch cutter, and for half of them, remove the centers with a smaller cutter, hearts, stars, or any fun shape you like. Don’t toss the scraps; chill and reroll them for extra cookies.
- Bake for 8–10 minutes until the edges are set but the centers remain soft and tender. Let them cool completely on the sheets, resist the urge to move them too soon, or they might break.
- Once cooled, spread a teaspoon of chocolate-hazelnut spread on the bottom of the flat side of each uncut cookie. Lightly dust the “window” cookies with powdered sugar, then sandwich them together. Enjoy!
Notes
- If your powdered sugar clumps, sift it before dusting for a smooth, pretty finish.
- Don’t worry if your cookies aren’t perfectly shaped, they’ll still taste amazing and look homemade-charming.