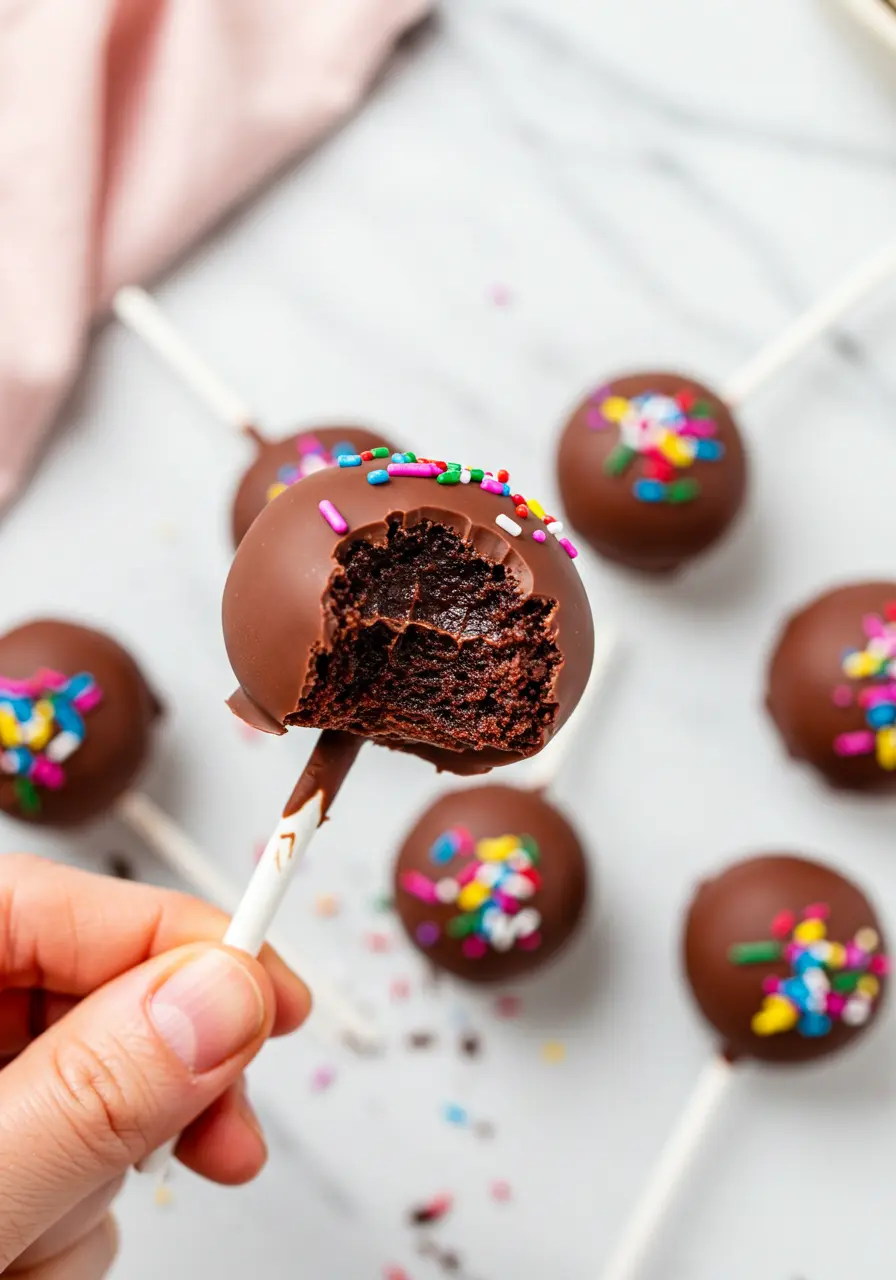
If you’ve never made Chocolate Cake Pops before, get ready, because these little bites of joy are about to become your new obsession. Moist crumbled chocolate cake mixed with creamy frosting, rolled into balls, and dipped in smooth melted chocolate, it’s everything you love about cake, but way more fun (and way easier to share).
Whether you’re baking for a party, a gift, or just because you need something sweet and cute in your life, this recipe keeps things simple and stress-free, with zero fancy tools required. Plus, you can customize them however you like.
What Makes These Chocolate Cake Pops So Good
They’re cake, on a stick. That’s fun enough already, but when it’s chocolate cake dipped in more chocolate? Game over.
Zero stress, all joy. No need for fancy decorating skills or hours in the kitchen, just bake, crumble, roll, and dip. That’s it.
Ridiculously customizable. Want to go classy with dark chocolate and sea salt? Or playful with rainbow sprinkles? Your call.
Perfect for literally any occasion. Birthdays, holidays, Tuesday afternoons, they fit in everywhere and always get attention.
Kid-approved, adult-devoured. These aren’t just cute, they’re dangerously good. People will ask for the recipe.
Make-ahead friendly. You can prep them ahead, freeze them, and pull out a batch whenever life calls for something sweet (which is always, right?).
The Ingredients You’ll Need
- Chocolate Cake Mix: I like using a good cake mix because it makes the whole process easy and the cake turns out moist every time. You can totally make your own from scratch if you prefer!
- Frosting: This is the glue that holds your cake pops together. It’s best if you use something creamy, I recommend chocolate frosting for that extra chocolaty kick.
- Espresso Powder (Optional): Maybe add a pinch to deepen the chocolate flavor. I like it because it makes the chocolate taste richer without tasting like coffee at all.
- Vanilla Extract: Just a dash of vanilla elevates and harmonizes the entire flavor profile. You can’t go wrong with a little warmth and sweetness here.
- Chocolate Candy Melts: These melt so smoothly and give a nice shiny coating. It’s best if you use candy melts because they’re designed to harden perfectly around your pops.
- Neutral Oil: I recommend adding a teaspoon to your melts, it keeps the chocolate silky and easy to work with.
- Rainbow Sprinkles: You can use sprinkles or any fun topping you like. I like rainbow ones because they make the cake pops feel festive and joyful!

How to Make Chocolate Cake Pops
Step 1: Bake the Base of Bliss
First things first, preheat your oven as the cake mix box suggests. Here’s a little secret: I swap the water for brewed coffee or whole milk because it wakes up the chocolate in the best way. Mix the cake batter according to the box, but don’t forget to stir in that optional espresso powder and a splash of vanilla extract. They may be tiny, but they make a strong impact. Pour your batter into a greased 9×13-inch pan and bake until a toothpick comes out clean. Once done, let the cake cool completely, because warm cake + frosting = a sticky mess you don’t want.
Step 2: Crumble Time, Make It Your Dough
When the cake is cool, crumble it into a big bowl. Add half the chocolate frosting to start. Stir with care, then roll a small ball to check the dough’s consistency. If it’s still too crumbly, add a bit more frosting, but only as much as needed. The goal is dough that’s soft and flexible, never wet or sloppy. This step is all about feel, you’ll know when it’s just right.
Step 3: Shape Your Little Chocolate Orbs
Scoop about a tablespoon of dough and roll it between your palms into a smooth, round ball. Perfection isn’t required here; a little rustic charm goes a long way. Arrange your balls on parchment paper and chill them in the freezer for 20 minutes. This step is your best friend, it firms them up, making dipping a breeze and keeping their shape flawless.
Step 4: Melt the Magic
While your cake balls chill, melt your candy melts with neutral oil in short bursts in the microwave. Stir every 20-30 seconds to keep the chocolate glossy and smooth. The oil thins the coating so it won’t get thick or clumpy, a small touch that makes a big difference. If you’re feeling adventurous, you can add a tiny pinch of sea salt to the melted chocolate for a subtle flavor twist. Totally optional.
Step 5: Stick It Like a Pro
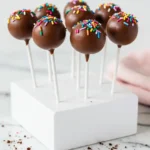
Dip each lollipop stick tip into the melted chocolate, then gently push it halfway into a cake ball. This little chocolate “glue” trick helps keep your pops on the stick when you dip them. Place each pop upright in a styrofoam block.
Step 6: Dip, Drip, and Decorate
Now comes the fun! Coat each cake pop in chocolate and softly shake off the extra by tapping it on the bowl’s edge. Before the coating sets, shower your pops with rainbow sprinkles. Here’s a quick tip: work in small batches so your coating stays nice and warm for a smooth finish. Place your decorated pops back in the stand and let them set for 15–20 minutes. Patience pays off!
If you love this recipe, you’ve got to try my no-bake Oreo cake pops, just as cute, super easy to make, and full of that classic cookies-and-cream flavor.
Mistakes to Avoid When Making Chocolate Cake Pops
Not testing your frosting amount
Adding too much frosting can turn your mixture into a gooey mess, while too little makes it crumbly. I always start with half the frosting and test by rolling a ball. Trust your hands here, if it holds shape without cracks, you’re golden.
Overheating the chocolate coating
Microwaves are sneaky! Heat your candy melts in short bursts and stir in between. Too hot chocolate can seize or become grainy. If it thickens, add a tiny splash of neutral oil to bring it back to smooth perfection.
Skipping the stick-dipping step
A quick dip of the stick in chocolate before adding it to the cake ball really helps it stay in place. It’s like giving your pops a little anchor so they don’t slip off when you dip. Don’t skip this step!
Dipping in thick or cold chocolate
If your melted chocolate cools down and thickens, it won’t coat smoothly. Warm it gently again or add a drop of oil. This keeps the finish shiny and flawless.
Topping Ideas to Make Your Chocolate Cake Pops Pop
- Crushed toffee bits, adds a buttery crunch that’s simply addictive.
- Mini chocolate chips, double chocolate never disappoints.
- A sprinkle of sea salt flakes, The ultimate sweet-salty combo.
- Crushed freeze-dried raspberries, a tangy pop of color and flavor.
- Chopped toasted hazelnuts, for that rich nutty vibe.
- A drizzle of white chocolate or caramel, because layers of yum are everything.
- Tiny edible gold pearls, to make them sparkle and impress.
- Coconut flakes (toasted or plain), for a tropical twist.
How to Store Your Chocolate Cake Pops
Keep them cool and covered: Store your pops upright in an airtight container in the fridge. This keeps the chocolate coating firm and the cake fresh.
Freeze for longer storage: Want to make ahead? Individually cover each pop with plastic wrap before putting them in a freezer bag. Thaw in the fridge before serving.
Bring to room temp before enjoying: Cold cake pops are tasty, but letting them sit for 15 minutes unlocks that soft, melt-in-your-mouth magic.
FAQs
Can you make cake pops without frosting?
While frosting is the secret ingredient that helps bind the cake crumbs into that perfect dough-like texture, you can still make cake pops without it, though it takes a bit more finesse. Without frosting, you might try using a bit of cream cheese, Nutella, or even a sticky syrup like honey or corn syrup to hold everything together. Just remember, the goal is to get the mixture to stick well enough to roll into balls that won’t fall apart when dipped.
Why are my cake pops so oily?
If your cake pops are coming out oily, it usually means there’s a bit too much fat in the mix, often from adding too much frosting or extra oil beyond what’s needed. Frosting is delicious but rich, so it’s easy to overdo it when trying to get the right texture. Also, some store-bought frostings have more oil or shortening than homemade ones, which can make your mixture greasy. To fix this, start with less frosting and only add more if the cake balls feel too dry or crumbly.
Why does my chocolate crack on cake pops?
Chocolate cracks on cake pops when there’s a temperature shock, dipping super cold cake balls into warm chocolate causes the shell to crack. It can also happen if the chocolate is too thick or cooled too much. To fix this, let your cake balls warm up a bit after chilling and keep your chocolate smooth and warm.
Chocolate Cake Pops
Ingredients
- 2 cups chocolate candy melts
- 1 box of chocolate cake mix plus the ingredients listed on the box
- ½ cup chocolate frosting
- ½ teaspoon espresso powder optional
- 1 teaspoon vanilla extract
- 1 teaspoon neutral oil
- Rainbow sprinkles
Instructions
- Begin by preheating your oven according to the directions on the cake mix box. Here’s a little trick: swap out the water for brewed coffee or whole milk to boost that chocolate flavor. Mix up the batter as instructed, and don’t forget to add the optional espresso powder and a splash of vanilla extract, they really elevate the taste. Transfer the batter to a greased 9×13 pan and bake.
- When the cake is cool, crumble it thoroughly into a large bowl. Start by mixing in about half of the chocolate frosting. Test the mixture by rolling a small portion into a ball; if it’s still crumbly, add more frosting little by little until the dough feels soft and holds together without being wet or sloppy.
- Grab a spoonful of dough and gently roll it between your palms into a ball. Don’t stress about perfect shapes, a bit of imperfection adds character! Place the balls on parchment-lined trays and chill them in the freezer for about 20 minutes.
- While the cake balls chill, melt the candy melts along with the neutral oil in short bursts in the microwave. Stir often to keep the chocolate smooth and glossy. The oil thins the coating, preventing it from becoming thick or grainy.
- Dip the tip of each lollipop stick into the melted chocolate, then gently push it halfway into each cake ball. The chocolate ‘glue’ step locks the stick in place when dipping. Stand the pops upright in styrofoam.
- Now, dip each cake pop completely into the melted chocolate, tapping off any excess by lightly shaking or tapping the stick against the side of the bowl. Before the chocolate sets, sprinkle on your choice of rainbow sprinkles or other toppings.
- Place your decorated cake pops back in the stand and allow them to set for 15 to 20 minutes before enjoying.
Notes
- Mix only after the cake is cold to keep the dough from becoming soggy.
- Work quickly when dipping so the coating stays smooth and glossy.